

Boost Your Curb Appeal With New Windows
Replacing your windows can sound overwhelming and expensive, but the benefits you gain can completely change how your home looks. Beyond the cosmetic value, replacing your windows can reduce energy costs, lessen outside sound, present more natural light, and increase safety. You may not have given your windows a second thought until now, but there are many advantages that you gain from replacing them.
Just like your home appliances, windows need to be maintained and replaced should any issue cause improper operation. Things to look out for include whether or not you can open and close the windows correctly, identify if there is any moisture on the inside of your windows, or if you feel a draft. These are all signs that your windows need to be replaced. Let’s take a look at the top five reasons how windows can enhance your home.
1. New Windows Increase Your Energy Efficiency
A lot of older homes still have their original windows that are typically made of single-pane glass. Sometimes they are harder to open. They also feel cold to the touch in icy weather. Newer, energy-efficient windows fit tighter and offer standard insulated features including heat reflecting low-E coatings and argon gas between panes. Energy efficient windows can reduce heating and cooling costs by 10-25 percent each year. With energy prices on the rise, it makes financial and environmental sense to replace your old windows.
2. Noise Reduction
If you’re tired of hearing your neighbor’s dog bark every morning before your alarm goes off, or your neighbor mowing his lawn at 7 a.m. on Saturday morning, new windows offer acoustic control benefits that virtually eliminate outside sound. A window’s sound transmission is impacted by two factors including the window’s design and the installation. Windows are rated by how well they can block sound. The good news is that high acoustic control goes hand-in-hand with energy efficiency.
The same air that brings in noise brings in outside temperatures that need to be heated or cooled. High-performance windows that lower your energy costs will also reduce noise. Different glass thicknesses will create different vibrations that deflect the sound. Be sure to review the various material types available when you choose your new windows.
3. Increase Your Family’s Safety
There’s nothing more important than the safety of your family. If your older windows are difficult to open, or get stuck once they are open, the windows could pose a risk to your kids. Unfortunately, faulty windows can allow your children can climb out or accidentally get a finger stuck while trying to close them.
Older windows could also pose a danger in the case of fire. If your escape plan is to exit using a window that is older, it may take more time to open it and escape. Worst case, your exit window could get stuck, causing you to need an alternate route that you may not have the time to find. This is reason enough to replace your old windows with new, safer windows.
4. Protect Your Belongings
Ultraviolet rays that come into your home through your windows can fade your furniture, carpet, window treatments, and artwork. Upgrading to energy efficient windows will reduce the amount of sunlight that can get through the window and cause damage to your property. Most replacement windows can block up to 95 percent of ultraviolet rays.
Investing in replacement windows means that your furniture will look newer longer. You’ve spent time and energy designing your home, so it’s important that you choose the right windows to protect the furniture and belongings that make your home, a home. You will also protect yourself from harmful ultraviolet rays.
5. Add Curb Appeal
Even if you’re not in the market to sell your home, new windows increase the value of your home and give your property an instant facelift. Your home is your largest investment, and one of the most important assets in your life. A welcoming exterior can put an extra spring in your step each time you come home. New windows also improve the look of your home on the inside as well. When you do need to sell your home, you’ll be glad you invested in those new windows.
RWC Windows, Doors & More is a family-owned home improvement business that has been helping families like yours for over 57 years. We offer unparalleled customer service, quality product selection, and affordable prices. Our certified factory-trained installers and in-house department can redesign your master bedroom, build an addition on your home, upgrade you kitchen and more. We’ll work to make your home improvement dreams come true.
RWC has been relieving home improvement stress since 1959. Call us today or visit us on the web for your free consultation!

7 Ways to Renovate Your Small Kitchen or Bathroom and Create Storage Space
Are you starting to feel like your kitchen or bathroom is too small for your family’s needs? Did your other half tell you that if you bring home one more gadget for these rooms that you’re sleeping on the couch? Your first response to feeling this way may be that it’s time to move, but things might not be that serious just yet. There are plenty of ways that you can renovate your small kitchen or bathroom that will help you to create some serious storage space.
Lazy Susan
The lazy susan is a pretty ingenious idea. It goes into your cabinet and creates a rotating platform for all your things that were in that space. No longer do you have to dig to the back of the cabinet to find what you are looking for, as you can find it with an easy twist of your wrist. This renovation idea may be as simple as putting in a lazy susan or getting new cabinetry that incorporates the lazy susan design in them.
Turn Cabinets into Storage Masters
Lazy susans are not the only way to turn your cabinets into storage masters. There are other ways that you can maximize the space in your kitchen with new cabinets. For instance, there are some cabinets that can incorporate drawers into them. Then, you can pull them out to utilize every inch of the drawer - no more wasted space in the back.
Pot Racks
Pots and pans can take up a lot of space in your cabinets, so try to be creative with their storage. A pot rack on the wall or hanging from the ceiling can be a perfect way to maximize your kitchen storage space. Your pots and pans will be nicely organized in a neat fashion, and all that space can be used for all your other kitchen gadgets and doodads.
Add an Island
It may be time to pull out the big guns, and go about adding an island to your kitchen. This may require a more extensive renovation of your kitchen depending on your space or you may even be able to find a cart that can work as an island. Having a custom island built can be the perfect way to go because you’ll be sure that it works just right in your space, and can be built to include the extra storage space that you crave.
Add Storage Furniture
Both your kitchen and your bathroom can benefit from adding storage furniture. Put in storage towers or storage ladders to add some interesting design details along with extra places to put all of your things. Think about adding some little wicker baskets to the space. These can be great for guest rooms to hold towels or other items. Don’t forget the walls. Hanging storage, such as new cabinets or just a couple of small shelves can increase where you can store items.
Bathroom Sink Revamp
Your bathroom sink setup may be taking up more space than it needs to in your bathroom. There are some new designs available that can help you to get the most space out of your small bathroom. For instance, they have amazing wall mounted sink pedestals that even come with their own built-in storage space for a small hand towel or other items while leaving the floor clear for other storage. There are also some sinks that are thin and long rather than square to help you maximize your bathroom space.
Hidden Storage
There may even be ways to tap hidden storage spaces in your bathroom that you didn’t consider. One way to do this is by installing a full-length mirror that doubles as a storage space. This is multi-functional and works for just about any family. There are also more hidden spaces in your home that go a little deeper. Depending on how your home was designed, there may be spaces on your wall where you can add some extra storage. This requires the help of a professional, but can be a dramatic way of expanding your storage space. It may not be located in your bathroom, but extra space is extra space.
You may be feeling as though some of these projects are a little too complicated for you to handle, or maybe you’d just like an expert opinion on your small spaces. That is where RWC can come into the picture. We listen to what you need and want in your space, examine your current setup, and help you come up with a project that will make your space better.
Our installers are factory trained, and we are able to do just about everything in-house for you. From remodels to new additions, we’ve got your back. Check out our services today to get you started on the path to a home you adore.
RWC has been relieving home improvement stress since 1959. Call us today or visit us on the web for your free consultation!
Thank you and feel free to contact me with any questions!
Project Spotlight: Kitchen Renovation in Closter, NJ
We've been in the home improvement business since 1959 and know the importance of attention to detail. That’s why, when we saw an opportunity to completely renovate a kitchen in Closter, New Jersey, we approached it with a willingness to work hard but also take time to achieve quality results. Throughout our project, we fully remodeled this home’s kitchen by stripping the old kitchen and putting in new cabinets, countertops and flooring.
Project Details
Before we began renovating this kitchen, the overall color scheme made for a somewhat drab and unappealing appearance, as the dark tile floor seemed uninviting. Furthermore, there was no sense of unification between the cabinets, counter, and floor. Thankfully, we were able to tackle this problem by selecting all-new materials that coordinated better and gave off a more open and light-filled appearance to the kitchen.
We began the project by consulting with the owners of the home to see what they wanted out of their remodel, as well as making our own assessment of what needed to be done. Then, we worked to carefully plan out what our new design would look like before beginning to dismantle the furnishings that already existed. Then came the hard labor - taking everything apart, and putting it back together again in a more satisfying and aesthetically pleasing way. Finally, we smoothed everything over and evaluated our progress to see if we had achieved our goals.
About RWC
RWC Windows, Doors & More is a family-owned, New Jersey-based home improvent business that has been helping people replace and renovate entire rooms, doors and windows for over 57 years. The basis for our success is the education of our customers, careful and quality product selection, and unparalleled service. We always strive to select the best materials for our clients, and are available for consultation at any time. Our goal is always to work with our clients to help them realize their home improvement dreams. Therefore, we are open to suggestions and will also provide our best advice that we feel will help you the most with your home.
If you like what you see or you’re interested in visiting our West Caldwell, NJ showroom for a free consultation, give us a call, contact us online, or simply stop on in!
How to Get Inspired for Your Next NJ Kitchen or Bathroom Renovation
Quick Summary
Remodeling your kitchen or bathroom can be a stressful process. One way to make it less stressful for everyone involved is to do your research before getting started. Your contractor will thank you, and you will be pleased. Know what you need and want from your remodel, talk with your contractor, be flexible, and be ready for an amazing process that can be fun and frustrating at different stops along the way. In the beginning you may need to put in some effort to determine what you want your new kitchen or bathroom to look like, but the end results will make it well worth the time you spent on it.
SECTION I: Introduction to Remodeling Inspiration
SECTION II: Go Into Your Remodel with Open Eyes
SECTION III: Kitchen and Bathroom Remodel Idea Sources
SECTION V: Talk with Your Contractor
SECTION I: Introduction to Remodeling Inspiration
You’ve been looking around your home for a while now and have decided that you need to do a little kitchen or bathroom remodeling. They are pretty outdated or just no longer fit your current needs, but you’re not really sure what you want. This guide will help you to get prepared for the remodeling process by helping you to start getting some ideas, and give you the information that you need to be aware of when getting involved in a remodel. This information is vital, especially if this happens to be your first remodeling project.
Chapter 1: Research!
Research is a vital part of this process from determining what you want to be done to finding a contractor. You have to research your upcoming remodel with ideas before talking with your contractor to get a better idea of what you are looking for and want to accomplish with your remodel. That being said, you should also talk with your contractor to make sure that your thoughts and design ideas are feasible for your space and budget. A great contractor will be able to take your vision and see ways to improve it based on their previous experience to help it better fit with your thoughts on the process. You may be tempted to try your hand at a DIY project, but this is just something that can create more mess and problems then it will fix. Some may find that their project is more expensive because they need a contractor to come in and fix what they did themselves.
SECTION II: Go Into Your Remodel with Open Eyes
You should go into your remodel with open eyes. This means that you know you want a remodel, but you should do your research before speaking with your contractor about what you want. A good contractor can work with your ideas, but they need something to work with, and if you don’t know what you want, they may not even know where to start to help you get the new kitchen or bathroom you’ve always wanted.
Chapter 1: Brainstorm What You Want
One of the first things that you need to do is brainstorm what you want to have in your new kitchen or your new bathroom. This can get you started on ideas that are possible for your remodel.
Chapter 2: Create a Diagram for Ideas
There are tools online that will help you start the planning process on your own to start playing around to see what will fit where in your new space. These tools will allow you to create a diagram of what your room looks like empty, and you can start placing objects into it, such as adding an island to your kitchen or putting in a shower stall into your bathroom. Your contractor can take this information and put it into their own tools to come up with your final plan.
Chapter 3: Determine Lists with Wants and Needs
You need to create a list that separates out your wants from your needs. It is one thing to have a dream idea of what you want your new space to have it in, but reality must also be kept in mind. You may not be able to have everything that you want in your remodel due to budget, space, or other issues. Creating this list will help your contractor come up with the best remodel possible for what you need the room to have, and what you want it to have in it.
Chapter 4: Set a Realistic Budget
You may think that you should wait to see your contractor before thinking about cost, but that is not a great idea. You need to start thinking about what a realistic budget will be for your purposes. You may want to think about how much you will be able to afford with your remodel. Everyone wants the biggest and the best remodel he or she can possibly have, but you have to think about what you can afford. You should be realistic when starting this process. You can set your budget lower than you expect it to be to allow yourself to grow this figure as features and ideas are incorporated. You should also have a firm idea of how much is too much, especially if you have to borrow the money to pay for the remodel. A remodel will not help anyone if you can no longer afford your mortgage payments. Starting lower will allow you to be more flexible in your budget.
Chapter 5: Be Flexible
You will need to not only be flexible in your budget when it comes to adding up all the different things you want in your new kitchen or bathroom but also with the process itself. You may not want to hear from your contractor that all of your ideas will not work in your new space, but it is possible that something you’ve got your heart set on will not come out exactly as you want it. The timeline may not work out as you thought it would or other issues may crop up. Be prepared to be flexible.
SECTION III: Kitchen and Bathroom Remodel Idea Sources
You may not realize it, but there are plenty of sources of ideas for your kitchen and bathroom remodel available to you all around you that you can tap into to start getting ideas on your remodel. It may not work exactly the same in your space, but it will help to get the creative juices flowing for the remodel process.
Chapter 1: Talk to Friends and Family
Your family and friends are excellent sources for information on kitchen and bathroom remodels as they may have been through the process themselves or know someone that has been through it. They can give you ideas on what worked great, and what did not. You can even visit their remodels to get an idea of the space. Be sure to ask if they have before and after pictures to get the full effect of what was accomplished in the room for them.
Chapter 2: Watch HGTV and Shows about Remodels
Take advantage of the television programming that you know and love. HGTV and other channels have quality shows about remodels and remodeling that can help you get ideas about what you are looking for in your space. This is also a great source of information for understanding the whole undertaking of the remodeling process, but of course, keep in mind that some of the drama may be more from the fact that it’s reality television than the actual remodeling itself.
Chapter 3: Online Sources
The Internet is a massive source of ideas that you can use for your upcoming remodeling process. You can check out social media sites, like Pinterest or Instagram, to see what other people are doing in their homes. You may even luck out with getting more before and after pictures. Houzz is a website that is dedicated to helping people with their home improvements. Explore blogs on kitchen remodels, bathroom remodels, and other ideas about what to do with all of your space.
Chapter 4: Local Real Estate
Don’t forget to check out your local real estate. First, you can talk with local real estate agents about what things are selling well in your neighborhood, and what remodels are not doing as well in adding value to your home. Secondly, just because you are not thinking of purchasing a home doesn’t mean that you can’t visit open houses. Open houses can be a good way to gauge what is possible in your neighborhood, and get plenty of ideas for what you like and what you don’t like.
Chapter 5: Window Shopping
Go window shopping to stores that offer interior design and other products. You may not be doing the work on your remodel yourself, but these stores are still a great source of information for what you may like or dislike in your newly redone room.
Chapter 6: Home Improvement Shows
Checking out your local home improvement shows are a great idea when you are looking for remodeling ideas. You’ve got a concentrated group of companies that are looking to tell you about their services and products. Often, there are model homes or set-ups that can give you some great ideas about what you’d like to see in your home.
SECTION IV: Mistakes to Avoid
Sometimes getting involved in a remodel isn’t just knowing about what you should do, but also how to avoid mistakes in your remodel. DIY projects are something that can seem really exciting when you first get started, but they can often end up the complete opposite. Often, home remodels that started out as a DIY project turn into a disaster for the homeowners that were so excited to get started, and becomes a very expensive project to fix once they turn to a professional to help. Often, these costs can be kept much lower if you just enlist the help of a professional from the start. Trying to tackle intricate remodeling projects yourself because you saw online that anyone can do it may be setting yourself up for a big fall and your home may not be as you wanted it to be.
Chapter 1: Expect Your Contractor to Know What You Want
As much as they might wish otherwise, your contractor is not a mind reader and is unable to know what you want. When you are meeting with your contractor, you should be able to give them something to work with for your project. This does not mean that your plans are going to be set in stone when you get to the meeting, but that you have some clues as to what you are looking for with this new space to have and things you may want to see in the remodel.
Chapter 2: Get In Over Your Head
You do not want to get in over your head when it comes to your remodel. This means that you should not think that just because there was a website offering instructions on doing it yourself, that you will be capable of handling this project alone from start to finish. You may find that you’ve bitten off more than you can chew or made big mistakes that will cost a great deal more to fix. A kitchen and bathroom remodel can be dangerous because of that fact that you are dealing with electricity, water, and gas lines. A poor remodel can also damage your house’s value in the eye of potential buyers, so rather than giving more value, it takes it away.
This also means that you should go into the process with a budget, a realistic idea of what will be happening with your remodel, and ditching the idea of the perfect kitchen or bathroom based on your original dream ideal.
Chapter 3: Budget Problems
Money can sometimes be a problem, and can cause mistakes in the remodeling process. Some people have a hard time talking about money. Some people try to cut as many corners as possible to save money. Some people set unrealistic budgets that are not going to work for their remodel. They may want a luxury bathroom that evokes a spa or master chef kitchen but finds that their budget is way below that level. This is all okay as long as you prepare in advance.
You should prepare yourself to talk about money. You will need to be open with your spouse or roommate about the money that should be budgeted for this remodel. You should also be prepared to discuss where this money is going to come from, such as if you have savings or will need to take out some type of loan to pay for the remodel.
You may think that you should choose the cheapest option for everything going into a remodel, but this may not be the best plan, either. You should evaluate each option not only based on the cost, but on the durability of the item, the difference in price, and other factors. Choosing only the cheapest items because of cost may mean that your remodel does not hold up for as long as you wanted it to or look as good as you imagined leaving you unhappy with the process.
Setting an unrealistic budget can be a killer for a remodel. You should take how much you’d like to spend, and then increase it by about 20% to get to a more realistic figure. You never know what may be found when the remodel starts that could impact your final price tag. There may be bad plumbing in your bathroom or mold in your kitchen cabinet under the sink. This cushion can help to absorb these costs that you were not thinking about when you were getting started with your contractor.
Chapter 4: Rush Into the Remodel
The final mistake that you shouldn’t make when getting ready for your remodel is to rush into it. This can be very detrimental to the process and the end product that you are looking to get out of it. Some things that you may do that are rushing the process faster than it should be are not doing your research, planning as you go along, and skipping the beginning conversations with your contractor.
Ignoring the research phase of this process can mean that you end up with a space that doesn’t truly fit your needs or that you grow tired of rather quickly. You should take the time to research the different trends and what you like before getting started.
Planning your remodel as you go along may mean that you are missing vital parts of your remodel or that the perfect plan that could’ve been had with a little prior planning is now gone forever because you already started moving forward. You should have all your ducks in a row before beginning this process.
This is a major undertaking for your family and your home. Skipping the important conversations with your contractor might cause problems down the road. You should carefully go over the research that you’ve already done, and what they believe can be done with your space along with how this process will be accomplished. This is the perfect time period to get some feedback on how the remodel is scheduled to progress, such as a timeline and so forth.
SECTION V: Talk with Your Contractor
Of course, your contractor will need all of this input to help you get the best remodel possible within your budget. Meeting with your contractor at various stages of this process is an excellent idea to make sure that all parties are on the same page with your remodel. The beginning meetings with your contractor might be the most important conversations that you can have with them, and will help to set the tone for the upcoming project.
Chapter 1: Meet with your Contractor
The time has come to meet with your contractor, and you need to be ready. One of the first things that you should do to prepare for this meeting is to gather up all of your inspiration and ideas to bring along with you. You should also be sure to bring along your realistic budget, want and needs lists, questions, concerns, and any other thoughts you had during the research and brainstorming portions of your remodeling project. Not having this information may mean that something gets missed in the meeting, and you might have to go back to the drawing board, so to speak.
This is also a great time to learn more about the contractor. Ask questions to find out more about them and their business. You may want to see how long they have been doing business in your area to see if they are well established, and may be able to offer some references from people that had similar projects done. You can ask about whom they use as their supplier to learn where the materials are going to come from for your home. Talk to them about their employees, and see if you are able to meet the foreperson and anyone that might be coming to your home to work on it. Ask them about their portfolio to get an idea of the projects that they have done previously.
Chapter 2: Get Their Input
While you don’t want to go into your meeting with your contractor without any ideas, this initial meeting is a great time to get their input on your project. They can go over your ideas, your needs, your wants, and other things that they see in your project to help you come up with even better ideas and thoughts on it. Trust that they are able to put their prior experience to work for you when it comes to creating the perfect design that balances everything you want with what is possible. Your contractor will have a good idea of what is going to work out well, and what will not. Ask them their opinion if you are not certain on an aspect of your design to see what they have seen with past clients. Put their knowledge and expertise to work for you in the initial project phase.
Chapter 3: Talk Budget
As mentioned previously, a budget is always a difficult topic for some people to discuss as money is almost a taboo topic for some families. Setting a realistic budget by doing your research may help you to be better prepared for the bid that the contractor is going to give you on the project with the details that you have come to them with for the meeting. Don’t be shy during this portion of the meeting.
Be sure to ask questions. Find out if you are able to get an itemized bid that helps you to determine what things can be axed or what can just be changed to better fit your needs. Also, it is important to ask at this phase whether or not the bid that is given to you is an estimate or if it is a fixed price. If it is an estimate, you can expect that this final bill may be higher than what has been quoted to you during this meeting.
Chapter 4: Discuss What Is and Isn’t Possible Between Budget and Need/Want Lists
This is the perfect time to start discussing what can be done and what cannot be done based on your budget and your need/want list. This may help you and your contractor come to a better agreement on a budget that will work for you both. Be prepared to give up some of the things on your lists if your realistic budget amount and the bid amount are not close enough together at first. You may even have to dig somewhat into your list of needs, depending on what is able to be done with your budget. The good news is that your contractor might have ideas for ways that you can save money, such as tweaking the design to fit better or ideas on using reclaimed materials.
You should also keep in mind that some things may need to be knocked off your need/want list, not because of the budget, but due to other restrictions. For instance, you may have it in your mind that you want to knock down a wall to make your kitchen or bathroom bigger, but based on your home plans, the wall may be a load bearing wall. This is another instance where your contractor may be able to help you salvage your idea to make it work for your space.
Chapter 5: Discuss Timeline
You should work on discussing a timeline at this portion of the meeting. This is where you should start setting a schedule. You should be able to determine a start date, an estimated finish date, and other milestone dates that should be completed at certain stages. You can also start creating a clear schedule, such as what time they will start working, what days of the week they will be working, and other timing details.
SECTION VI: Conclusion
Your remodel is something that you should be excited about, but you need to go into it with a better plan than just trying to wing it. Try to avoid the mistakes that other have made in the past to ensure that you get the best remodel possible for your space. This is not an easy task, but following these steps may help you stay away from the pitfalls.
Chapter 1: Do Your Research, Brainstorm What You Want and Talk with Professionals
Your remodel process will be whatever you put into it. You will want to take the time and effort to do everything that you can to get the best remodel with the budget that you have available to you. Start this process by doing your research. Look into what is popular and trending. Look into what styles you like. Research what remodels will help your property value and what will be detrimental to your property value. Take this information and brainstorm the ideal remodel that you are looking to have in your home. Your brainstorming can help you to discover what you want this new space to do for you, what you are able to pay for it, and what things you would like to have in it and what you need for it to have in it. Then follow this up by taking all your information to a contractor that can take what you imagine and help you turn it into a realistic reality for you to enjoy on a daily basis.
Contact us today to get started on the remodel of your dreams. We're here for you.
Don't Sell Your Home: Examine Ideas for a New Jersey Spring Remodel
Winter is just about over, and after being cooped up in your home for so long all you can think of is how it’s no longer working for you and your family. Rather than go through the hassle of putting your house on the market, look at the potential it still has for your family along with how you can put that potential to use for you. Spring is the right time to start thinking about ways you can improve your home. Most people think about spring cleaning and putting their homes on the market, but what better way to skip that headache by improving the flow and organization of your home with a few remodeling projects?
Your Kitchen
Kitchens are usually areas that can get pretty cluttered throughout the year. A spring remodel is the perfect way to kick off the good weather. You can incorporate lots of new and innovative storage ideas in the kitchen with cabinets and an island that are sure to make your spring cleaning a lot easier. Spring is a good time to get started with renovations because summer party season isn’t in full swing yet, and you might be able to get in with your contractor before he starts getting really busy for the season.
Your Bedroom
Keeping in the same mind as spring cleaning, your bedroom is another area that can often benefit from some remodeling. You can improve your closets or en suite master bath to take better advantage of the space that you have available to you. Installing built-in storage is a good way to get better use out of these rooms, and a different design flow may work wonders for how your home will better suit your needs.
Your Bathroom
No en suite bathroom? No problem. You can still enjoy a fresh bathroom space for spring with a bathroom remodeling project. Big shower stalls with rainfall showerheads are a popular trend that people are putting into their homes to achieve spa-like luxury. Creating a relaxing environment in your bathroom is sure to make you want to stay in your home, and these remodels often add great value to your home’s market price.
Your Doors and Windows
Spring is a great time to think about installing new doors and windows. Older doors and windows may not only be uncomfortable to have in your home because of the drafts that can come from them, but they can also cost you money on your electric bill. Your heating and cooling costs will thank you for taking the time to put in more energy-efficient doors and windows. Doing this in spring will make it more pleasant for the installers, and puts you in a good position with your upcoming summer cooling bill.
Your Mudroom
This can be the perfect time of year to update your mudroom or other entry space in your home. This is the area that is first seen when someone enters into your home, and can often be rather messy. Look at ways you can redesign the space to make it work better for you. Expanding the space or putting in storage options can be a good way to better use this area. Doing this in spring is a great idea because this is the time of year when it really gets put to use, and you may be more open to ideas of how to transform it.
New Additions
Spring is an excellent time to look into adding a new addition to your home. Add some additional outdoor living space by creating a screened in back porch that can be used all year long. Please the outdoor chef with an outdoor kitchen that is perfect for hosting parties. Put in a fire pit that works great on cool spring and autumn evenings. Create another bedroom to let your growing kids spread out. Add that extra space for an office or entertainment room to help your family fit better in your current space. There are a lot of different ideas out there for your new home addition, and this space can really be anything that will help your family be happy in your current home.
Spring is a time of new beginnings, but it doesn’t have to be the time to say goodbye to your home. You can implement some of these spring home renovation ideas to remodel your home and make it better fit your needs. Then, rather than spending your summer trying to find a new home and selling your old one, you can enjoy your new space. Not only will you have a new space (or spaces) that you adore and make you want to enjoy your home, but you’ll potentially be building in more value for your home when the time is right to put it on the market.
Not sure what springs remodels will be right for your New Jersey home? Talk with the professionals who can walk you through the process.
Project Spotlight: Double Front Door Renovation - Wayne, NJ
These beautiful double doors belong to a residence in Wayne, New Jersey. We are proud to be able to share this project with you and hope that you enjoy this photographic journey of the renovation.
From beginning to end, we knew this would be a challenge, yet one that would yield elegant and rewarding results. We've been relieving home improvement stress since 1959, and love when we're introduced to anything out of the ordinary. Double door redesign and installation not only improve curb appeal but allow for easy access through a striking entranceway. Here are some pictures, from start to finish, so you can see the transformation. To start we’ll show you the detail of the original tread and trim:
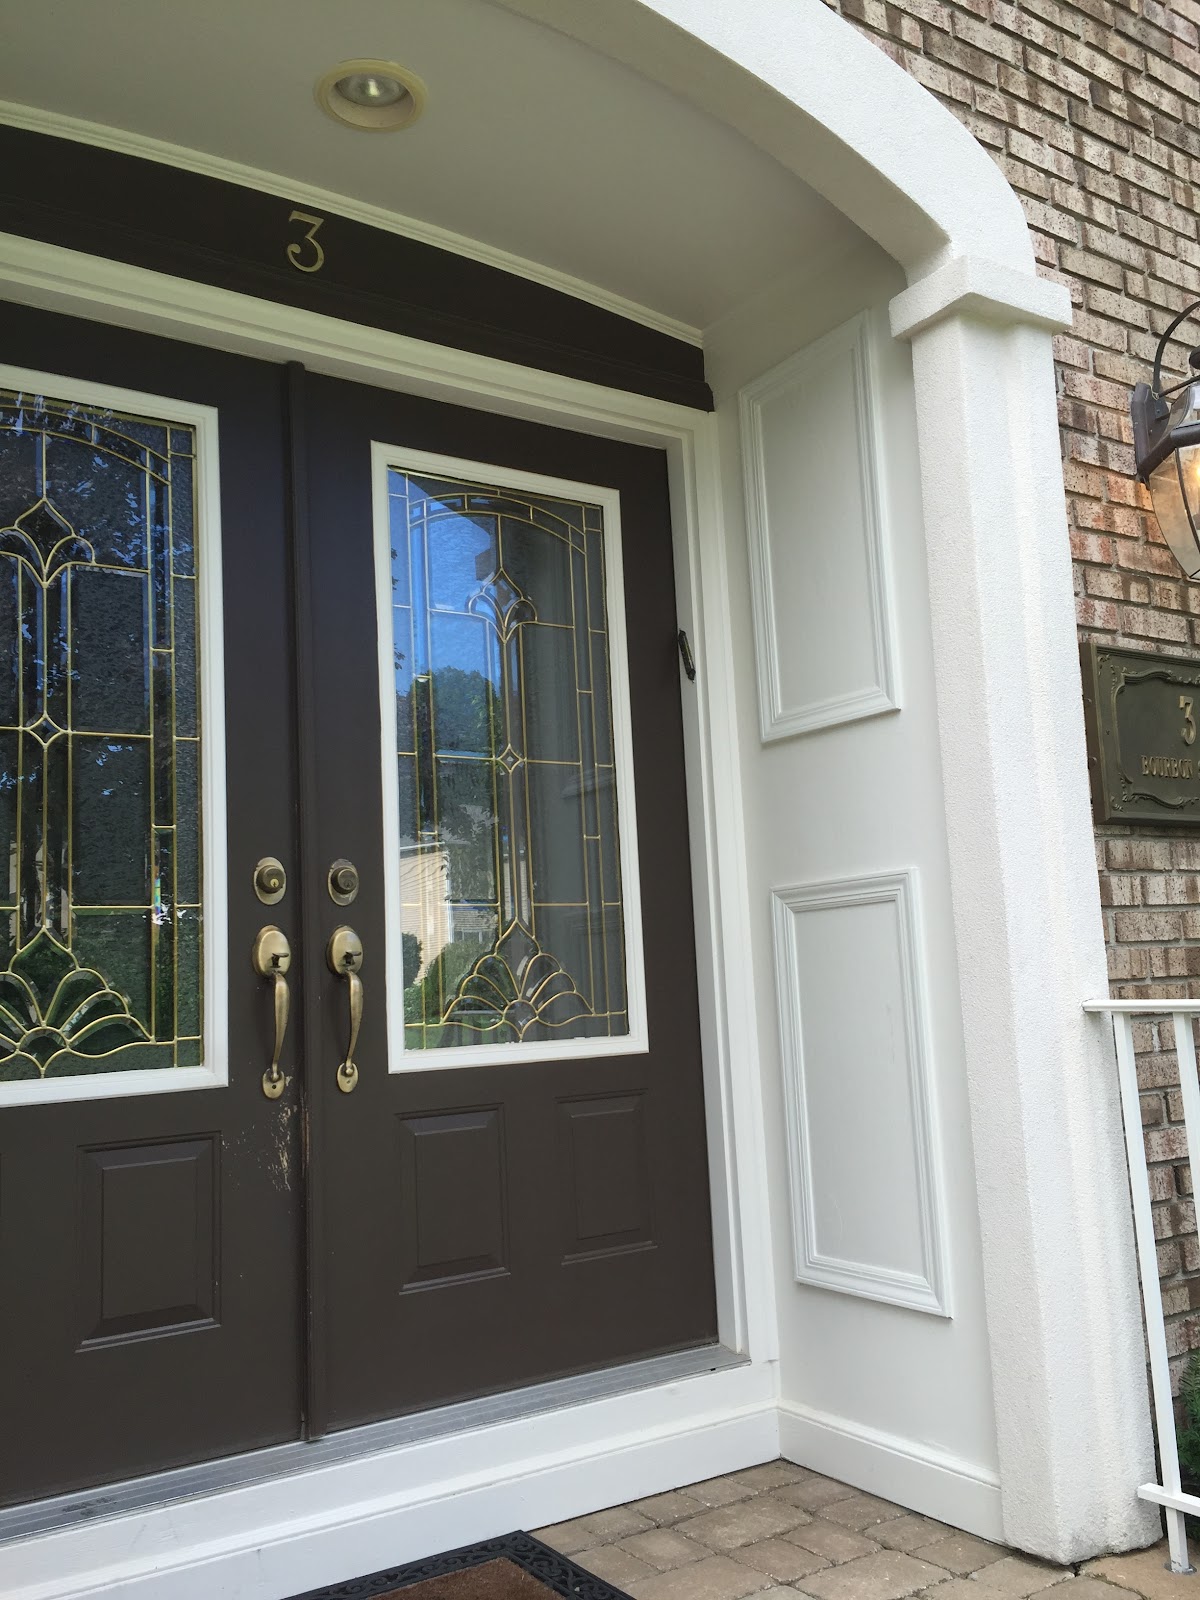
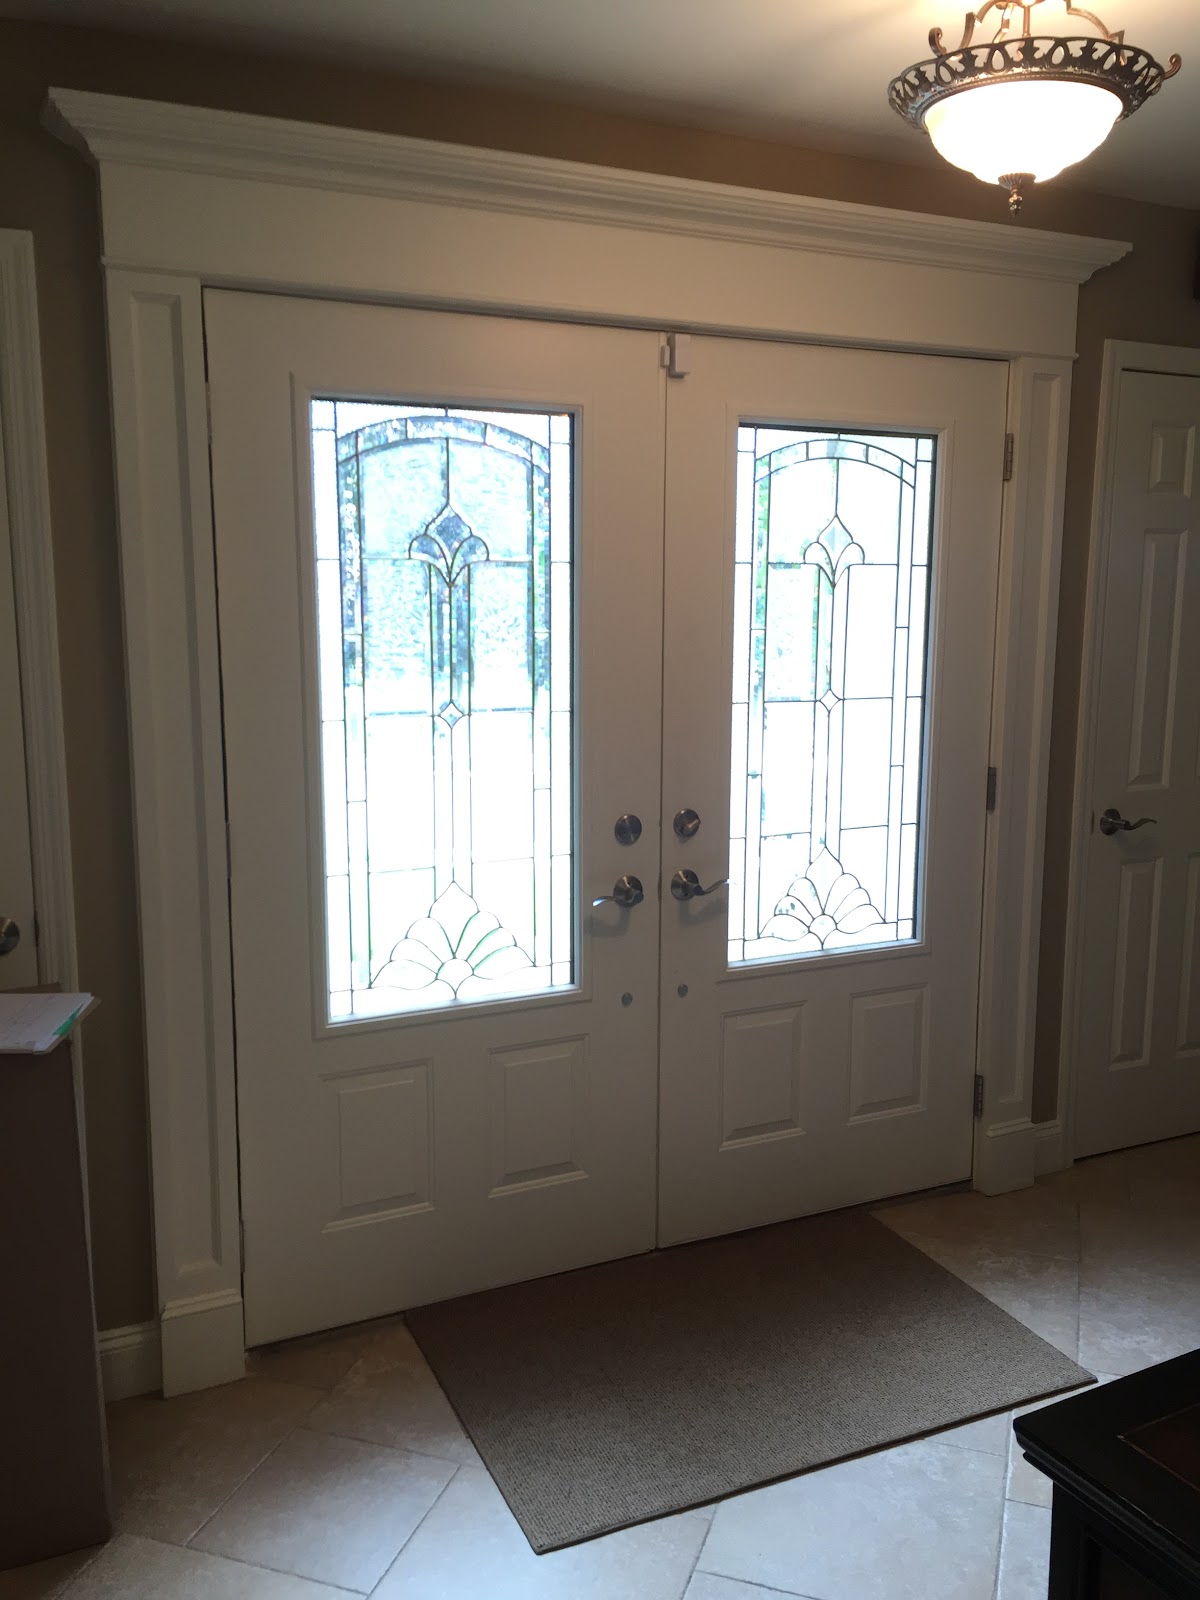
This is what the interior detailing looked like before we began...
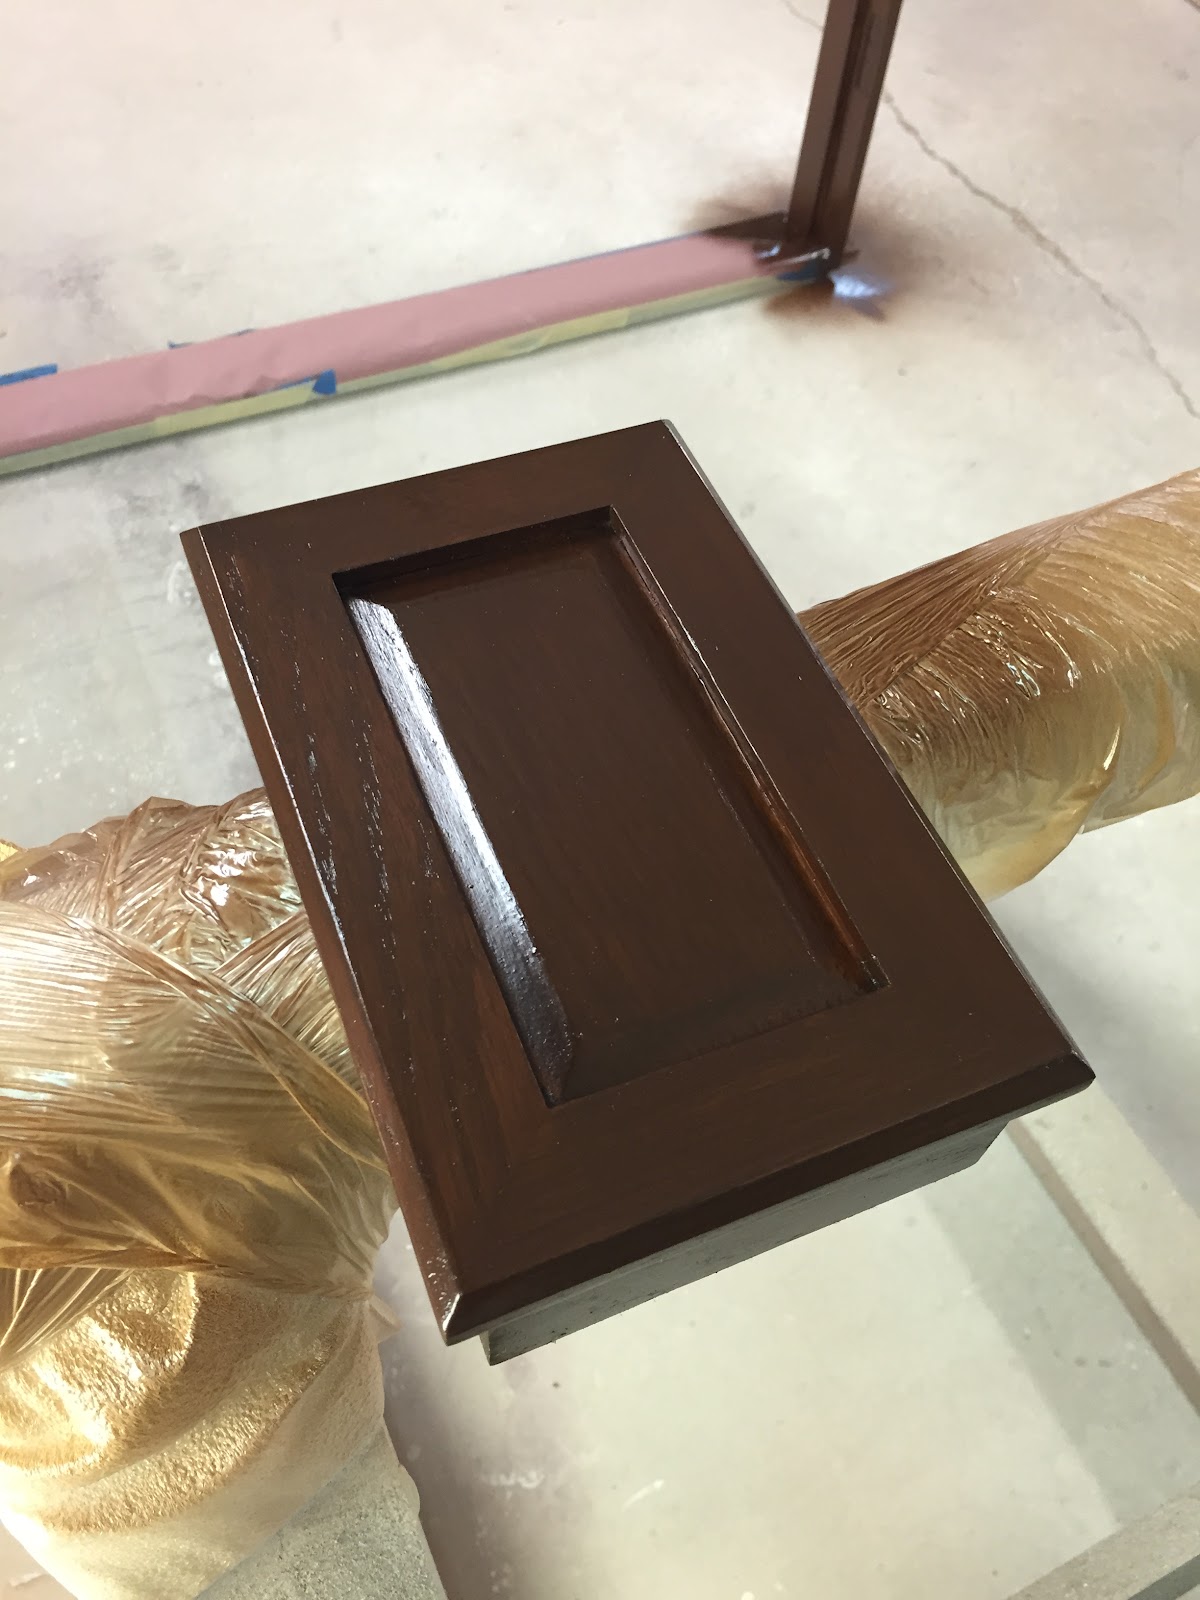
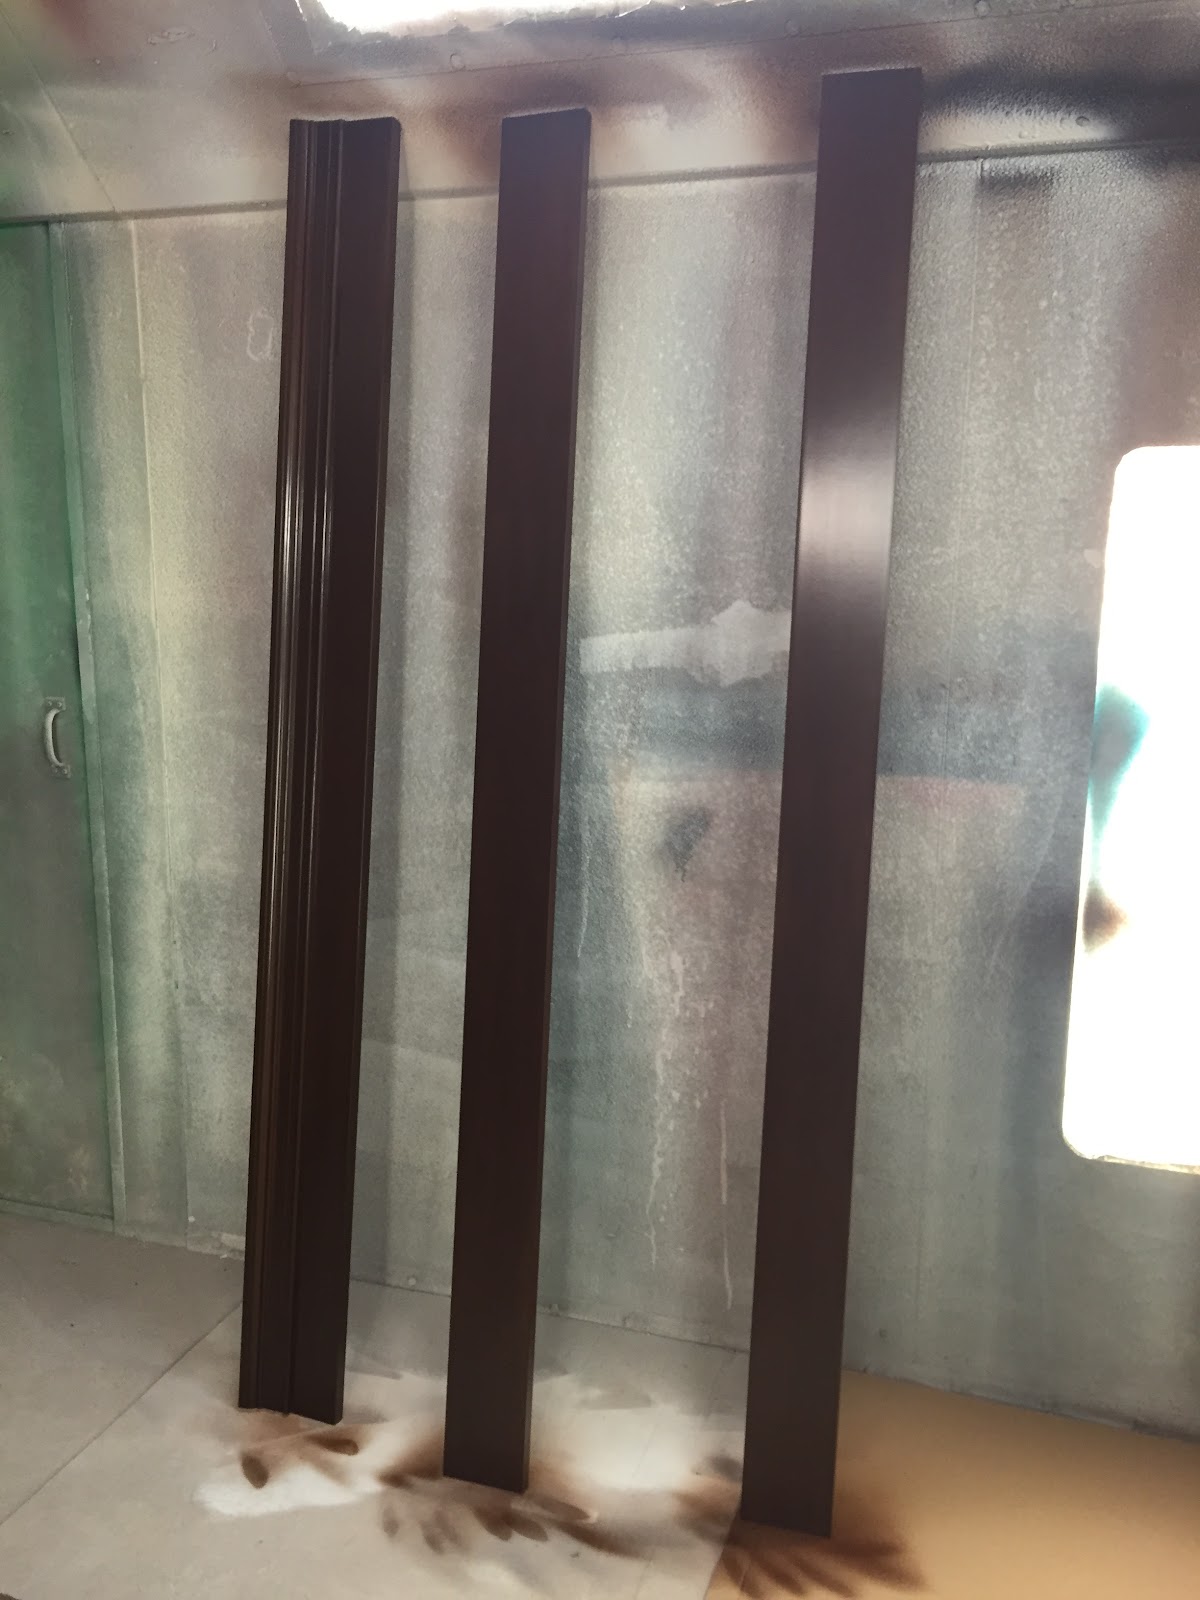
We began the process for removing the doors and existing trim so that we could change the color. Outdated trim was removed and updated pieces were tested and approved, then finally installed after our team was finished with the stain.
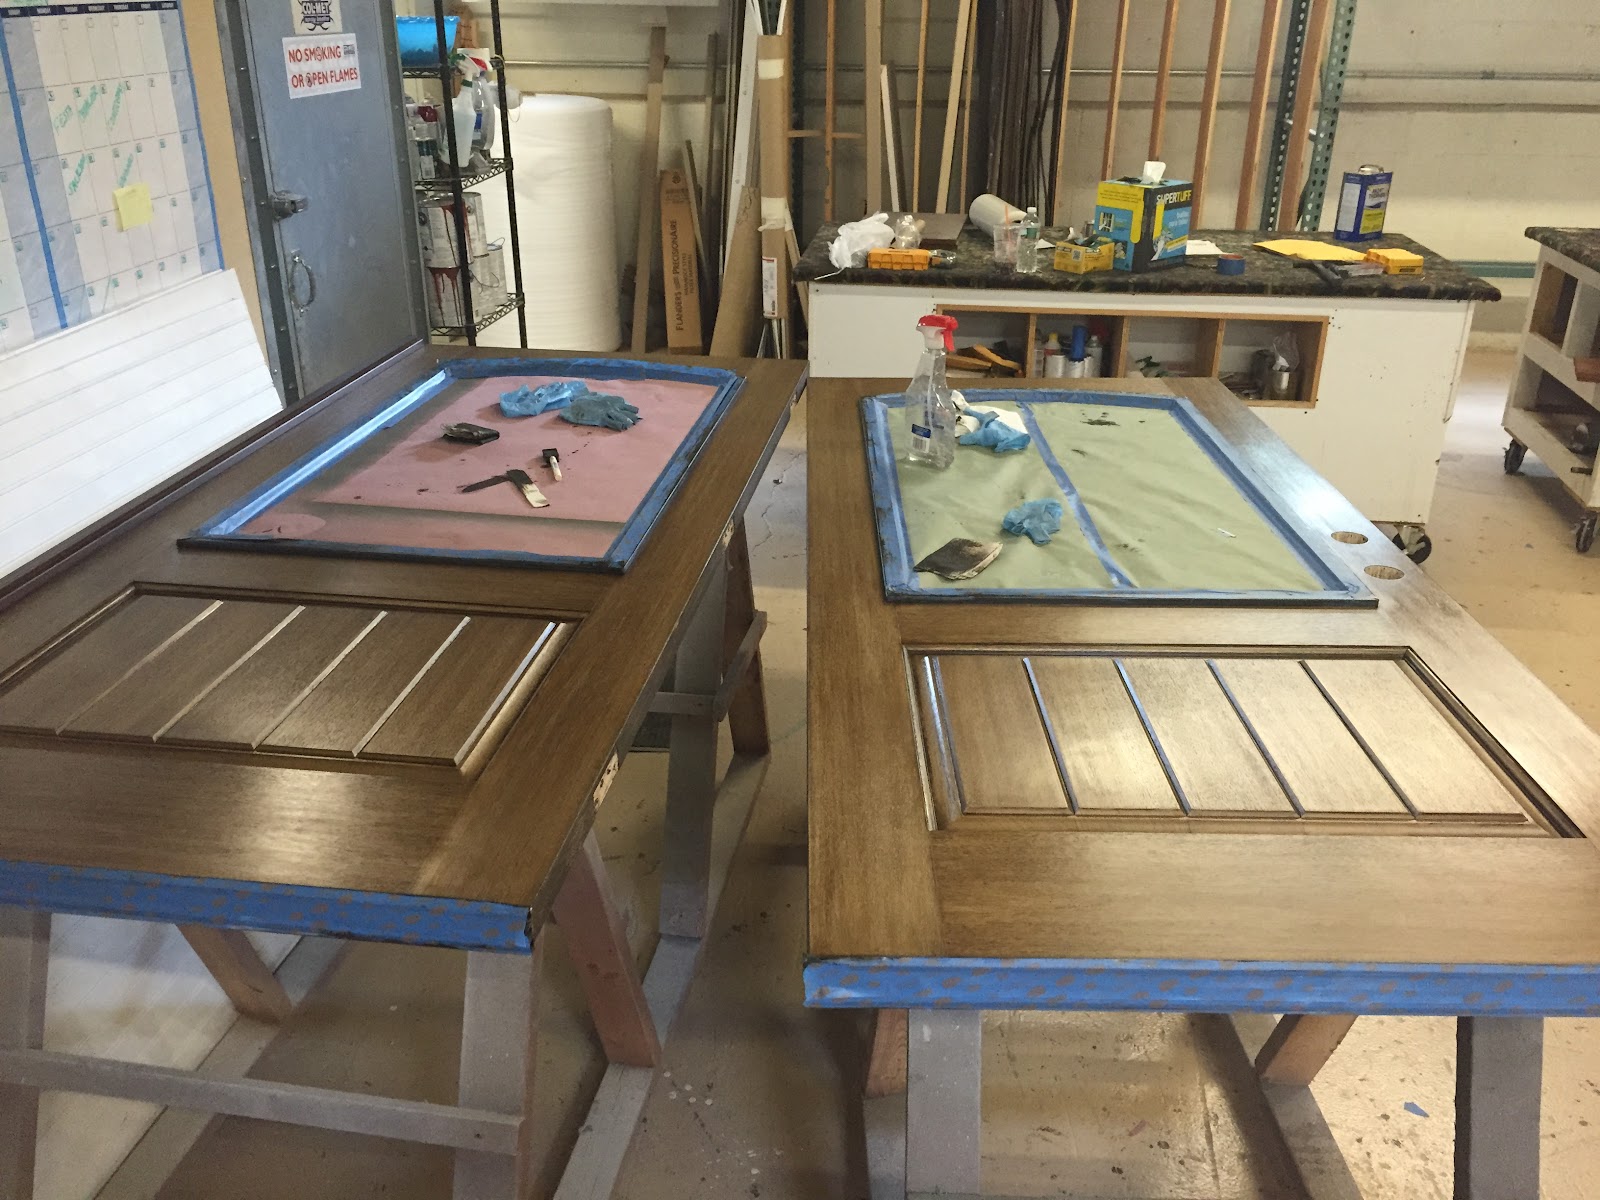
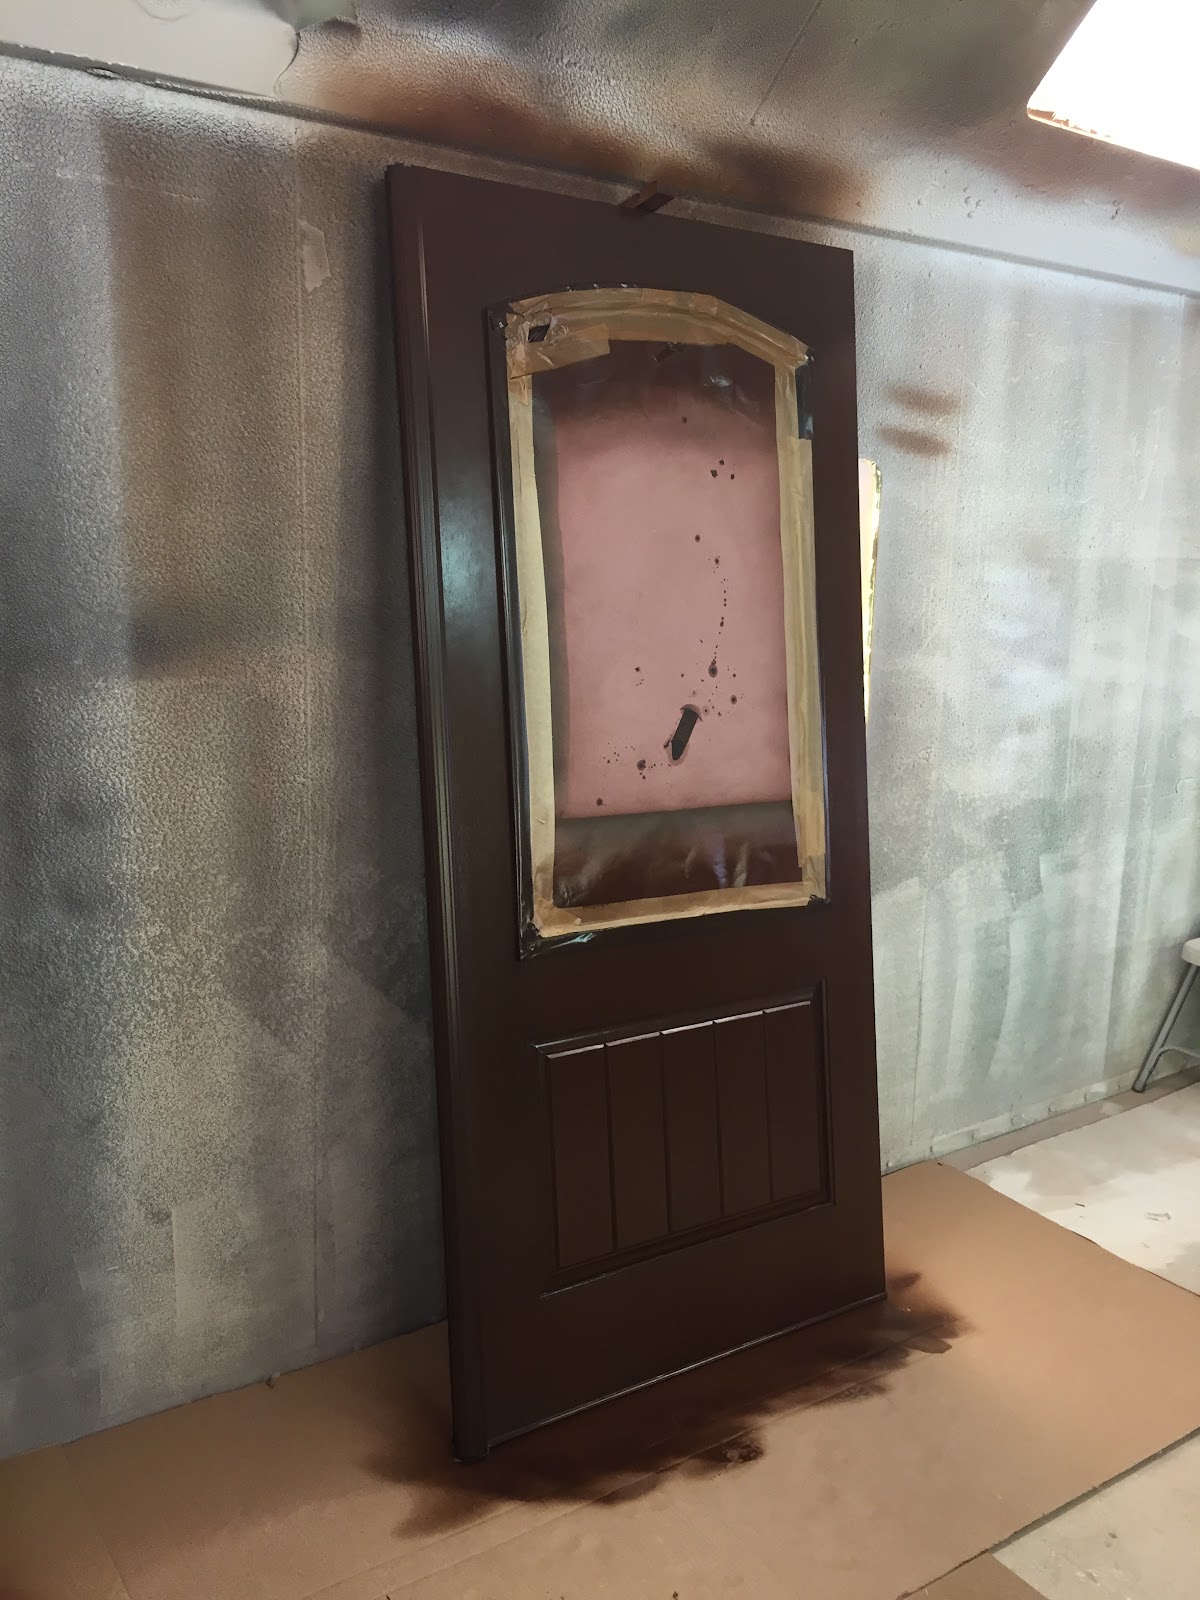
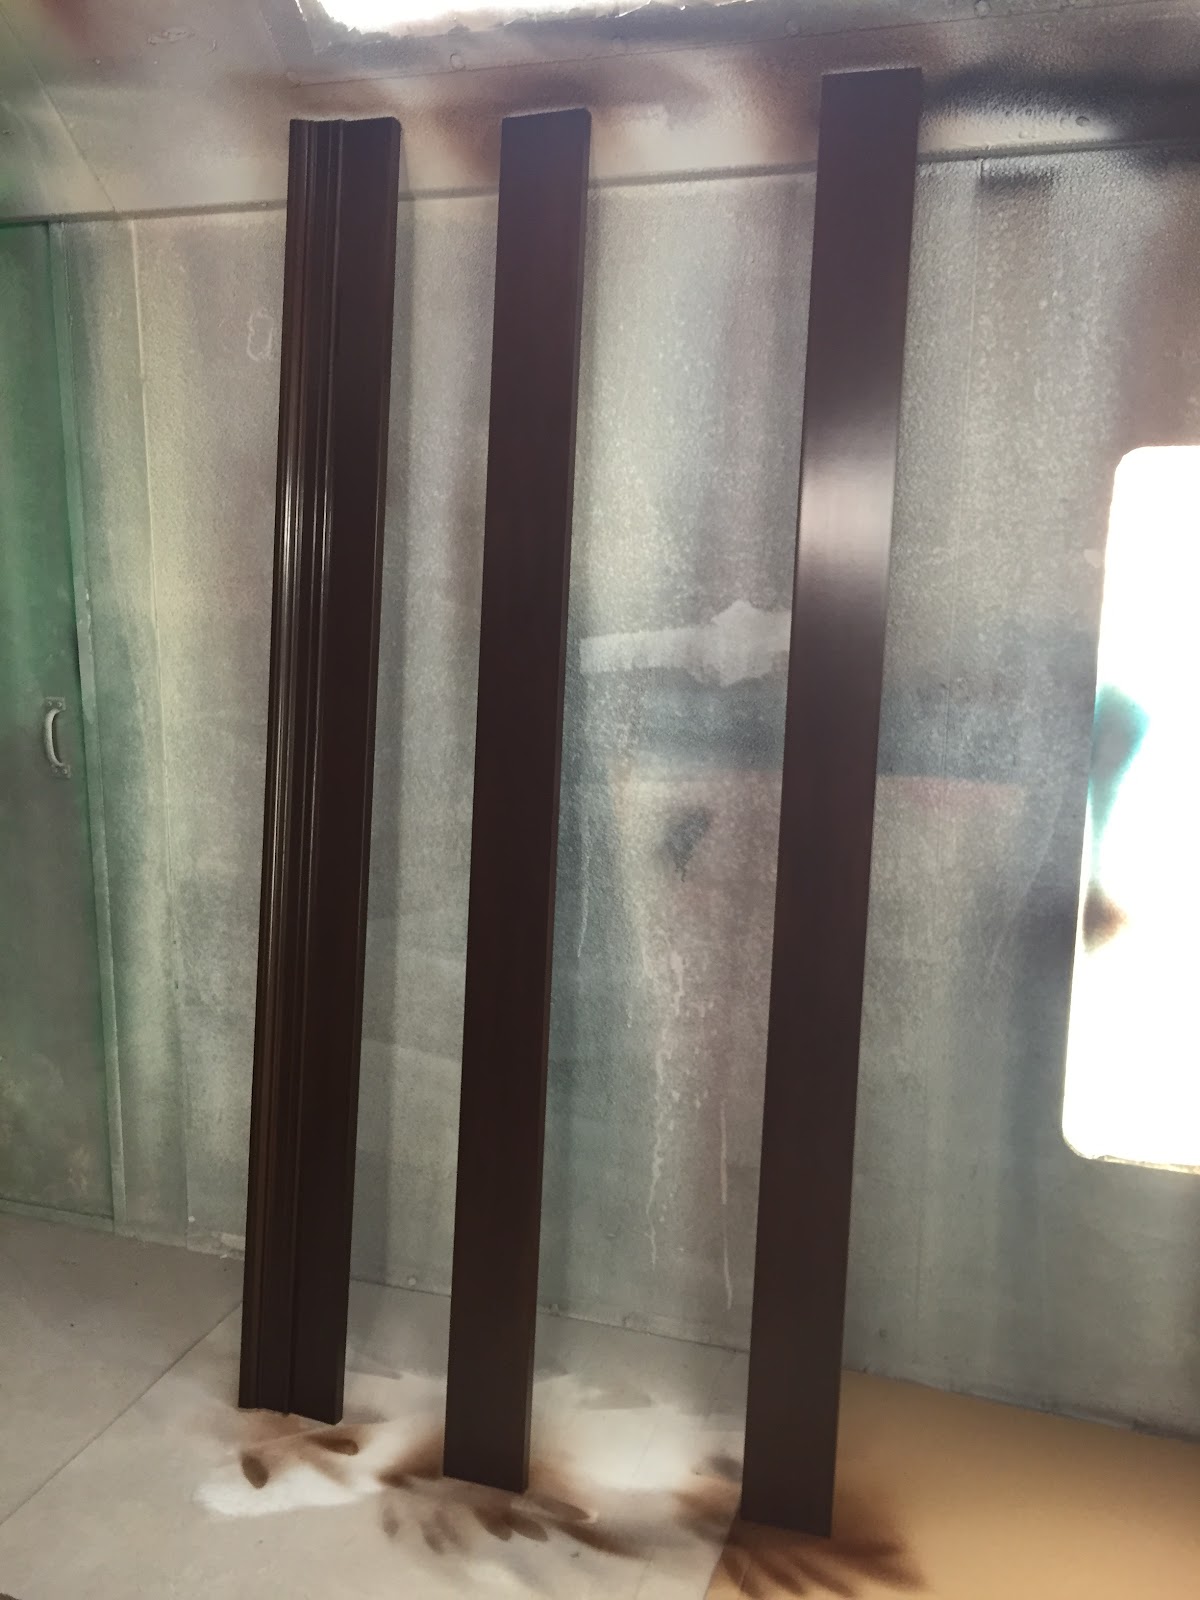
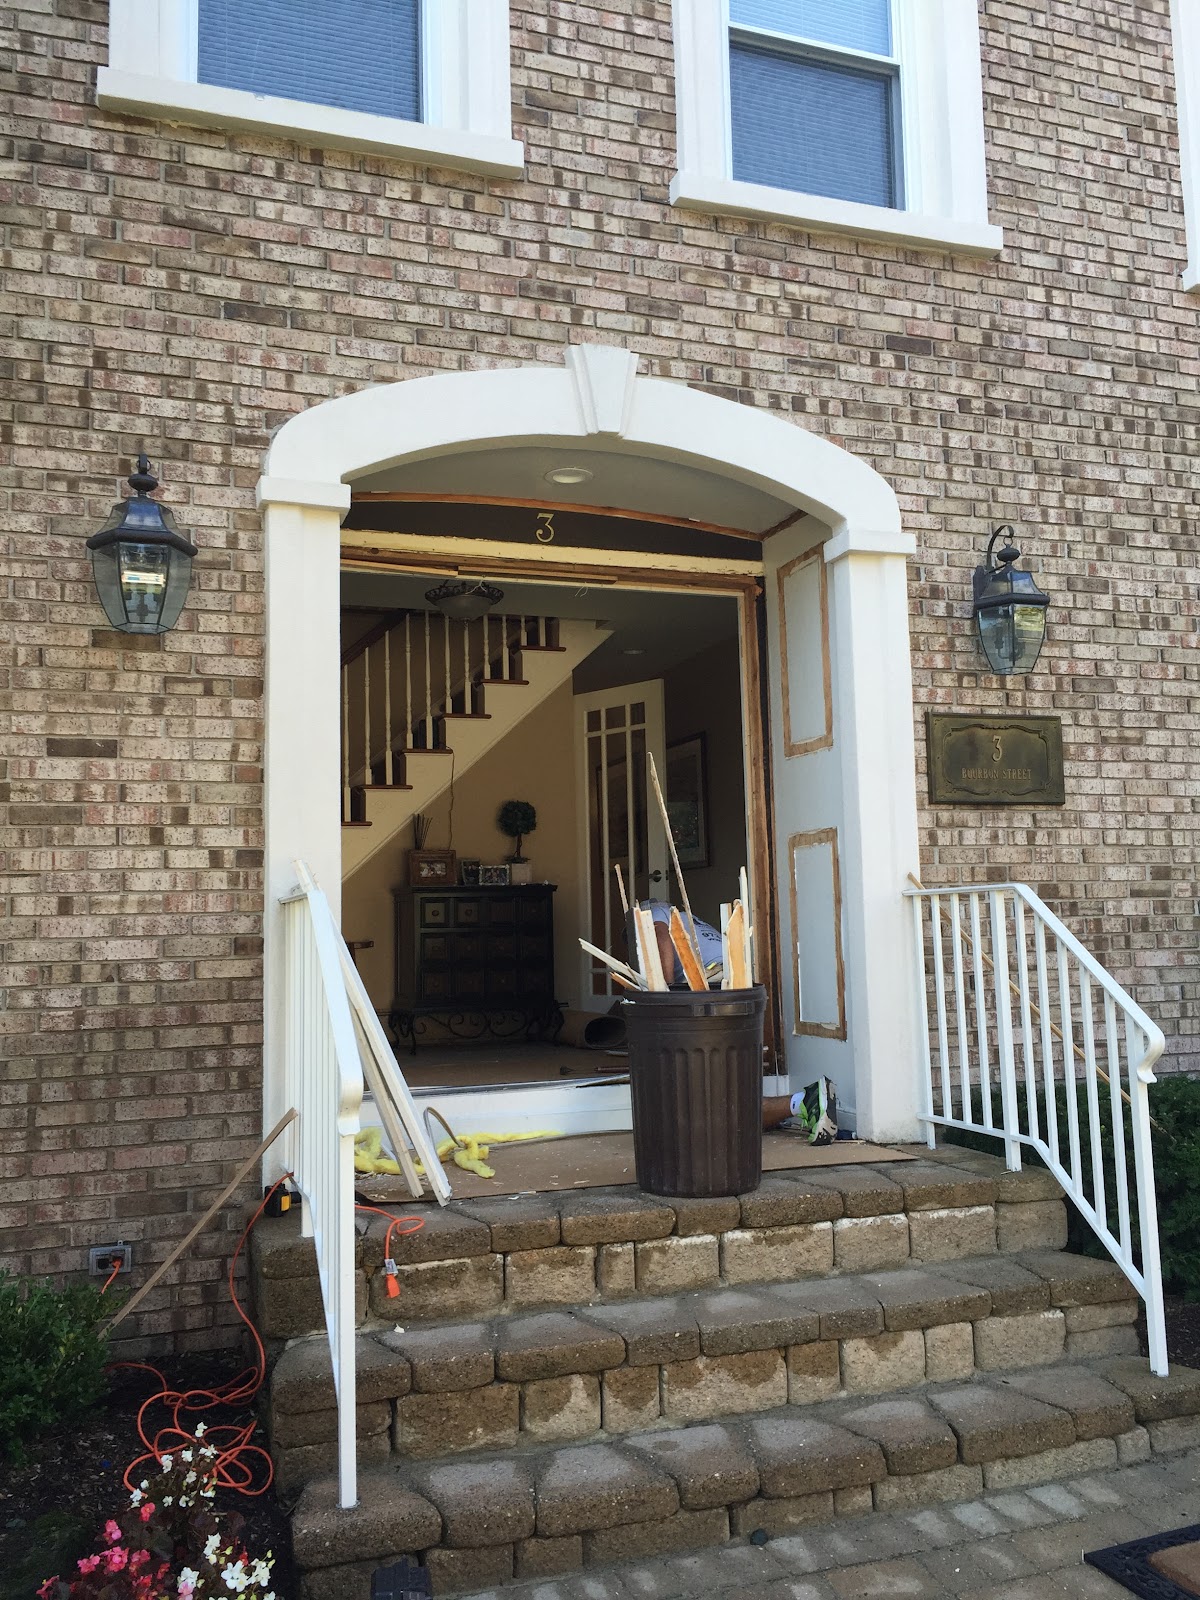
Now the entrance was ready for the new doors to be installed.
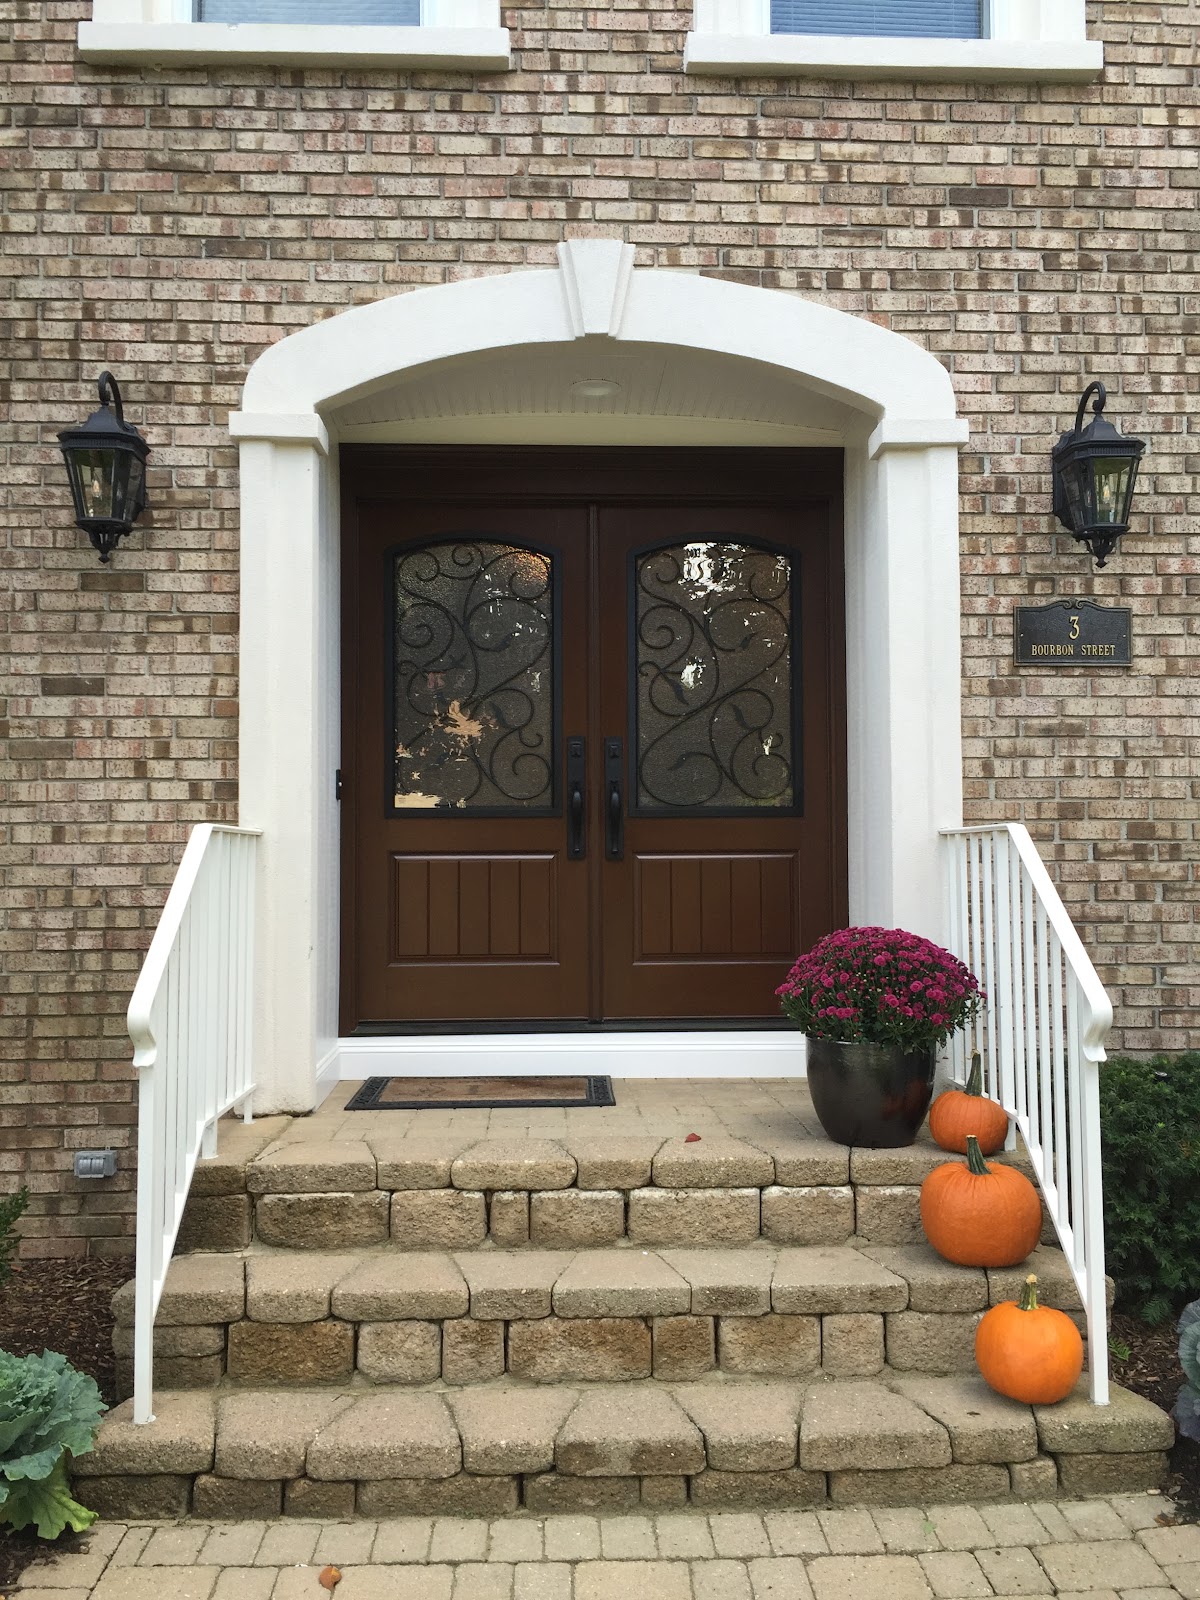
And above is the end result. At first glance, it may seem as if the updates were minor but once examining all of the hard work that goes into this kind of job, you may develop a deeper appreciation for the aesthetics of your own front entry door. We suggest that you consult the experts when tackling any major renovation and would be happy to give you a free consultation in our walk-in showroom or simply over the phone, if you like what you see.
Call us today or visit us on the web and let us make your home improvement dreams a reality!
The Benefits of Skylights in Your New Jersey Home
The benefits of installing skylights in your home extend beyond aiding the environment. The increase of natural light that comes from skylights will have a positive effect on your own personal well-being. Yes, skylights definitely help bring light to a room, but they can also improve your overall health and happiness. There are many physical and psychological benefits to having skylights. Plus, you are sustaining the environment. What could be better? Here are the top seven benefits of having skylights:
1. Hormone Regulation
Exposure to natural lighting increases the production of serotonin in your body. This hormone is associated with improved energy and mood regulation. You will feel happier and you will be in a better mood. Also, melatonin levels increase during the nighttime hours in people who are exposed to sunlight during the day. When people are exposed to sunlight in the morning and throughout the day, their nocturnal melatonin production occurs sooner, which allows them to enter into a deeper sleep more easily at night. To top it off, levels of the hormone cortisol will decline, leading to a reduction in stress.
2. Vitamin D Exposure
Exposure to natural sunlight means that you will absorb vitamin D. The benefits of vitamin D are endless! Vitamin D promotes healthy bones through the absorption of calcium, and can also lower your blood pressure significantly. Your risk for type one diabetes, muscle and bone pain, and cancers of the breast, colon, prostrate, ovaries, and lymphatic system can be lessened significantly through the intake of vitamin D. Vitamin D also contains phosphorous, which aids in a healthy immune system. Your health can improve greatly just by increasing your daily vitamin D intake. And, what's an easier way to do that than taking in some rays from your skylights?
3. Privacy and Security
Do you hesitate to open your regular windows because you feel like your neighbors can basically see everything you're doing? So many homes are built very close to each other, which limits the amount of privacy you can have. But, skylights are high off the ground, which limits the view into your home. You can open these windows without having to worry about the outside world looking in. And, opening your skylight windows is a much safer option than opening your regular windows. Break-ins will be far less probable, so you will feel safer in your own home.
4. Money Savings
Installing skylights means that you will be improving the energy efficiency of your home. Your utility bills will most likely be reduced. Having natural sunlight stream in through the skylights means that you can use less heat and turn on fewer lights.
5. Energy Efficiency
Skylights naturally cut down on the earth's emissions and the need for electric lighting. As mentioned above, using daylight reduces energy costs and consumption. It also reduces the demand for unsustainable power that challenges the health of the world's environment. With skylights, you don't have to pay, and neither does the environment. Solar energy is an unlimited resource, and does not require pipelines or transportation like electric energy does. It also does not produce harmful emissions. It's a win-win situation for you, and the earth!
6. A Beautiful Atmosphere
Let's not forget the aesthetic features skylights. Skylights are very pleasing to the eyes, and will make your home look even more gorgeous than it already does. Sun cannot stream through regular windows at the angle it can through skylights. Skylights can add life to small spaces in your home, like the bathroom or a small bedroom. There is something about natural light that looks and feels so much better than artificial light!
7. Skylights Are Made for Many Purposes
There is a large variety skylight designs to choose from. Venting skylights allow air to be recycled through ventilation. Poor air quality in your home can lead to a lot of health issues. Stagnant air in your home allows germs and bacteria to grow, and they get stuck in the air you breathe. With venting skylights, air will naturally cycle through your home. Sun Tunnel skylights have the reflective property of tubular skylights but also reduce your HVAC (heating, ventilation, and air conditioning) level. They use the natural power of the sun to emit light without the heat of electrical sources. As you can see, there are skylights made for very specific uses!
If you would like to get skylights installed into your home and need a reliable company, click here.
Quick Snacks for Parties to Make During Your Kitchen Renovation
Your kitchen may be missing some vital cooking components due to your current kitchen renovation, but that doesn’t mean that the party has to stop. You can still host a killer game night, party, or other fun gathering. Hosting during a renovation just means that you have to find the right snacks that will not require you to use a microwave or oven, while keeping your guests in the living room rather than the kitchen.
Takeout is an attractive answer for party hosting, but that bill can get rather pricey with having to buy food for all potential gests. Takeout is not the only answer to your food woes. These fun recipes might just help you to keep your guests fed while keeping your party bills low.
Cheese Spread
Picking the right cheese spread and crackers for your get together can be easy with all of the amazing cheeses offered by your local grocery store. Go with a traditional cheddar cheese ball and townhouse crackers, or go wild with something more exotic. Dress it up by adding different flavors or textures to your cheese spread offerings. One fun combination is taking a log or brick of goat cheese and adding your favorite jam for that little extra zing. Add some gourmet crackers, and your guests will not even know that you were worried about what to serve without the full use of your kitchen.
Prepare a Charcuterie Board
Charcuterie boards are all the rage at parties and are a great way to skip using kitchen appliances. It may sound difficult, but it is basically a meat tray. You will want to find some tasty cured meats, add some breads, jams, and spreads, and you’re good to go. Some meats to think about using for your board include cured sausages, pate´, whole muscle cuts, and lard, such as fatback, that you thinly slice. Add some homemade bread, toast or crackers to go along with these meats. The jams and spreads will work well in conjunction with the high salt content of the meats, and will be a nice contrast in taste.
Tart little pickles are another great add-on for your charcuterie board. Don’t forget some artisanal cheeses as well. Be creative when finding your pairings to see what will taste great together. Put your choices out on a cute cutting board for that perfect effect.
Prosciutto, Melon, and Mozzarella Skewers
Mix some sweet and savory with this easy recipe for skewers. You will just need to take a melon, like a cantaloupe, and create little melon balls. You will want to use lemon or lime juice to help keep these looking their best. Wrap a piece of prosciutto around the melon and put it on the little sword skewer or toothpick, and then add a mozzarella ball to the end of it. Arrange these in a pretty pattern on your serving dish, and you’re ready to go.
Hummus Dip with Pitas
Guests that are looking for ways to eat healthy will love this option, as chickpeas are very healthy. You can find commercially produced hummus or mix up a quick batch of your own. Add chickpeas, tomato, garlic, water, salt and pepper to a blender and mix it up into a smooth paste. Once everything is mixed well, put the hummus in a bowl. Then, cut up some pitas and serve.
Some people may prefer their pitas to be more like chips. Since you don’t have access to your stovetop, it may be easier to pick up already crisped pitas, but soft ones are just as delicious with your hummus.
Peanut Butter Pie
Don’t forget dessert! Your guests will love this no-cook peanut butter pie that you can make without the use of your kitchen. You will need peanut butter, powdered sugar, sweetened condensed milk, cream cheese, whipped topping, pre-made crusts, and chocolate syrup for a topping. Graham cracker crusts work well for this type of recipe. You will combine the peanut butter, sugar, condensed milk, cream cheese, and whipped topping. Then, pour it into the crust. Add some chocolate syrup to the top of it, and you’re ready to wow your guests.
Achieving your dream of having the perfect kitchen in your home doesn’t mean that you will have to put your life on hold during the renovation. You can still have amazing parties with food that your guests will love with some careful prep and planning. You may still have to get takeout if you are planning on offering a big meal, but remember that there are plenty of recipes out there that can be used to supplement your food choices to limit the amount of food you need to order.
Alternatively, you can choose to go the potluck route. Have your guests bring in some of their favorite dishes to add variety while you provide the snacks.
Contact us at RWC at 973-227-7123 today to talk about how we can help you get the perfect kitchen for your needs.
The Ultimate Guide to Choosing Windows for Your New Jersey Home
Awning, Bow, Casement, Double Hung, And Bay Windows Guide
Your home is your domain and, as the master of your domain, it’s imperative that it embodies your vision and character. There are very few things in this world that you can completely customize for you, so don’t be afraid to take the upper hand when making renovations and remember to have fun!
Quick Links:
- The Anatomy of a Window
- Windows Buying Guide
- Window Frame Materials
- Buy the Right Type of Window
- Planning New Window Placement
- Window Hardware
- Window Glass Buying Guide
Your home is where you live, sleep, wake up, host parties, relax after a hard day’s work or maybe even be where you work full-time. Any way you dice it, you’re going to spend a very large portion of your life inside of your house, which means it’s crucial that you enjoy its aesthetic. This is your chance to let your personality shine through and shape your home to be as unique as you are.
You may not think of your windows as being a reflection of your personality, but the questions you will face during the installation process will be more complicated than you think. This is the ultimate guide to choosing the perfect windows for you, your lifestyle and your New Jersey home.
The Anatomy of a Window
Just like any other part of your home, your windows do more than just let you see out or let light in. They do more than keep the cold breeze from entering in the winter or keep the sleepy hot air out in the summer. Windows are multifaceted, sophisticated pieces of hardware in your home. On the surface, it appears that everything just works together so well. It’s an entire system comprising of many parts – each one playing a different role. So, let’s take a look at the anatomy of a window.
Familiarizing yourself with a window’s parts and the terminology that is used will help you completely customize your experience as you shop for new windows. Instead of looking at a window and pointing while you say, “You know that one part… yeah, this one right here?” you’ll be able to expertly talk about the window you want and how you want it without running into communication issues. People in the industry will instantly be able to know what you’re talking about - key people who will be able to help you get what you want.
Stiles
When you look at a window, the stiles are the two side pieces that frame the window. These are the major vertical supports that hold up the sash. You’ll see a vertical stile on both sides of your window.
Sash
The sashes are the top and bottom pieces of the window. Together with the stiles, they frame the window. You’ll find the rails for the sash along the top and bottom of each window.
Muntins
The muntins of a window are usually decorative. These are the rails that divide the window into lights. Each glass section is called a lite. They make up the grid of the window. They can both be sitting on top of the window and be used as decorative pieces, or they can help hold each piece of glass in place.
Muntins can be installed on the inside of the window, the outside of the window, or, as is often the case, both. On thermal insulated windows, they are usually mounted in between the two panes of glass. When this method is used, the windows are usually easier to clean as you have one big piece rather than nine little pieces.
Glazing
Glazing refers to the piece of glass itself. In fact, window installers are often called glazers. These pieces of glass can be installed in a single thickness or a double thickness. Sometimes there are air pockets in between the panes of glass. The most energy-efficient windows use double and triple glazing. If you ever get the chance to see what a glazing compound is, it is a putty that holds the piece of glass in place to prevent breakage.
Apron
The apron is easy to remember because of how a person wears a cooking apron. Usually, a cooking apron attaches at the waist and covers the pants. In terms of windows, the apron is the horizontal rail that is fixated directly into the wall underneath the windowsill. It is usually a decorative piece that helps to complete the look.
Stool
The stool usually goes by a more common name – the windowsill. This is the shelf–like board that sits at the bottom of the window that protrudes out into the interior of the house.
Side Casing and Head Casing
The side casing and head casing of a window are the decorative frames that are fixated directly into the wall. Just as if you were to put an item in a case, the casing finishes the look of an installed window. These are the rails that make up the decorative window frame on an installed window. The side casings are the two pieces on the side, while the head casing is the piece on top. There is no bottom casing as this is called the apron – the board that sits directly underneath the windowsill.
Jambs
The jambs are the two side railings that are located between the side casing in the stiles. These are more functional than decorative as they hold the window in its frame on the wall. These boards are placed vertically and run the entire length of the window from the bottom to the top.
Rails
I know I used the word “rails” while describing the other parts the window, but they have an official name. The rails are the horizontal boards that are joined directly to the vertical pieces of the windows – the stiles. The rails hold the glass itself in place.
Operator
Not every window has an operator. The operator of a window is the crank mechanism that is used to open and close both awning and casement windows. Some windows slide either up, down or to the side to open. But, in the case of awning and casement windows, a mechanism must be rotated and cranked to open or close the window. This mechanism is called the operator.
Latch
Latches are usually the locking devices on a window. At the exact spot where two rails meet – these are called the meeting rails – on a double-hung window, you will find the latch. On a single hung window, you’ll usually find it on the bottom rail. This also applies to an awning window. For a casement window, you’ll find the latch on the stile.
Latches generally have two functions. They not only lock the window, but they help keep the window closed. When the window is closed, it allows the weatherstripping to do its job by effectively sealing the window – blocking out the cold in the winter and keeping the heat out during the summer.
Scissor Arm or Extension Arm
A scissor arm is attached to the window frame, either on the stiles or the rails. This extension arm is the part of the mechanism used to open an awning or casement window. While the operator operates this mechanism, it is operating the extension arm or scissor arm as the window opens or closes.
Windows Buying Guide
Now that you’re familiar with the different parts a window, it’s time to get into the fun part of shopping for windows. You need to understand the different styles, materials and even the types of windows that are available to you. You see, windows that are old or poorly installed are not energy-efficient. In fact, windows have their very own ROI. The money you spend upgrading your home to energy-efficient windows will eventually be returned to you in the form of energy bill savings. In other words, new windows can pay for themselves. By not buying new windows, you’ll eventually spend more money on energy costs than what you will have paid for a new window.
Benefits of New Windows
Older windows are usually made of wood. You can instantly tell if it needs replacing because the paint is often peeling away revealing the wood underneath. The wood is often warped or water damaged.
Inside your home, you may notice your carpet or furniture begin to fade. You may notice a draft when you stand nearby windows that are closed. You may not be able to enjoy the peace and quiet your home can offer when windows that are not energy-efficient. You’ll usually hear the echo of the strong noises directly outside. Lastly, the most damaging effect of old windows can be seen when you're overpaying for your energy bills throughout the year.
The type materials that that your current windows are manufactured from also play a role when it comes to the state of your home. Window frames cast from aluminum are often colder in temperature than the immediate air surrounding them. When this is the case, condensation builds up and seeps into the frame, often causing water damage. This will rot the wood and invite more leaks into your home, creating a domino effect of damage. When you see this, the damage has already been done. It can be extremely expensive to repair as you’re not only replacing the windows and frames but the walls inside your home can become severely damaged as well.
Cost Estimate
Even if you don’t notice any immediate damage around your windows, you will notice it when you have a higher energy bill. When you replace your windows, you’ll be able to save as much as 27 percent to 30 percent on your heating bills in the winter and 16 percent to 32 percent on your energy costs in the summer. This is a rounded figure as we look at the average gas and electricity prices in the U.S. to illustrate how important new windows are to your pocketbook.
As you estimate all these costs, remember that replacing the windows in your home is a tremendous undertaking. If you don’t do your homework ahead of time, you may end up spending a lot more money than you initially planned on. There’s a lot more involved than simply calling up a contractor and saying, “I want new windows.” A recent estimate for replacing five windows with new ones in a house that was 90 years old totaled $2500. In other words, the estimate was $500 per window.
Any project with this degree of undertaking will improve your home environmentally, economically and aesthetically.
The most difficult decision you’ll be facing as you go window shopping is selecting the right materials for your home. This has a direct impact on the cost of your project. You’ll need to look at the style and the quality of the materials, the type of glass you intend on using, as well as how efficiently your new windows will operate. Finally, you’ll need to look at the warranty that will come with your new windows.
Window Frame Materials
Choosing the right materials is the most important decision you make when it comes to your new windows. This will decide the look of your windows, and sometimes even the operation of your windows. They come in several varieties. You can choose from fiberglass, steel, vinyl or even aluminum. As with many things in life, you often get what you pay for and the more money a material may cost, the better weather protection you will receive. Usually, newer windows pay themselves off with low maintenance schedules and substantial energy savings.
Wood Windows
In a very general sense, wood tends to be the most popular choice for window material. These windows are beautiful both from the inside looking out and from the outside looking in. Condensation does not gather on wood, nor does wood get too terribly cold.
Wood windows do require the most maintenance. Over time, wood shrinks and swells as the temperature fluctuates, which can cause it to rot and warp over time. This is more prominent on the exterior of the window than the interior. However, you can protect yourself against it – if you make sure that you have a maintenance schedule in place and adhere to it.
Wood windows can be painted in any color. Typically, when you order a wood window, the wood comes unfinished – giving you the freedom to customize its look and match it to your home perfectly. If you intend on painting them, you can have the manufacturer prime the wood before they send it to you. That can save some work on your end. Of course, if you wish to eliminate the work altogether, you can always order pre-painted windows.
Clad Wood Windows
Clad wood windows are windows that are wood on the inside and have either aluminum or vinyl on the outside. This outside layer is called cladding, it usually comes in several colors. The advantage of clad wood windows is that it allows you to keep your windows maintenance-free for several years.
The vinyl material hides scratches very easily. Although aluminum will scratch, it is more durable than vinyl and easier to paint if you choose to take that route. Aluminum comes in a wide variety of colors and should not require painting – it is merely an option to you. Vinyl is rustproof and aluminum is rust resistant.
Vinyl Windows
Vinyl windows are made from PVC. They’re not solid – they have hollow spaces engineered on the inside that make them resistant to heat loss and condensation. They are less expensive than the wood windows or clad wood windows. However, vinyl has a tendency to warp when exposed to extreme temperature fluctuations. They can be harder to operate and tougher to completely seal to prevent air leakage. Pure vinyl windows are not intended to be painted. If you choose a darker shade, keep in mind that it will generally fade over time.
Steel Windows
Steel windows are arguably the most expensive window option you have available to you. They are more resistant to the elements than any other material, including aluminum and wood. They are generally not used in homes simply because of the expense. However, if you have room in your budget for steel windows, they can be made to be very attractive and have a very low maintenance schedule that will last for several years.
Aluminum Windows
Aluminum windows are extremely common due to their low cost and high efficacy. They stand up to the elements better than bare wood and are easier and lighter to handle. They typically come insulated with a thermal break of extruded vinyl. Sometimes, they are treated with foam which can help reduce and eliminate condensation and heat loss. Aluminum comes finished from the factory, which protects it from corrosion. However, if you live in a coastal area, expect aluminum windows to deteriorate faster simply because of the humid, salty air.
Buy the Right Type of Window
Windows do a lot more for a home than let light in and are let us see out. Windows can change the very architecture, mood or ambiance of a room. It can provide a focal point that can define how you decorate. Windows can allow for ventilation or provide for emergency escape routes. Windows are made in a broad spectrum of sizes and types to accommodate varying needs, different houses and different personalities.
Before you decide on a window style, ask yourself how you want the window to perform. You need to look at ventilation, maintenance and security.
In general, windows are either operable or fixed. Fixed windows do not have any opening mechanisms. They are usually used for architectural looks and light where ventilation is not an issue. You can find fixed windows in various shapes including round top in standard geometrical shapes. However, you can always get them custom made to any irregular shape as the situation calls for it. This also includes large picture windows.
Sometimes, you may wish to have a seamless bent glass corner as it offers an unobstructed view through the corner of the house. This is more readily available in newer types of windows.
Operable windows are defined as windows that you can open. They can slide down, up or from either side. Furthermore, they may hinge outward or inward. Usually, these types of windows are the ones that use the operator and the extension arm. Windows can always be made in several different styles and incorporate various innovations. Some windows are created using both fixed and operable parts to them. You can always also get bent glass corner windows, curved glass windows and more.
Here are the major types of windows that you typically see being offered by any given window manufacturer.
Double-Hung & Tilt-Turn Windows
Double-hung windows provide the best ventilation of the common window styles. They’re quite common – usually, the bottom sash will slide up or the top sash will slide down. You’ll often find hidden mechanisms such as weights or springs or other devices that will help you lower, lift and position the sash where you want it.
Depending on how they are manufactured, some types of double-hung windows will allow you to remove, rotate or tilt the sash. This is a nice feature as it makes for easier cleaning.
You can always tell a double-hung window from a single hung window because of how it opens. If you can only open the window one way – if only one of sash pieces slide up and down, but not both - it is not called a “double-hung” window. It is known as a “single-hung” or “vertical sliding” window.
Tilt-turn windows are different as they have unique advantages over double hung windows. They open inward toward the room at the top and rotate a full 180° for cleaning. For this window, look for a multipoint locking system to keep the window tightly closed.
Casement Windows
Casement windows offer simple operation as they are side mounted on hinges and operated by cranks. These cranks will open the window either outward or inward. They open completely to make for easy cleaning, and offer excellent ventilation by encouraging fresh air to enter the home.
Awning & Hopper Windows
Awning and Hopper windows are just like casement windows except that they don’t open from the side. Awning windows have a hinge at the top while Hopper windows have a hinge at the bottom. They typically don’t open all the way but still offer excellent ventilation. Hopper windows are usually used above doorways and often protected by eaves.
Horizontal Sliders
Horizontal sliders do exactly as the name implies – they slide horizontally. They may have more than one fixed panel in addition to the sash that slides. They usually slide effortlessly on horizontal tracks. While these do offer ventilation, they can never open all the way – only half of the window can be open at any given time. Horizontal sliders are usually the window of choice when you don’t have a whole lot of clearance to swing a window in or out.
Jalousie (Louvered) Windows
Louvered windows are made from several parallel slats of glass that open at the same time. They’re beautiful, but they can be costly. They’ll allow the user to slope the slats to keep rain and obscure direct sunlight from getting inside without completely shutting out all air and light.
They’ve fallen out of favor in the recent years because they allow for uncountable drafts and costly energy losses.
Bay & Bow Windows
Bay or Bow Windows are distinct in that they aren’t a single window. Rather, they are between three and five windows that form an abscess or a recess in a house wall. The usually protrude, allowing for an inward “bay” that can make a room seem bigger than it actually is and allow people see more from the bay windows and they can from a normal window. When you see a curving series of windows, what you’re looking at is called a bow window. These windows usually curve out of the house and are capped with their own roof covering. Normally, this allows for an extra window seat on the inside of the window.
Glass Blocks
Glass block windows are often privacy windows that still allow light in and are most often used in bathrooms. They have no operability as you cannot open them. However, you can design glass blocks to look like glass windows and come up with your own design. They allow for varying degrees of privacy and will allow light to flood the area. These blocks are durable and highly resistant to moisture. They can often be seen as not just bathroom exterior windows, but exterior bathroom walls. They can also be installed in curved shapes.
Despite their look and strength, glass block windows are not better at insulating than other windows. The R-value for your standard glass block is about 1.96. More on R-values later.
Planning New Window Placement
If you simply plan on replacing your current windows, you don’t need to worry too much about placement. However, if you plan on installing entirely new windows in your home, you’ll need to take a considerable amount of time planning exactly where you want them to go.
You’ll want to capture the best views and have your new windows provide the highest quality of natural light as possible.
Make Every Effort to Look Outward
Spend a considerable amount of time standing on the other side of your walls - on the outside of your house - to see what you can see. Pay attention to what you want to see when your windows are installed, and make note of what you don’t want to see. Study the path of the sun. This will affect not just the amount of natural light that will enter into the new window, but the quality of the natural light. Furthermore, it can also influence the amount of heat that will seep through the window and affect the new room.
Also, it can be beneficial to take special note of how the sunlight may bounce off streets, buildings, bodies of water and other various surfaces directly within your line of sight.
Every day, the sun makes an arc from east to west. During the summer, the sun rises and sets furthest to the north – making it the highest during the day. During the winter, the sun is setting in a more southern position, at a much lower elevation.
Take note of your lateral position. The further north you live, the lower the sun will be in the sky during the winter.
The Sun’s Angle
The cardinal directions – north, south, east, and west - will make a big difference in the quality of light your new window will receive.
If you want to capture the morning sun, make sure your window faces east. Be wary when the window faces south as sunlight will be bright and direct. Solar panels are usually oriented facing south to maximize their efficiency. If your window must face south, consider installing an eave or an awning to block some of the intense summer heat but still allow the warmth of the sun during winter.
If your window faces west, it can be both intense and glaring. This is possible to control, to a degree, through shades, blinds or even glare resisting glazing.
If you have a deciduous tree – one that is not an evergreen such as a pine tree – you can always use these trees to help shade your house. Deciduous trees are trees where the branches extend out and offer a considerable amount of shade. Deciduous trees shed their leaves in the winter. Evergreens do not. It’s always helpful to have a deciduous tree planted on the west side of your property. In the summer months, they will help shade your house and in the winter months, they will permit the sun’s rays to permeate through the leafless branches.
If your window is facing north, you will never get direct sunlight. Instead, you’ll get bluish-colored sun rays coming from the sky. It can be beautiful because this type of light is constant. Artist studios love northern windows because the light is steady, bright and never direct.
Make sure you discuss all of this with your architect when you’re planning where to place your new window.
Window Hardware
The hardware that comes with the window usually operates it. These include latches, counterbalances and even hinges. Each of these has a double-duty to play. First and foremost, they must be functional. A window latch that does not lock is useless. Second, the hardware has to look good. Window hardware has just as much to do with the aesthetic finish of your new window as does the rest of the window. In fact, these little mechanisms can be the difference between a window looking good and a window looking like it doesn’t belong. Here’s a look at the different types of hardware you need to consider as you go window shopping.
Cranks
Cranks are mechanisms that are used to open hopper, awning and casement windows. Before cranks came along, older types he used to have push-bar operators. Some of the newer types of cranks offer fold–down handles that are relatively inconspicuous, adding to the beauty of the new window. Keep in mind that you don’t have to get a crank in a metallic finish – some manufacturers offer non-metallic finishes.
Hinges
When you look at the various hopper, awning and casement windows, it is important make sure that they have enough arm space between the sash and the window frame while the window is open so that you can wash the exterior glass. The best ones always take this into consideration. In some cases, you may find hardware – typically, European hardware – that can turn a casement window into a hopper window. These windows that open from multiple points often have multiple locks. This minimizes air infiltration.
Just remember that if you get a European-style window mechanism, expect the window to swing into the room instead of out. Typically, American casement window hinges will swing out.
Counterbalances
You’ll typically find counterbalances on the single-hung or double-hung windows. When you open the window, the counterbalances prevent the window from slamming shut. They balance the weight of the sash so that the window stays open. I’ve seen older model windows where the counterbalances are nothing more than ropes on lead iron weights. Typically, you won’t see that – these were antiques. However, what you will see are things like torsion screws.
Sliding Mechanisms
Most aluminum and vinyl windows are light enough that they can slide from side to side on their own. However large, door height windows and sashes are usually supported by heavy-duty rollers installed along the bottom edges. If you opt for wooden windows, make sure your gliders include low-profile hardware.
Latches, Locks & Security
This is typically the most important part of a window. They not only lock the window, but they hold the window closed and prevent air drafts. On double–hung windows, the latches lock together the top and bottom half of the window and are installed where the two sashes meet.
When looking at various latches, keyed sash locks are often more secure. If you have a window that opens from side to side, be on the lookout for security latches that can prevent the window from being jimmied open.
Windows are not as easy to secure and doors are. Windows can be forced off their tracks, lifted off their tracks and the windows themselves can be broken. If security is an issue where you live, consider replacing the ordinary glass that comes with the window with laminated, tempered or even glass that has chicken wire inside. Furthermore, consider installing a perimeter alarm system.
There are several devices on the market that make it harder to pry open a window or remove it from its tracking. These devices may work differently depending on the window you have, whether it is a double–hung window or if you need to secure a horizontally sliding window. Make sure you get the right hardware for the right window.
Track grips can prevent a panel from sliding. These are usually secured with the thumbscrew or a key. You can always use metal stops along the lower track that are also secured by a thumbscrew or lever of some sort.
Another way you can secure your window is to secure a bar that screws into the doorjamb. These bars pivot on a hinge to prevent the window from being opened and can easily be lifted when you do want open it. Furthermore, pins can be used to secure these bars in place.
To prevent an inside panel from sliding, cut a dowel or piece of stiff tubing a quarter inch shorter than the distance between the panel and the jamb and then drop it into the empty portion of the lower track.
Other locking mechanisms, particularly for double-hung windows, include wedge locks, locking pins that go through one sash to the next, and key-operated latches.
Window Glass Buying Guide
Window glass is notorious for being energy inefficient. It allows heat to leave the house in the winter and cooler, air-conditioned air to exit the house in the summer. It seems as if it’s a battle you just can’t win.
Taking a look at what’s on the market nowadays, you’ll find that it’s a battle that you can win. Double-glazed, and even triple-glazed windows have made some far reaches into the realm of energy efficiency. These new windows will make you want to welcome the summer heat and stand at the window as you watch the snowfall in the winter – all without feeling a difference. Many new types of high-performance a windows have been popping up all over the horizon that address all of these problems.
Understanding R-Values & U-Values
Before you determine the window glass that will work best for your new window, we need to take a look at the two basic measurements of performance – namely, the R-values and the U-values. Other measurements may include a light transmittance value that rates how much light the piece of glass allows to enter your home. Lastly, the shading coefficient and UV value measure the amount of glare and ultraviolet light that a piece of glass allows through. Make sure you discuss these values with your glass dealer.
R-value
This R-value rates the thermal resistance. In other words, this evaluates the ability of the glass to resist heat flow. Glass is given a value wherein the higher the R-value, the more resistance the material has. A single pane window may offer an insulating value of R-1, while its dual-paned counterpart will offer an R-value of twice that – R-2.
The primary factor that determines what R-value a piece of glass has is the type of glass. However, it’s not the only one. You can always buy various films and tints that will impact the R-value.
U–value
The U-value works differently. This measures heat loss against time. In other words, it measures the amount of heat that escapes per hour through a piece of glass. Typically, windows have two U–values – one for the piece of glass itself and one for the window including the frame. Unlike the R-value, you’re looking for a lower U-value. The lower the value, the more energy efficient the window is.
U–values don’t matter as much as R-values in regards to heat gain. If minimizing heat transfer is important to you, simply pick a piece of glass that has a high R-value. If you want more light to be let into the room, choose a piece of glass that has a high light transmittance value. However, the opposite is also true if you want to cut glare. If you wish to reduce the heat gain your room experiences, select a piece of glass with a high shading coefficient. If you pick a piece of glass that has a high UV value, it will prevent your furniture and curtains from fading due to the ultraviolet rays. It all comes down to what is important to you.
Types of Window Glass
An excellent and common insulating method is a choosing a window that has more than one pane. These are either two or three pieces of glass have an air gap in between them. Double-pane windows have recently become the gold standard in terms of performance. Triple glazed windows may do better, but they are more expensive and heavier to handle than double-pane windows.
Let’s take a look at your options and see what you can put in your windows.
Low-E & Insulating Glass
Low E stands for “low emissivity,” and has a thin and virtually invisible film coating that actively prohibits a radiant heat transfer. Furthermore, it also protects carpets and furnishings from fading due to its high UV value. Some windows have two of these coatings to achieve an unbelievably high R-8 insulation value. If you really want more efficiency, you can get windows that are airtight and have argon gas sealed in between the glass panes. Windows that utilize Low-E glass filled with argon gas are twice as efficient at insulating as standard dual-paned windows.
Tinted Glass & Reflective Glass
Tinting glass has been a traditional method of reducing heat loss, glare, and ultraviolet radiation that typically discolors carpets, furniture and even floors. Tint works by absorbing and reflecting solar radiation.
As the name implies, tinted glass is much darker than clear glass. This reduces the amount of visible light. You can, however, choose from several different colors and shades that are available. Each one has a different effect on lighting and heat. Gray and bronze tints often cut down on heat and light equally. Windows with green or blue tints to allow more visible light. Black tints, of course, absorb more light than heat.
Reflective glass works the same way as tint and reduces solar gain. When you look at reflective glass from the outside, it appears to be a mirror. Tinted glass absorbs a tiny percentage of light and does not have the same reflective appearance as reflective glass.
Don’t block too much light. Doing this can have a detrimental effect as your home will require higher amounts of artificial light and likely raise your energy bills.
Safety Glass Windows
Safety glass windows are designed for situations where a person might accidentally be injured by the window itself. You most likely find these in any window that is within two feet from the floor, along staircases, in bathrooms and among railings. They are usually called safety glass because they can be tempered, wire reinforced or even laminated. These windows will not shatter when they are broken. Tempered glass is what you typically see in vehicles and will crumble when broken instead of shatter. Laminated and wire-reinforced glasses are held together by an internal layer of plastic or wire.
Specialty Glazing
You can always find decorative pieces of glass that are etched, leaded, beveled, stained and more. Hydrophobic coatings help shed water more quickly, and leave the window clean after a rainstorm. Impact-resistant windows are also available to you and will protect your home from windblown objects and the typical baseball through the window.
Divided Lites
Dual-pane and triple-pane windows may have fake or real divided lites. A lite, in this case, is a single section of glass. For example, if you were to take a look at a piece paper and draw a tic-tac-toe symbol, you’ll have nine sections. If you see that same design on the window that window would have nine divided lites. Homes that have real muntins, which are the divisions between pieces of glass, are considerably more expensive and difficult to get than the ones that merely snap onto a larger piece of glass.
A really nice feature that you will see on newer windows are window shades or mini-blinds positioned within the two pieces of glass. They make maintenance a breeze, reduce the amount of rope that may hang down from a typical set of mini blinds, and will reject glare and heat gain on sunny afternoons.
Window Film
Window film is an inexpensive way to create privacy and lower your monthly bills. Get the right one, and it can also preserve your furnishings and floor and prevent them from fading.
Direct sunlight is notorious for causing floors and furnishings to fade. It’s not the light itself – it’s the ultraviolet radiation in the sunlight that causes it. You could block the sun with curtains, but you’ll also lose the natural light.
A more practical solution is to have window film applied directly to your existing windows where direct sunlight is an issue. It acts just like window tint and is designed to deflect the heat and absorb UV rays. They come in different colors and will slightly reduce natural light and offer a higher degree of privacy, all without impacting your view in a negative manner.
When you purchase window film, pay attention to how it’s intended to be used. Different films have various levels of light transmission. A darker film may sound good, but you will lose natural light. Typically, you’ll see three types of window film available. These include glare-reducing, privacy and insulating films.
The glare-reducing film reduces glare – this one is simple.
Privacy film is used indoors to add a higher degree of privacy to any given window. These are typically used on shower doors, sidelites and transom windows.
Insulating films reflect sunlight and UV rays. These are the ones that will reduce your home's heat gain and substantially lower your energy bills. Furthermore, during the winter months, they may reflect radiant heat and send it back toward the inside of your home.
5 Tips for Lawn Care and Snow Removal
As the cold winter weather continues, you will soon find that your lawn is inundated with snow and ice, making it difficult to care for your landscape and maintain your home’s overall appearance. You may be tempted to simply leave the snow where it is (carving out a path to your front door and through your driveway, of course). However, doing so may leave you a much bigger mess to deal with come spring. Instead, care for your lawn and work on removing snow throughout the winter, not only to help reduce the impact on your lawn after the snow melts, but also to increase the appeal your home has to potential buyers (even if you are not currently putting it on the market).
Following these five tips throughout the winter can help you improve your home’s property value, whether you are just moving in, starting a remodel, or putting your house up for sale.
1. Protect Your Plants
Most plants (especially those not specially modified to survive deep frost and snow) cannot survive the winter without help. Therefore, it is important to take steps to protect them so that you don’t have to deal with completely replanting your garden or landscaping in the spring. For example, This Old House recommends driving tall stakes around plant beds near paths and driveways so that you know where to stop shoveling.
Furthermore, it is a good idea to envelop particularly sensitive plants in a protective covering (such as a burlap sack) to keep them warm and shield them from snow. Mulching is also one of the most effective safeguards against frost. Protect plant roots with a thick layer of bark, straw, sawdust, peat moss, leaves or even grass clippings.
2. Plan for Spring
You may not be thinking that far ahead, but flowers and other plants that will bloom in the spring should really be prepared several months in advance. For example, spring-flowering bulbs such as tulips or daffodils should be planted before the first frost of the season to ensure that they survive the rest of the winter and are ready to blossom in spring. That way, you are not greeted by a barren lawn once the snow melts, but instead can experience (and show potential home buyers) a springtime color explosion!
3. Aerate and Dethatch
Keep your lawn as healthy as possible by aerating and dethatching it to improve its ability to absorb water, air and nutrients. Aerating your lawn involves perforating the soil with small holes, which will alleviate soil compaction and help roots grow more deeply. Dethatching removes the buildup of thatch that grows as grass blades and other dead plant pieces accumulate underneath the visible surface of the lawn, and helps new grass shoots grow once the snow melts in the spring.
4. Don't Forget the Front Door
Your front door is often the first thing that people see when it comes to your house (whether they are real estate agents, potential buyers, or just passers-by on the street), after scanning your lawn and patio. During the winter, maintain your front door by wiping away the grime left from rain, snow, and sleet, and consider investing in a more decorative front door if you have a somewhat plain one. RWC provides a number of door services including front entry door replacement.
5. Be Proactive
Taking steps to tackle your snow removal and lawn maintenance before they become an issue will help save you time and keep your home looking the best that it can. For example, use a snow melter (such as a liquid magnesium chloride blend applied with a garden sprayer a few hours before a storm) before snowfall in order to minimize cleanup later, and make sure that your lawn is in peak condition - even when you are not there to maintain it.
Ultimately, the steps you take to care for your lawn (especially deep in the throes of winter) will reflect back on your home’s property values and curb appeal. Whether you are just starting on building your dream home or are looking to put it on the market, staying on top of your lawn care and snow removal will have countless benefits down the road. Our goal at RWC Windows & Doors is to help streamline the renovation and remodel process as much as possible - we have proudly been helping New Jersey homeowners “relieve home improvement stress” since 1959.
We offer a variety of products and services to help you relieve home improvement stress including decorative glass, doors, kitchen and bath renovation, pre-finishing, windows, and the installation that comes with each. Whether you are looking to purchase a new front entry door or upgrade your kitchen design, RWC can help you through every step of the process.
Call us today to speak with one of our friendly and knowledgeable professionals! We've been improving home improvement stress since 1959! Let us help you build your dream home.