

Celebrating RWC Renovations in 2015
Clifton, NJ Kitchen Renovation
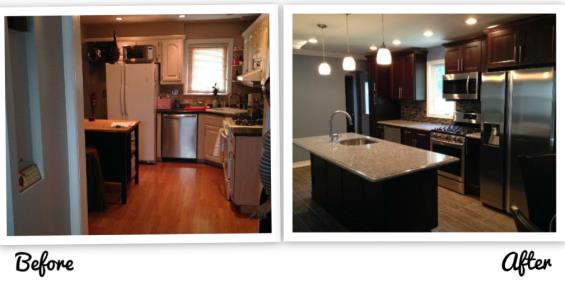
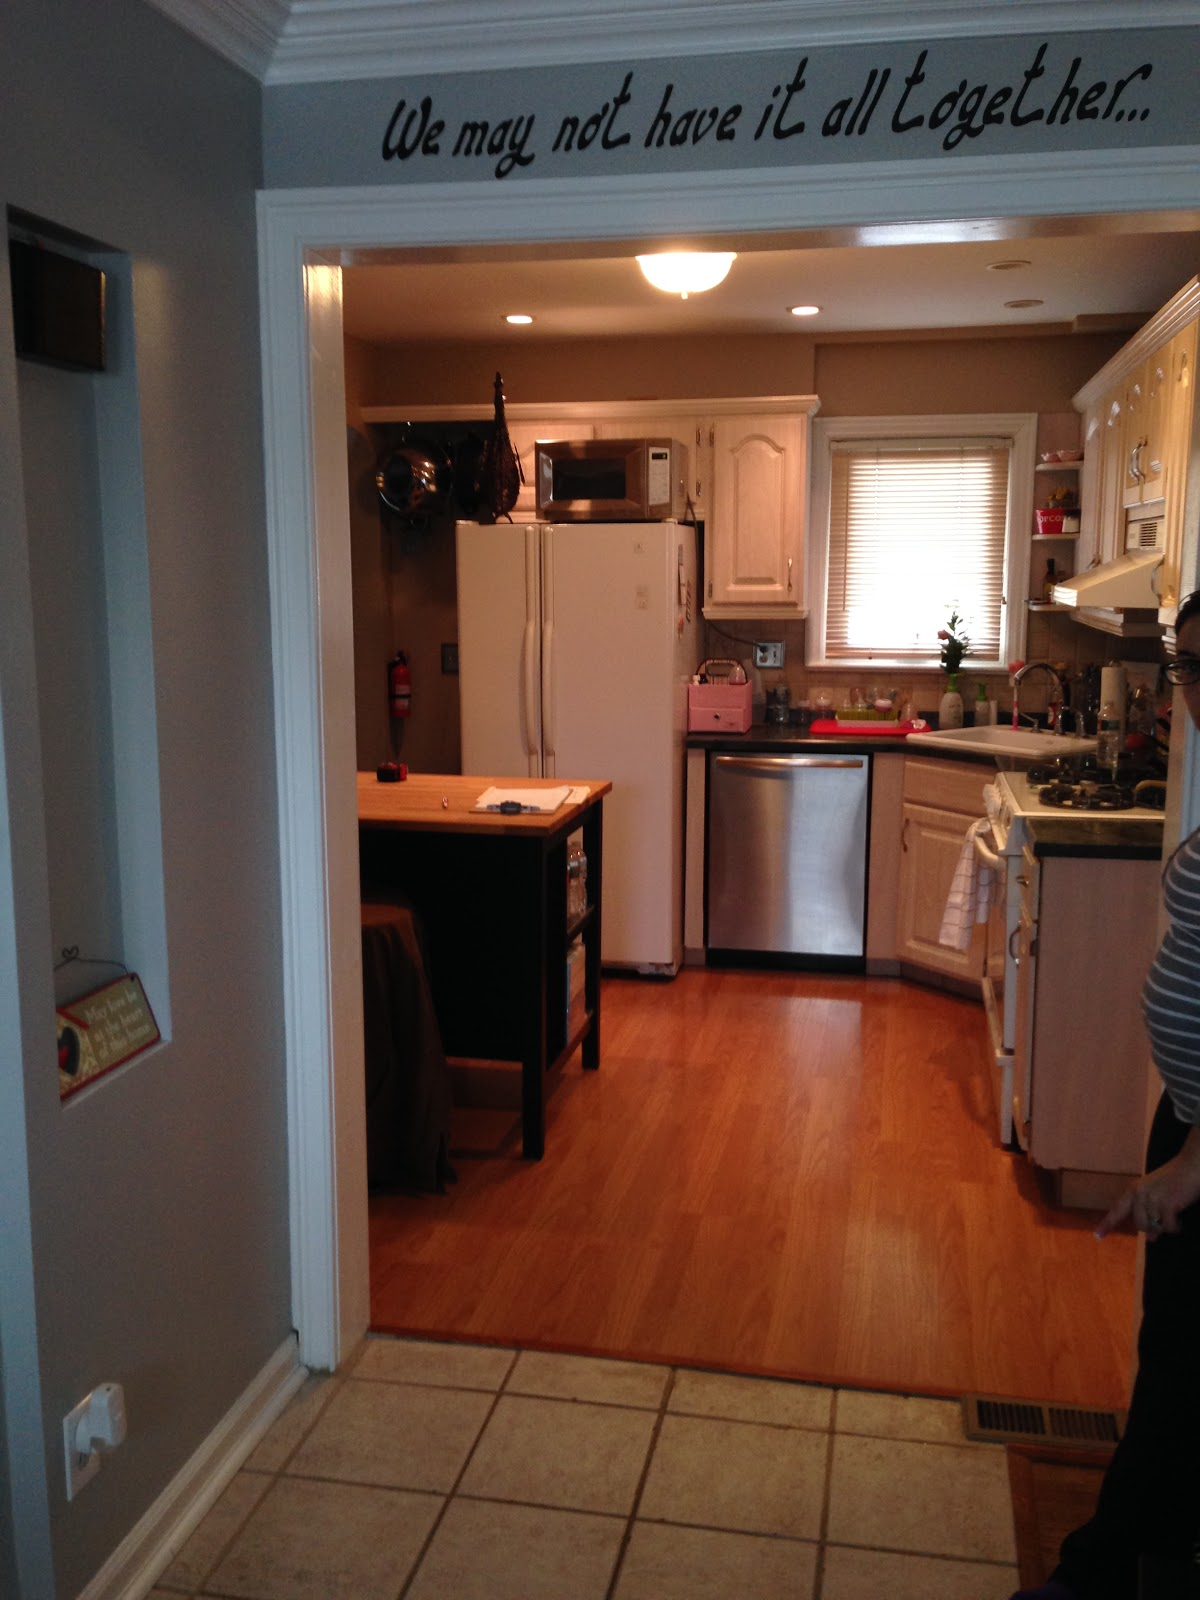
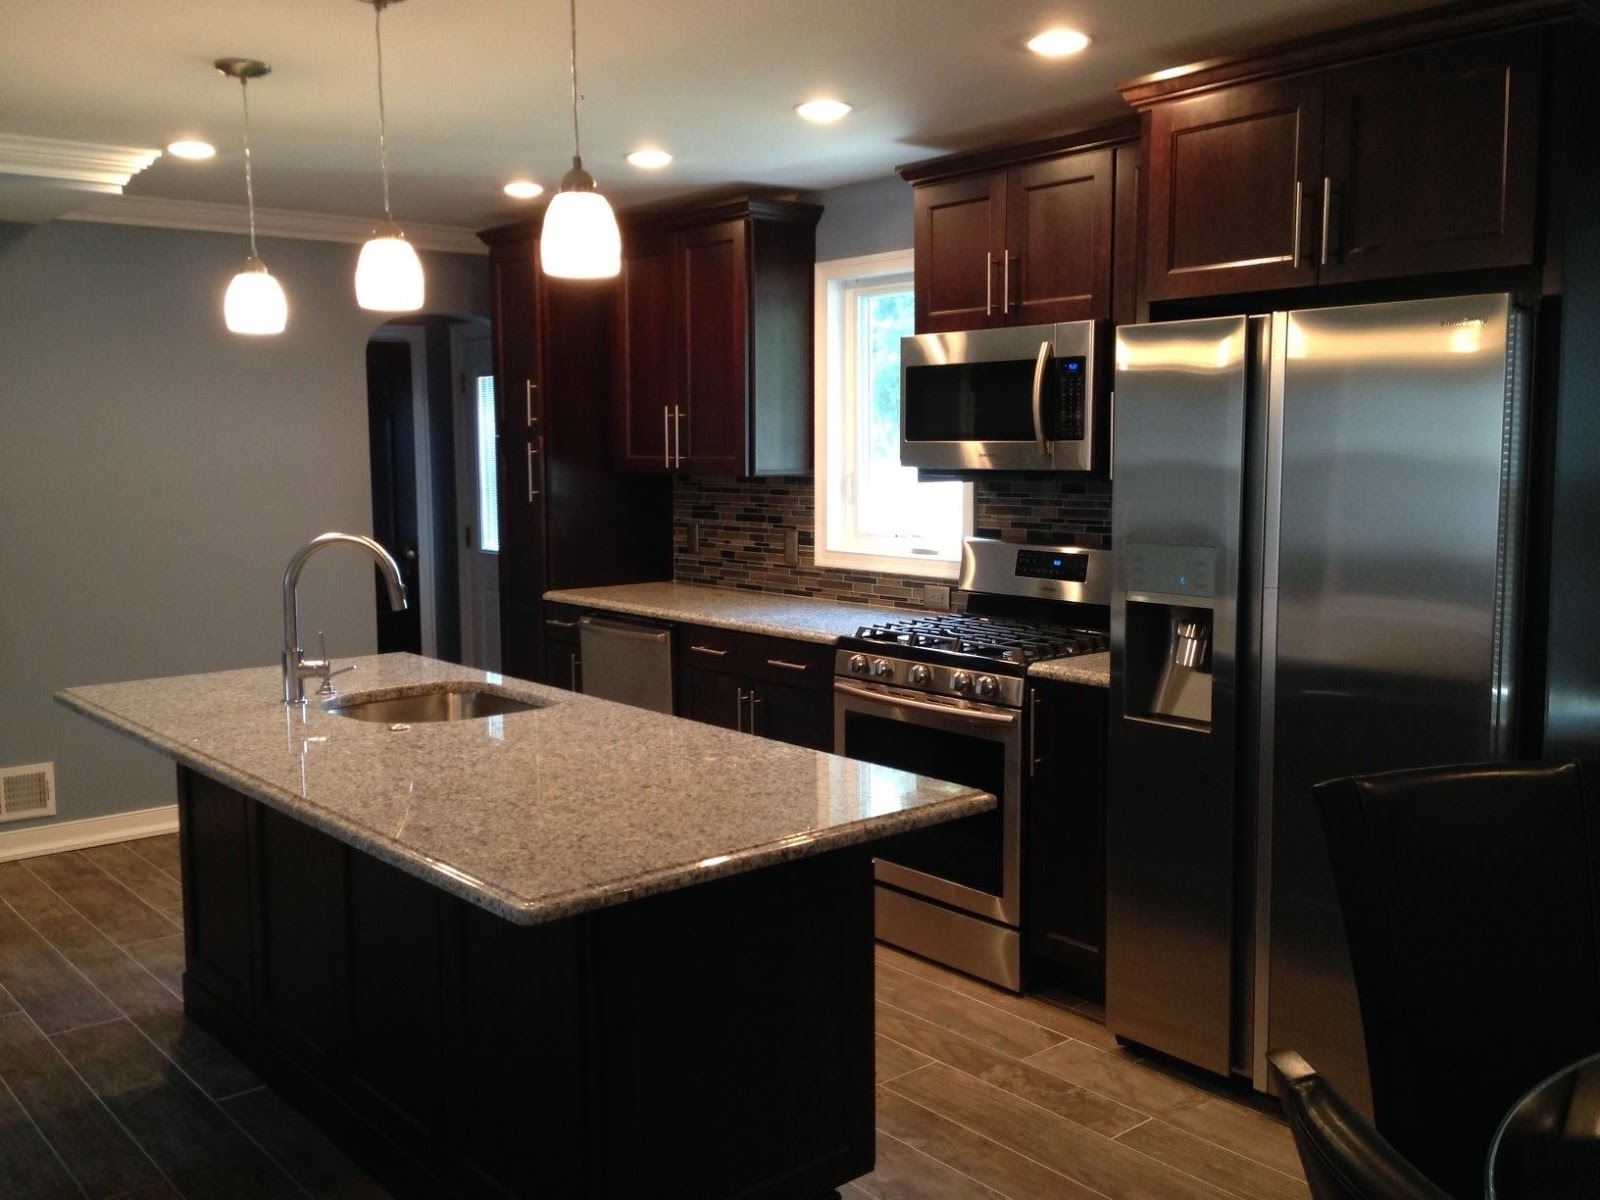
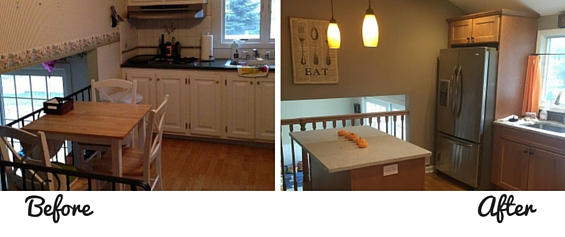
Although the original dimensions worked as a kitchen, it was obvious that the family needed more space. With an adjacent dining room, we knew the best idea moving forward was to go ahead and knock down that wall! It was time to turn two rooms into one - making it a dining room/kitchen combo that for both aesthetic and practical reasons, made much more sense.
Towaco, NJ Bathroom Renovation
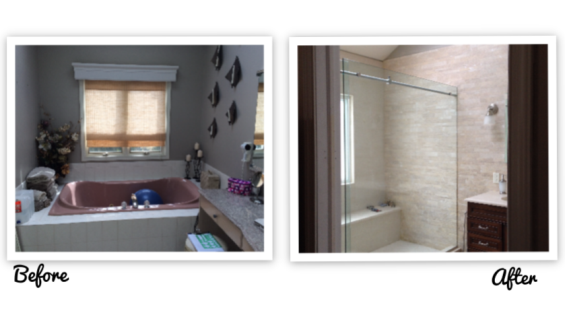
After this bathroom renovation, the room was COMPLETELY transformed. These kinds of projects are our favorite. Since we built a new shower stall, we had to remove the one that already existed on the other side of the room. We replaced it with a makeup station. We’re so proud of the results and glad to have another happy customer. The end results were well-worth the hard work.
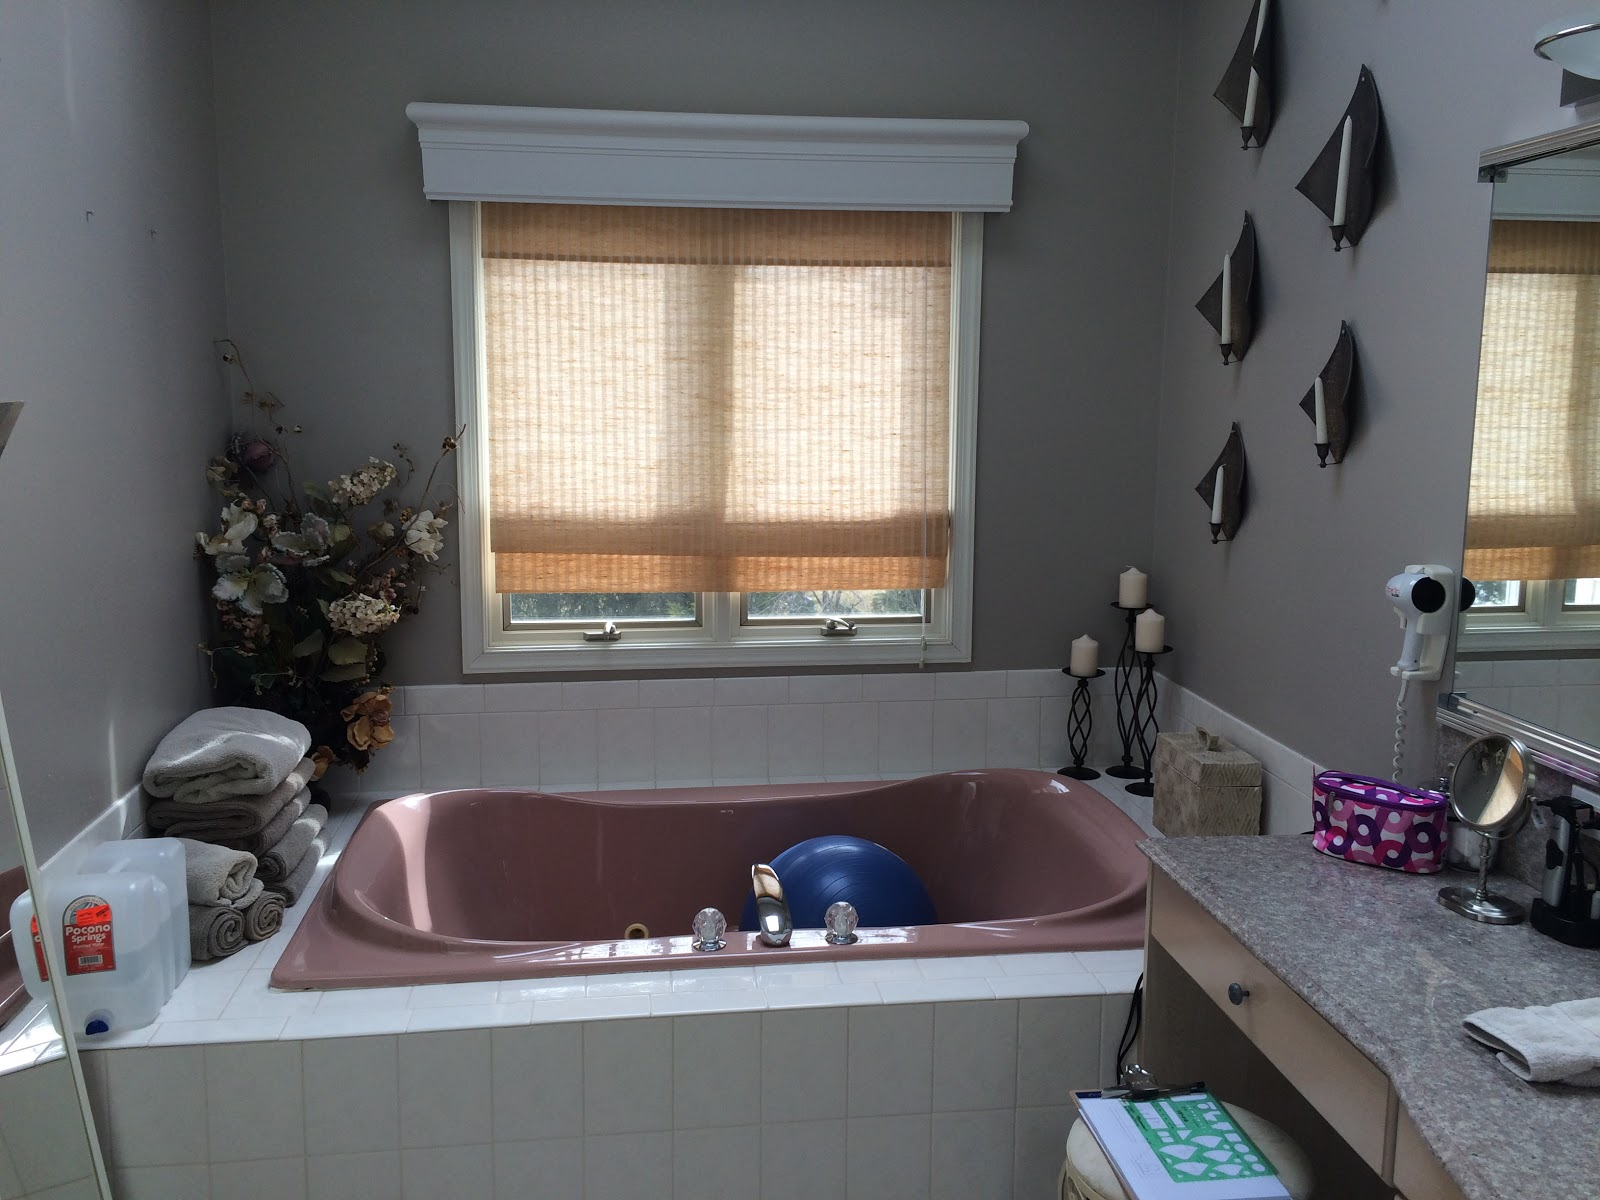
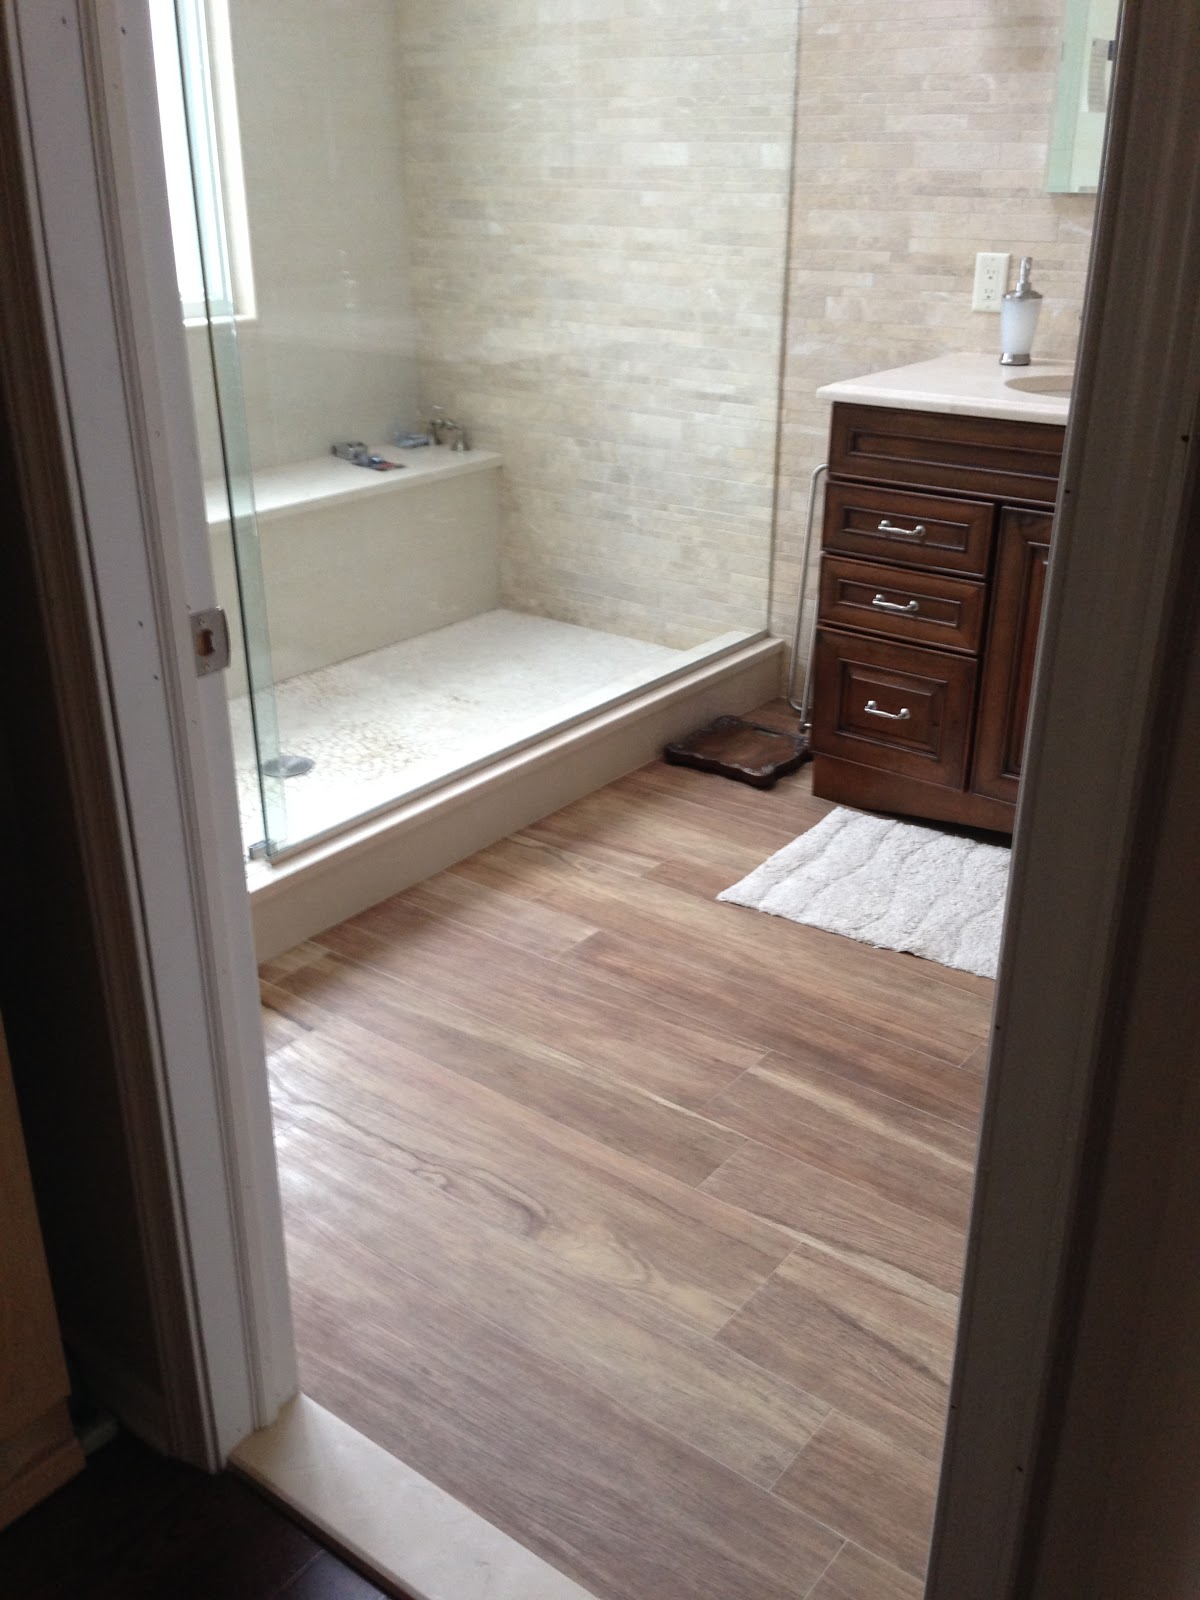
West Orange, NJ Bathroom Remodel
The current layout was not conducive to the plans for the finished product, so we changed the layout. Why? To accept a bathtub as well as a shower enclosure. We created a different vanity layout as well. The wall of the vanity is also covered in accent tile.
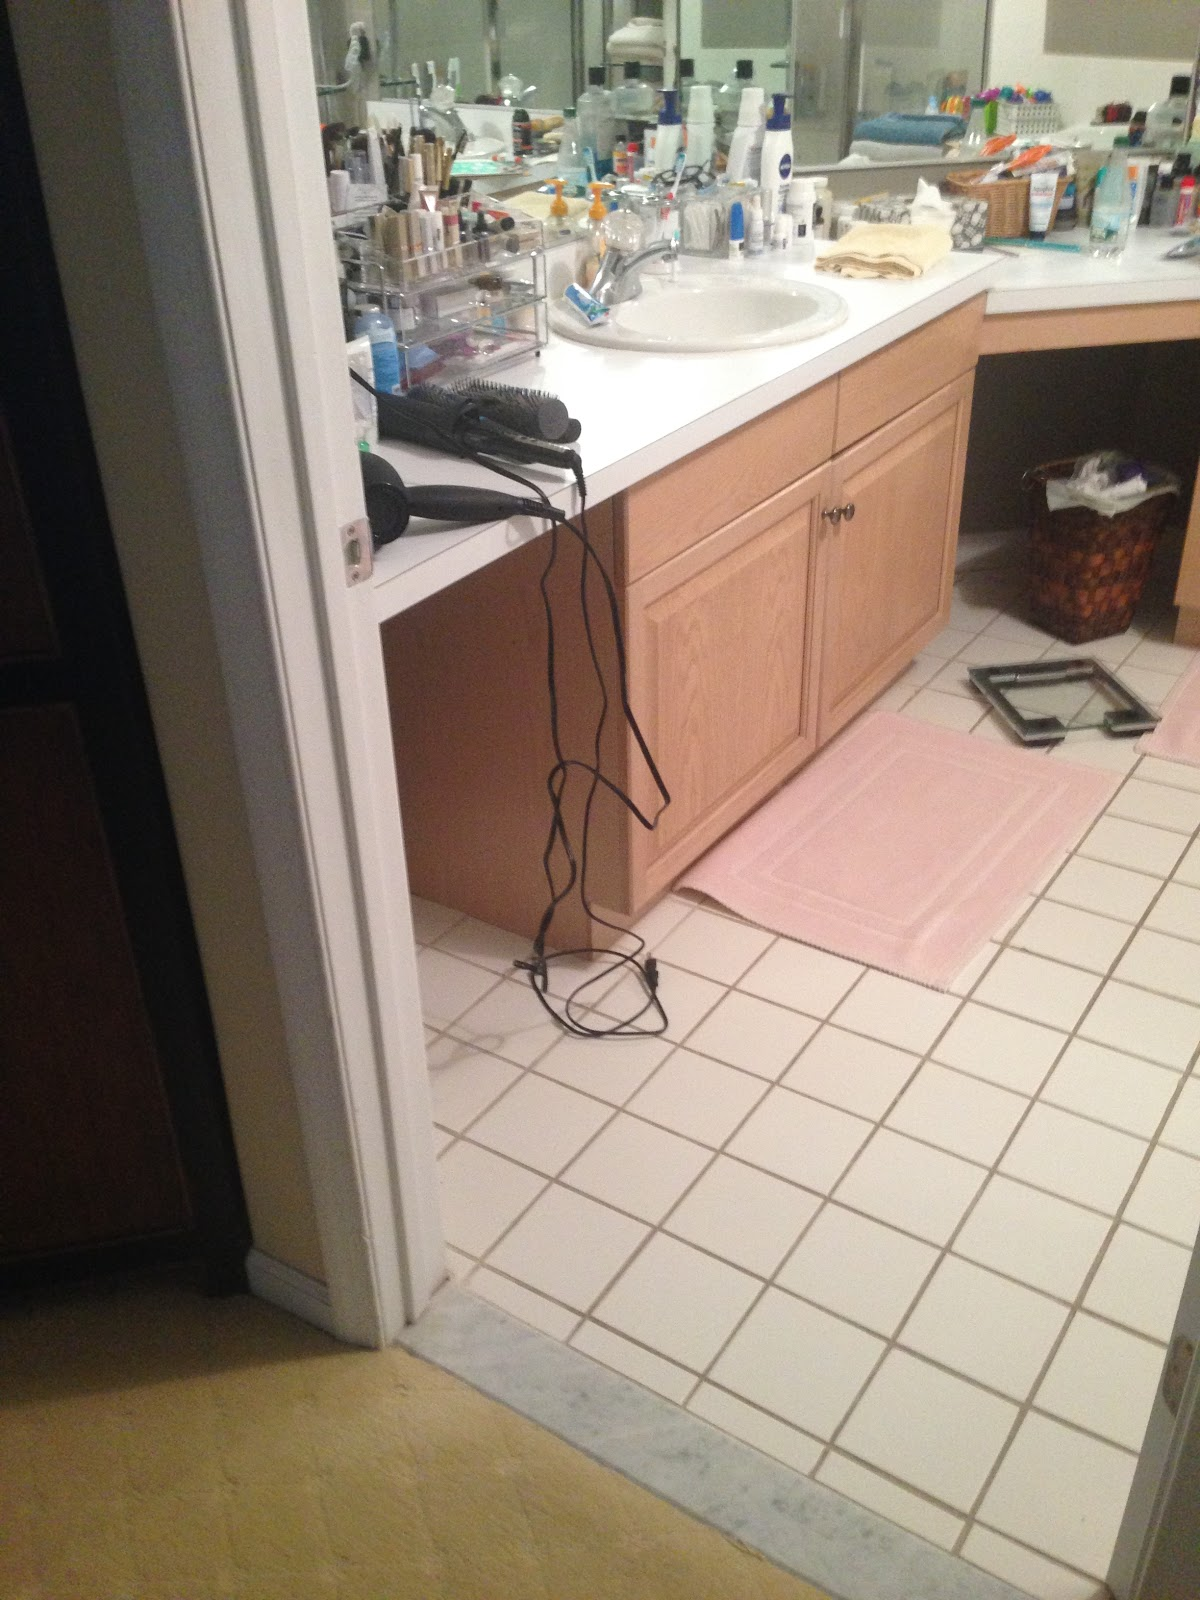
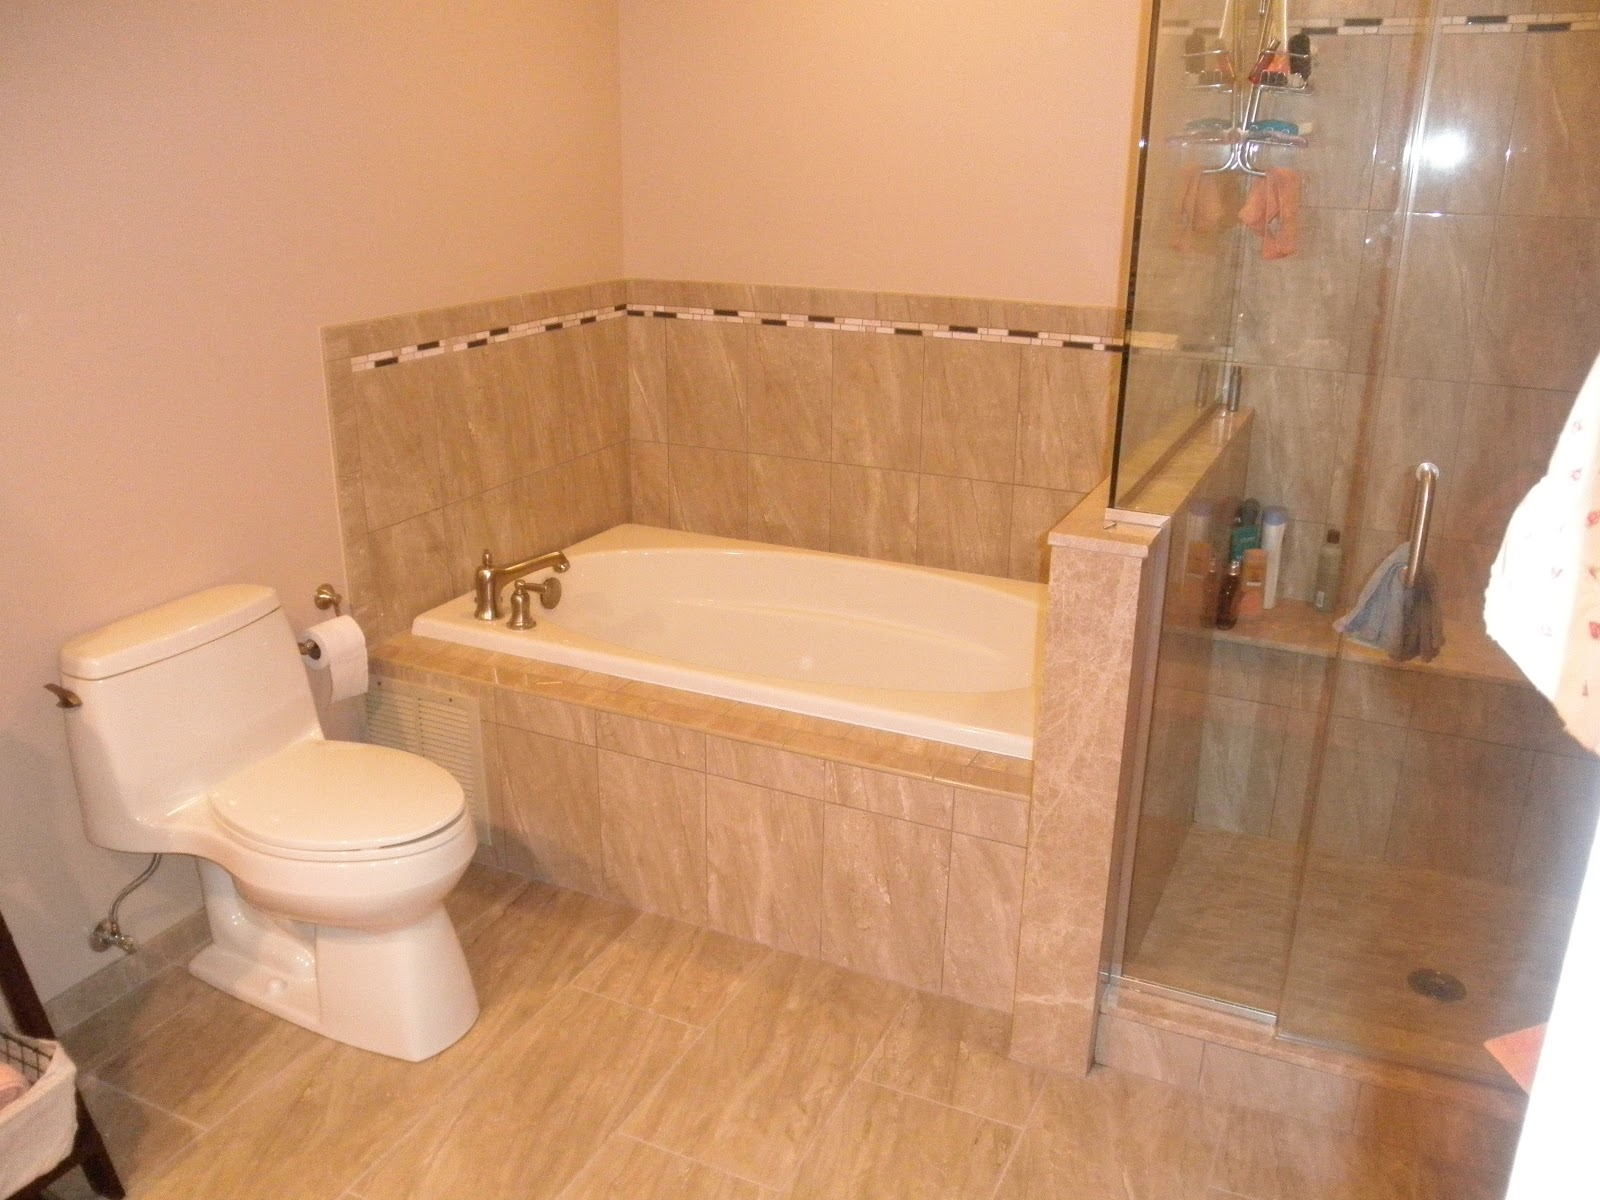
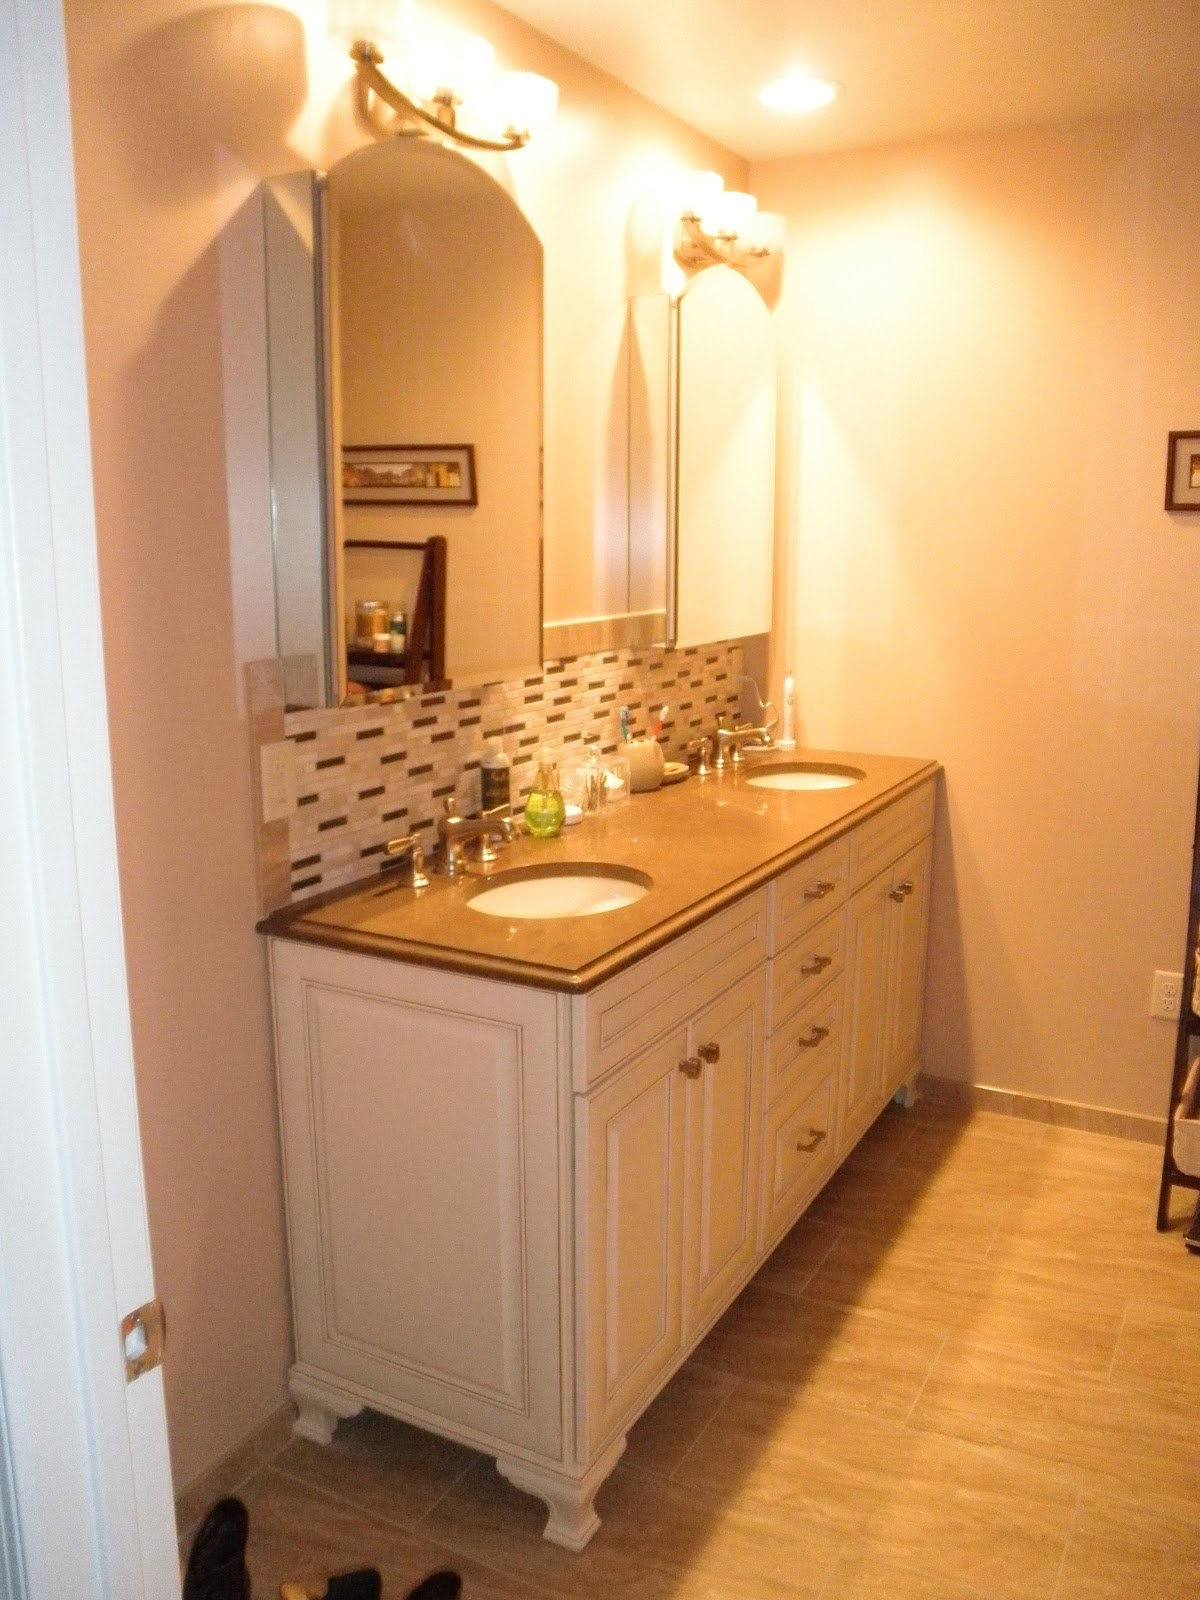
Mendham, NJ Bathroom Renovation
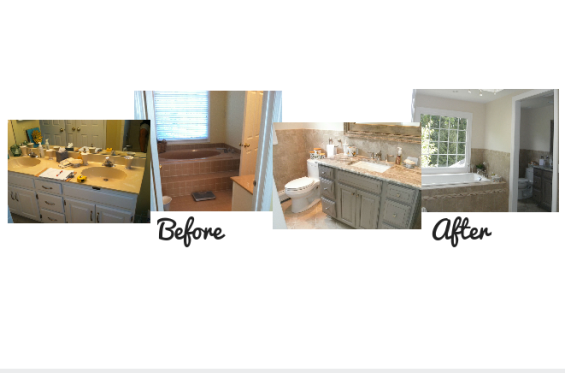
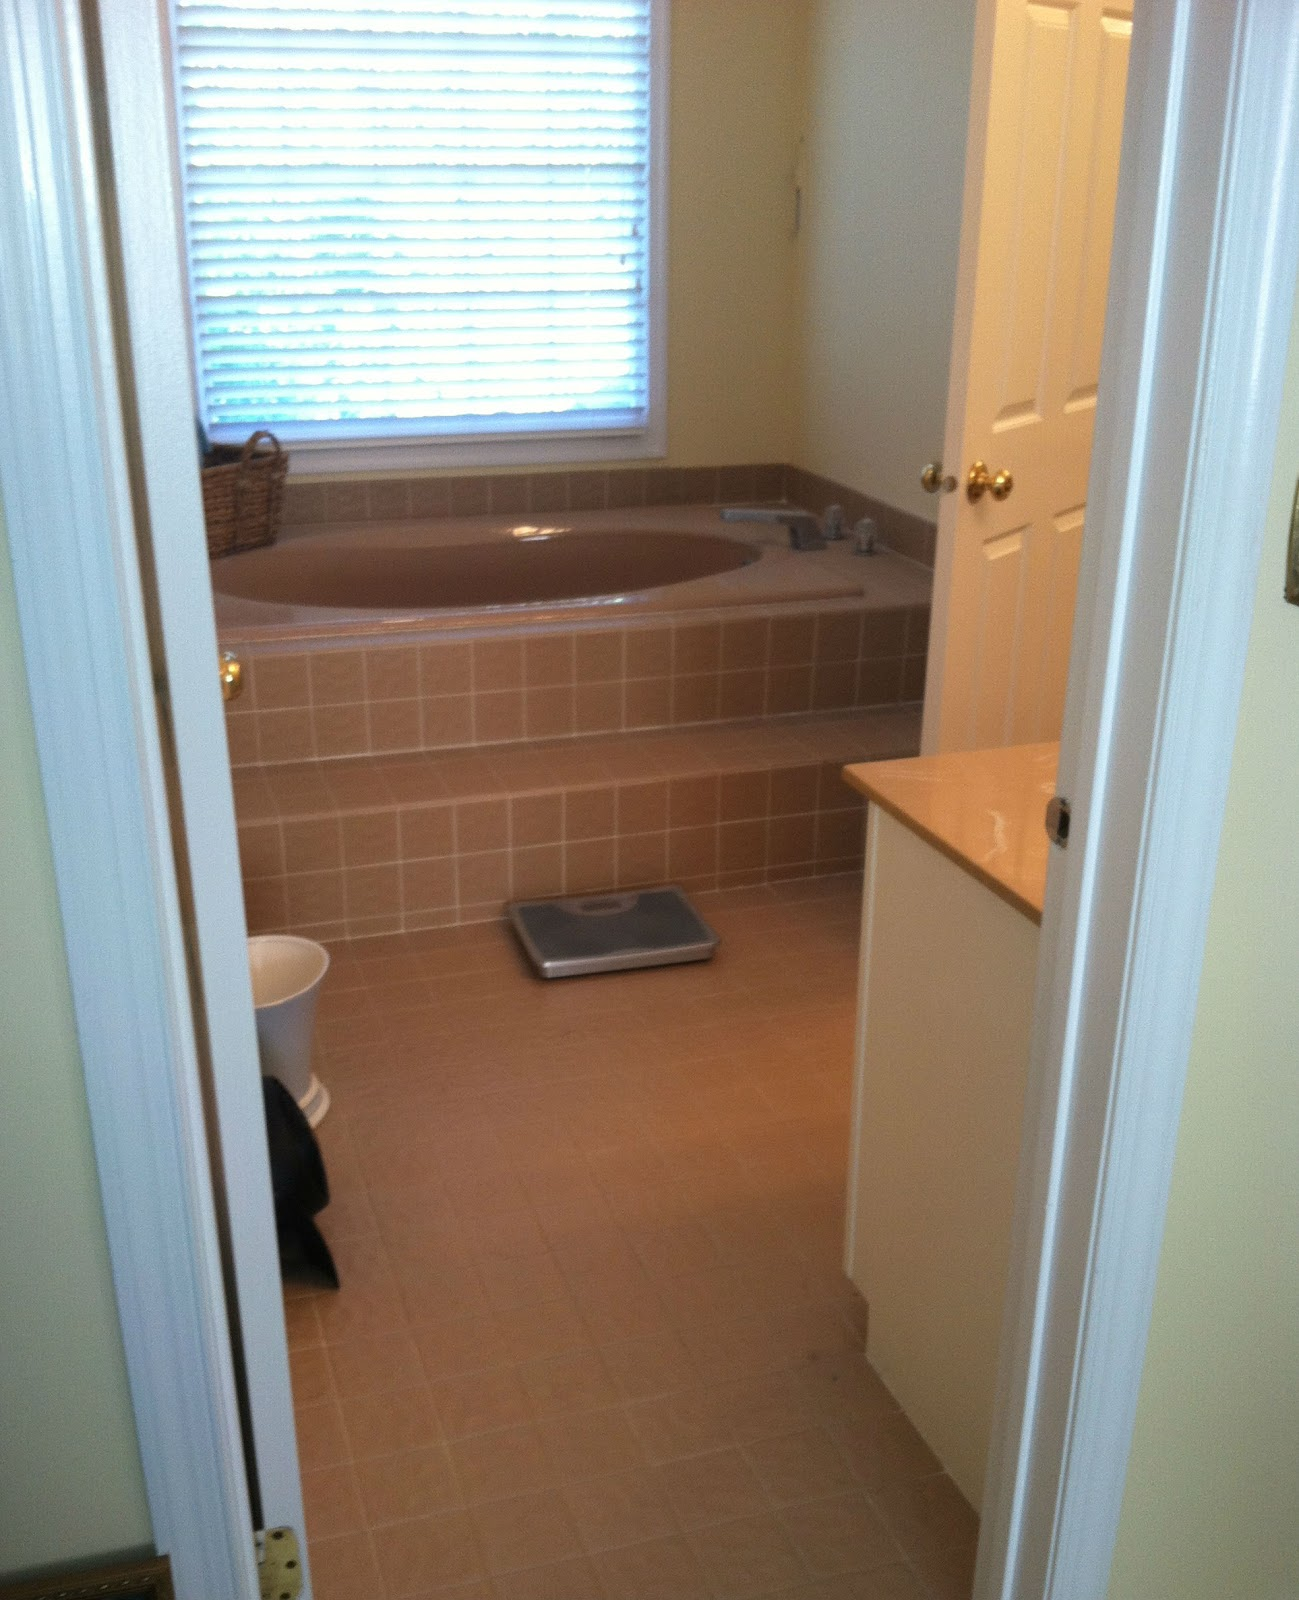
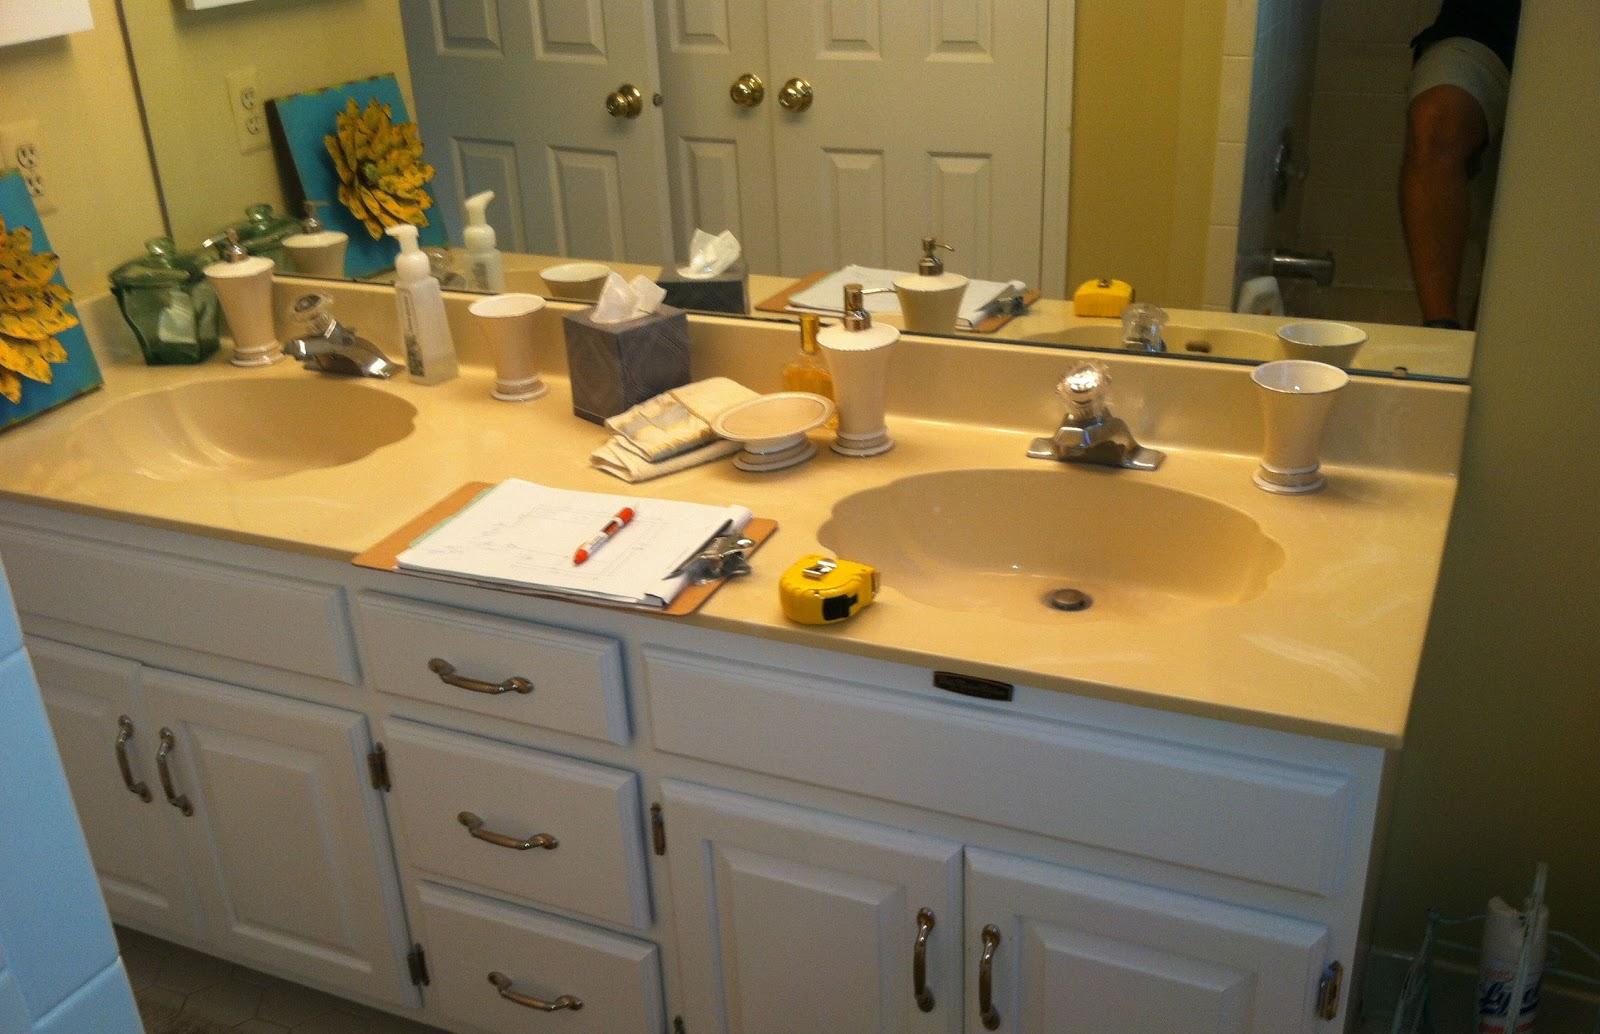
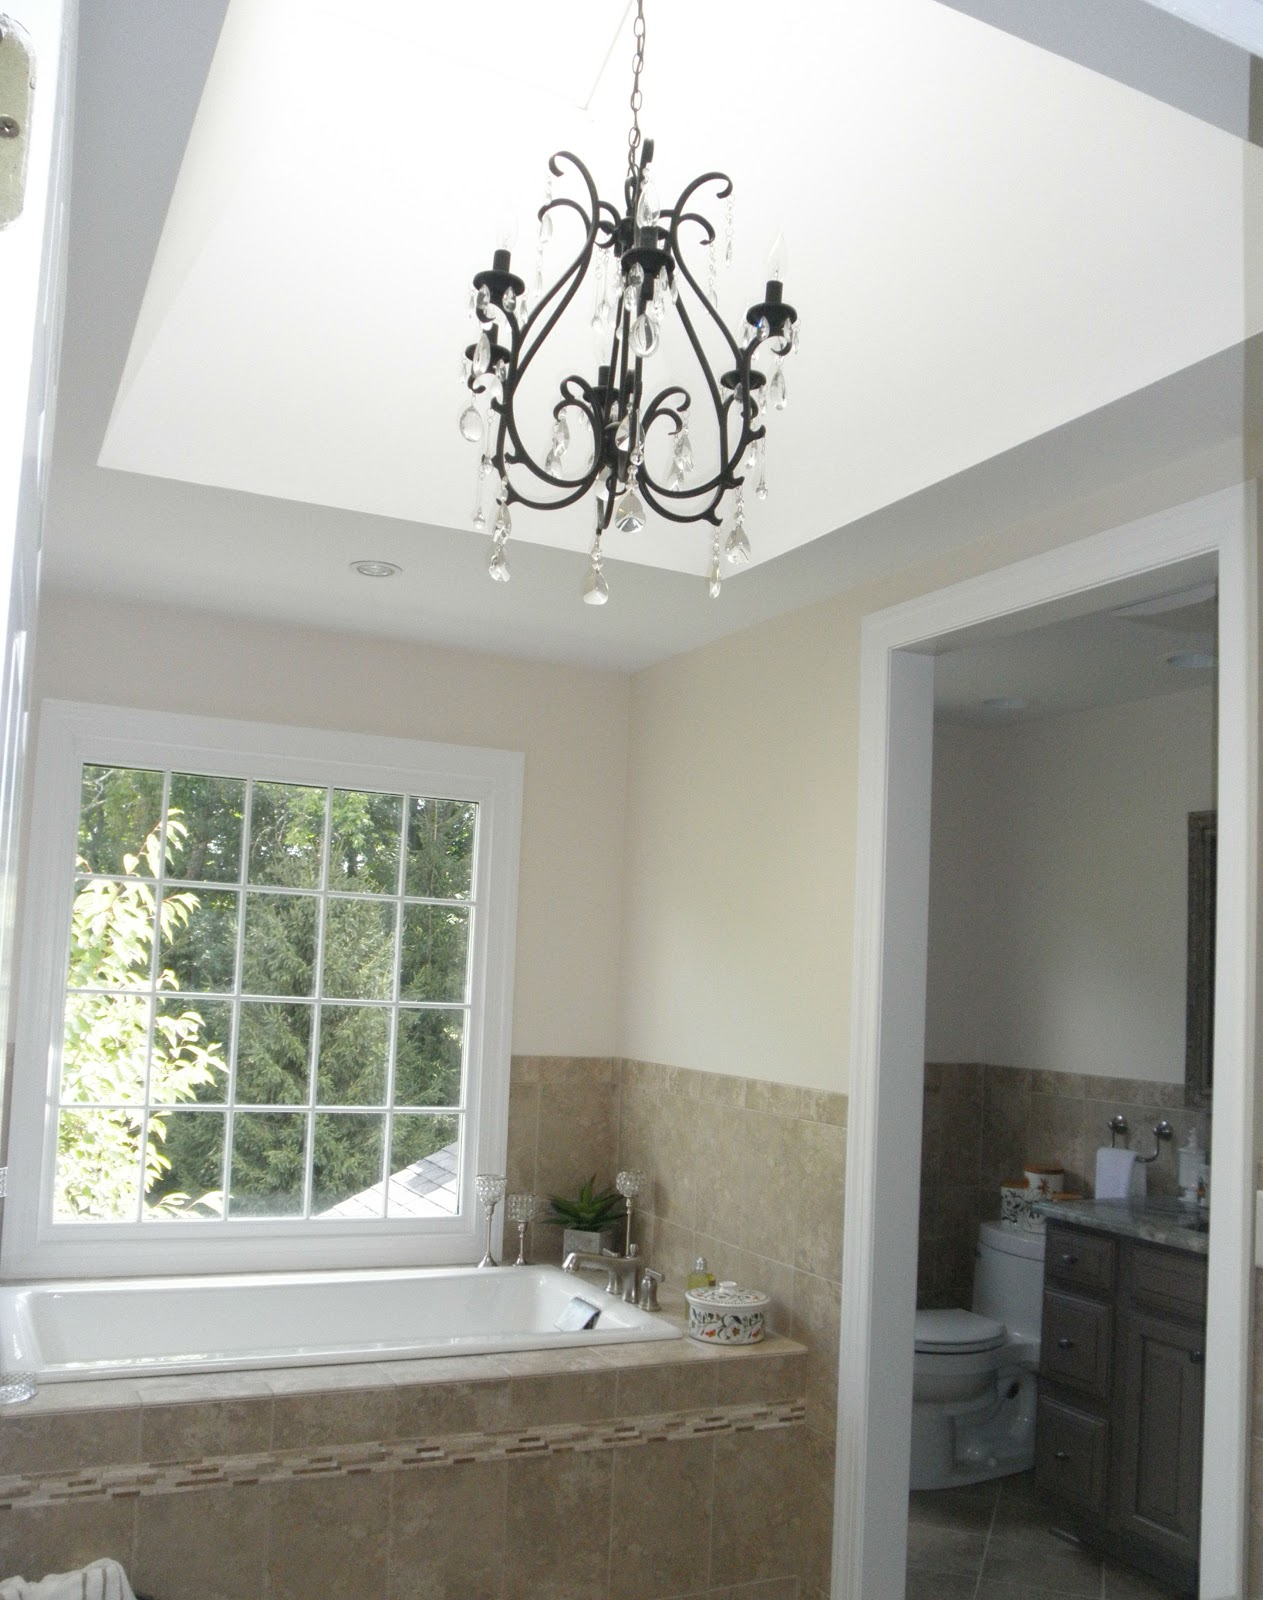
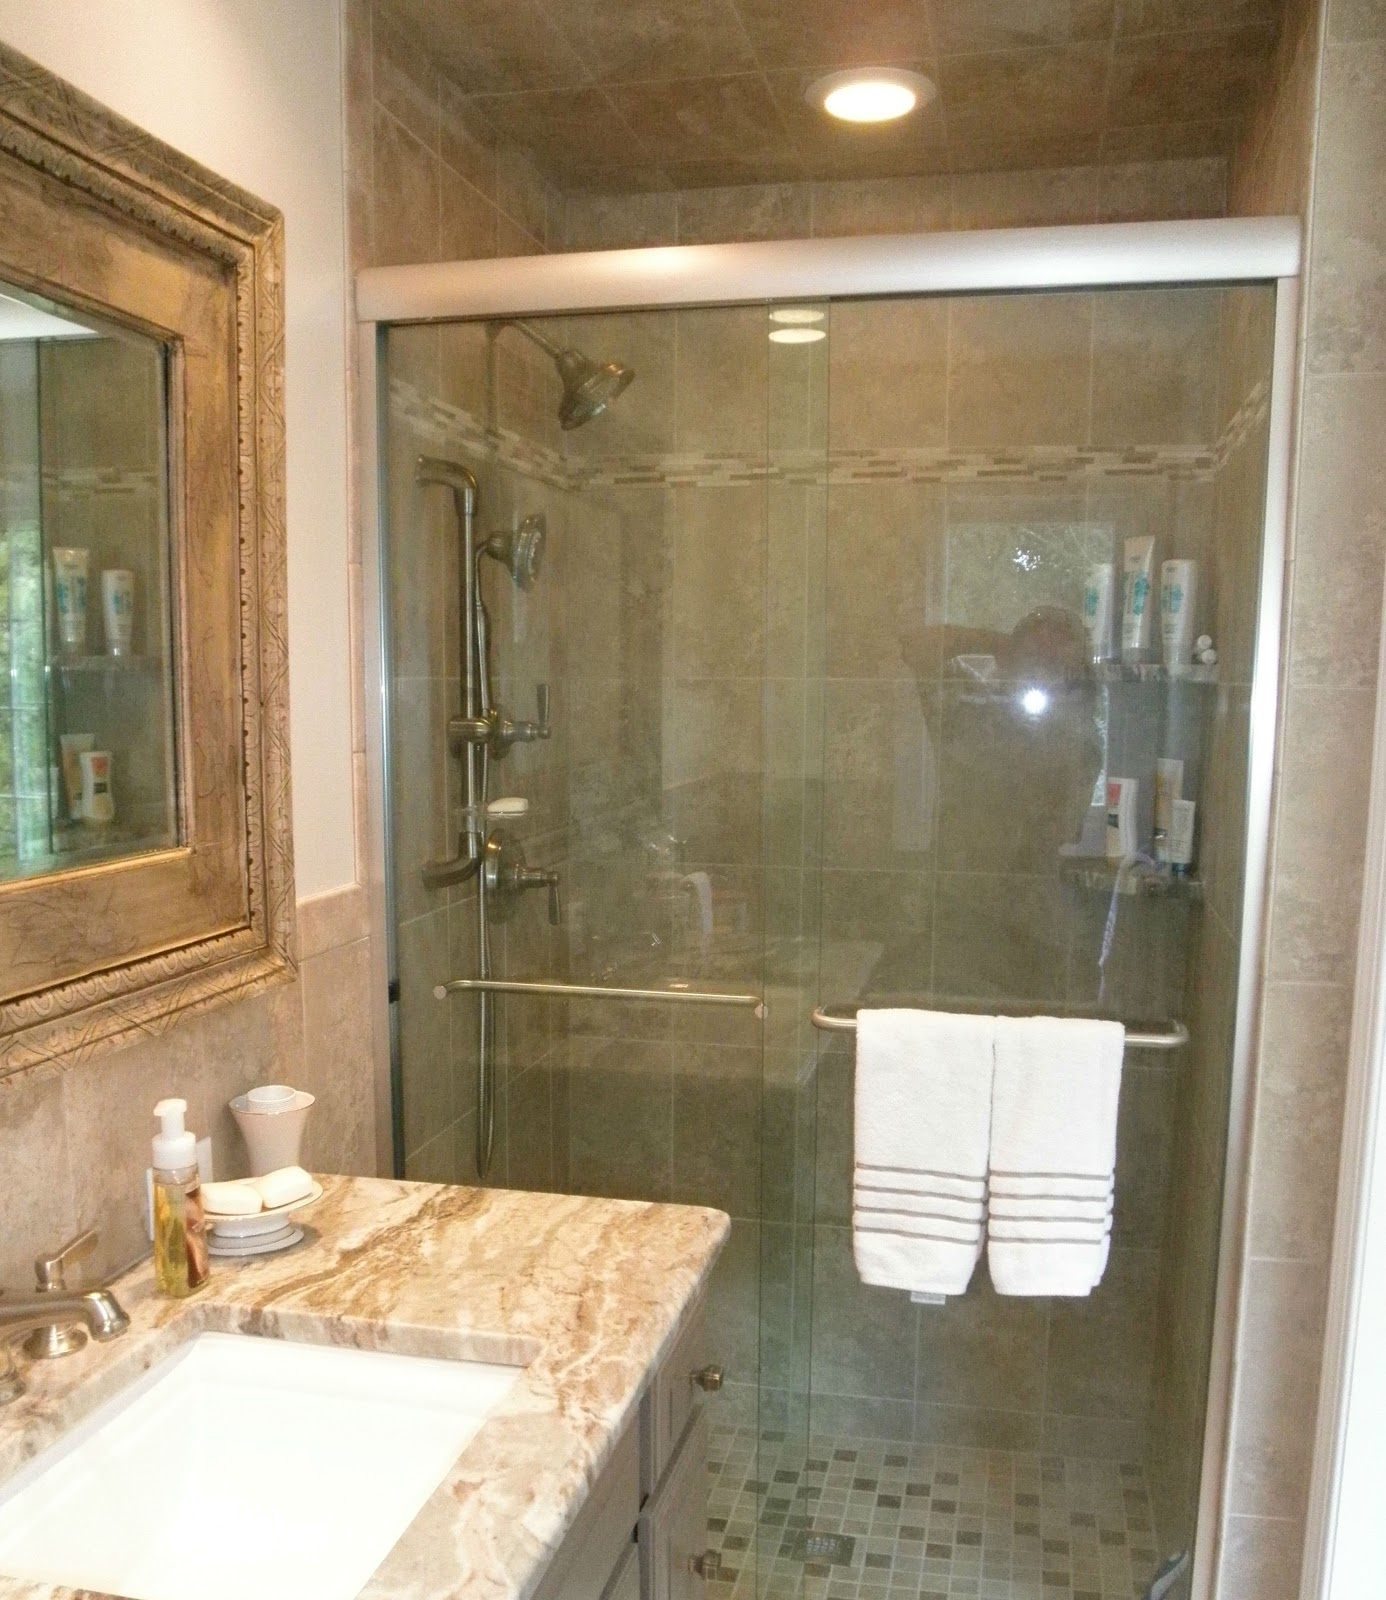
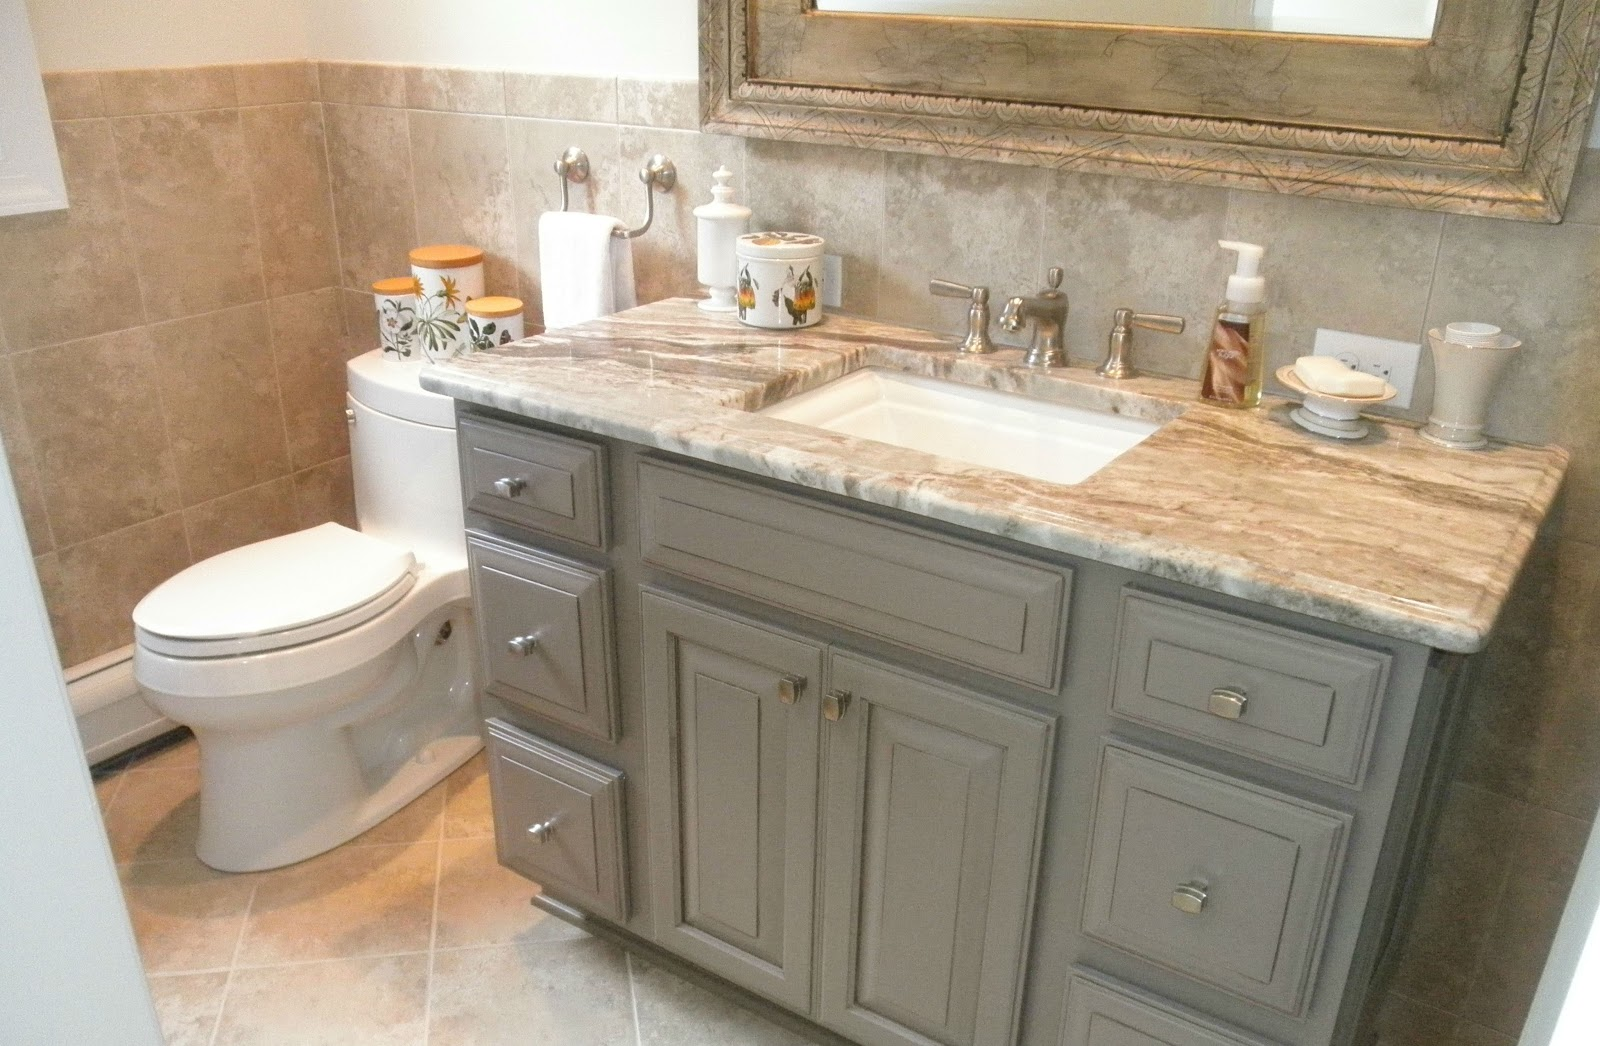
Remodeling this bathroom was almost a two-in-one job. The adjacent rooms were together yet separate, forming a unique double bathroom - each serving its own purpose - yet one was unable to function as a full bathroom without the other. A fun challenge for the RWC team! Although the layout is quite similar in the end result, the rooms look completely different. Here are several pictures of how the double bathroom looked after pouring our blood sweat and tears into it and we couldn't be happier.
Pompton Plains, NJ Kitchen Remodel
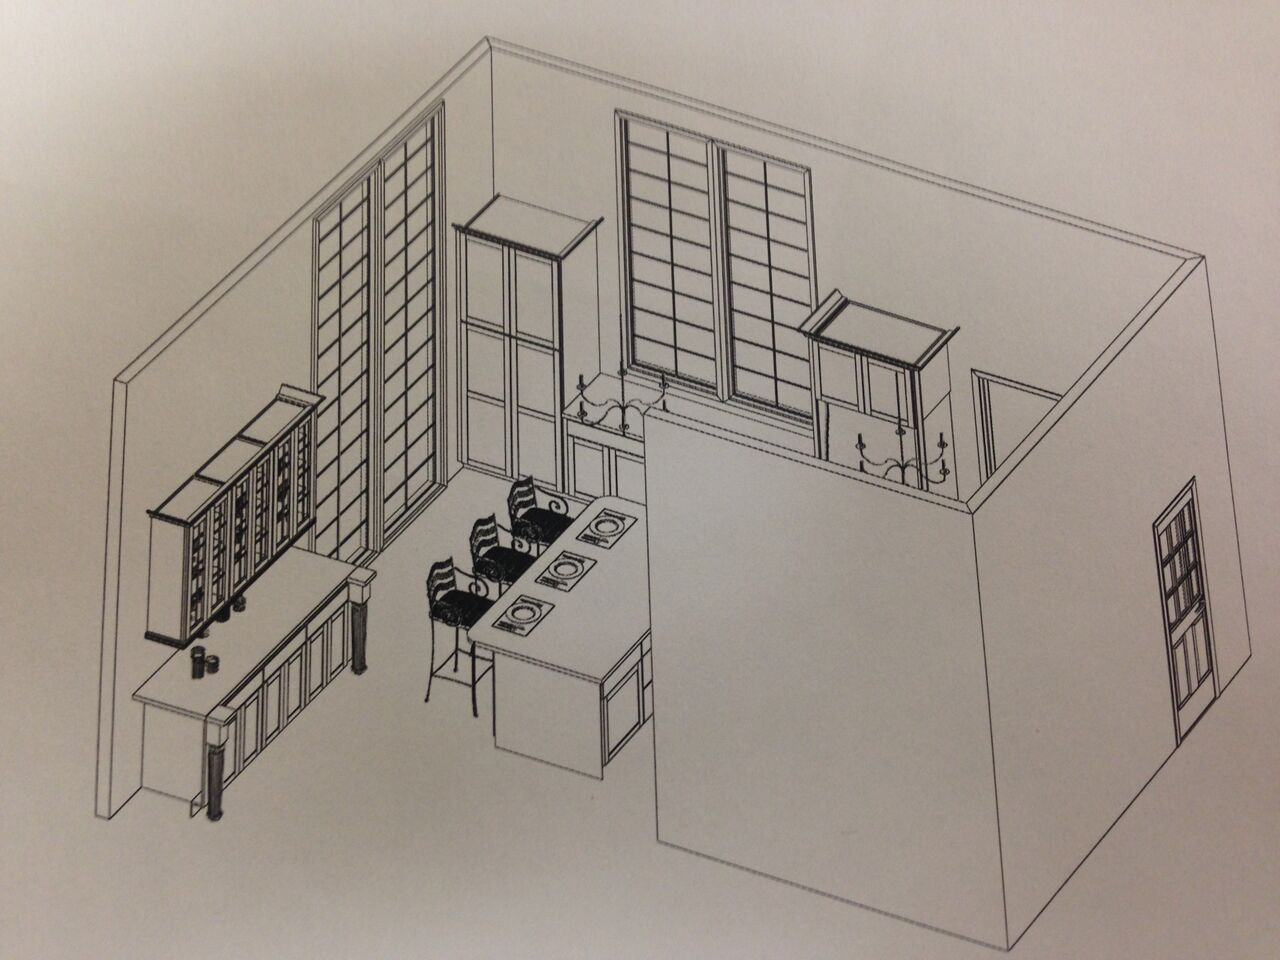
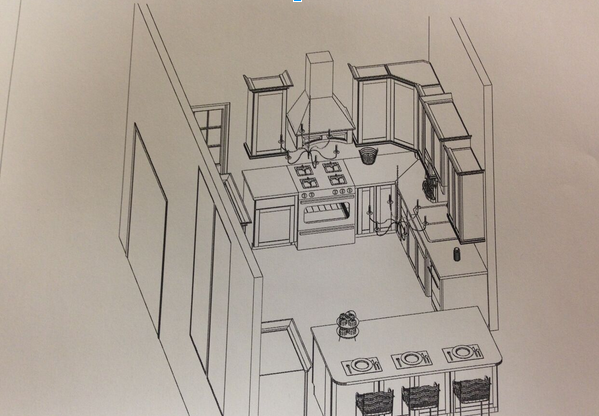
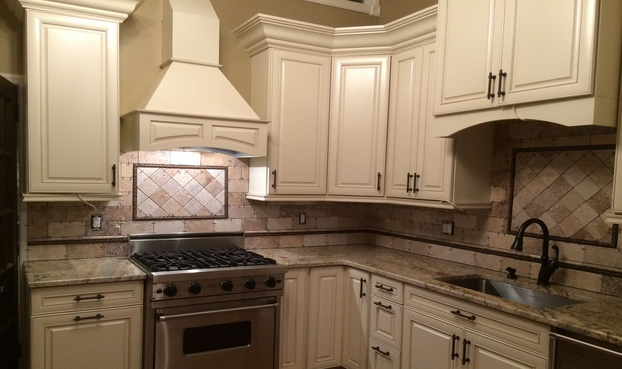
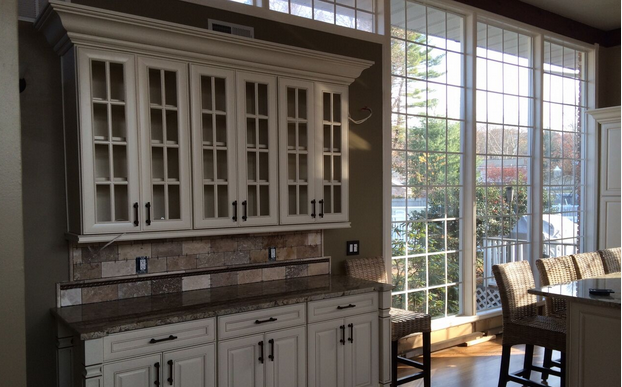
This kitchen renovation in Pompton Plains was a blast - literally. We had to knock out the walls and remove the existing patio doors. By doing this, we could build a wall and add a cabinet. We put cabinets underneath to give the kitchen a crisp and beautiful space.
Westwood NJ, Bathroom Renovation
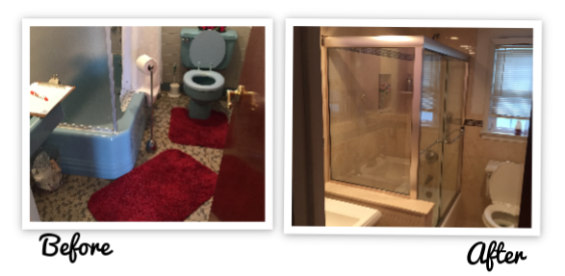
We did a full remodel that delivered the “WOW factor” that Pete and Michele were hoping for. "Are we satisfied? YOU BET WE ARE!!!!!!!...." That was part of the amazong testimonial that we received from the couple. This job warmed our hearts and made us happy to be able to do what we do.
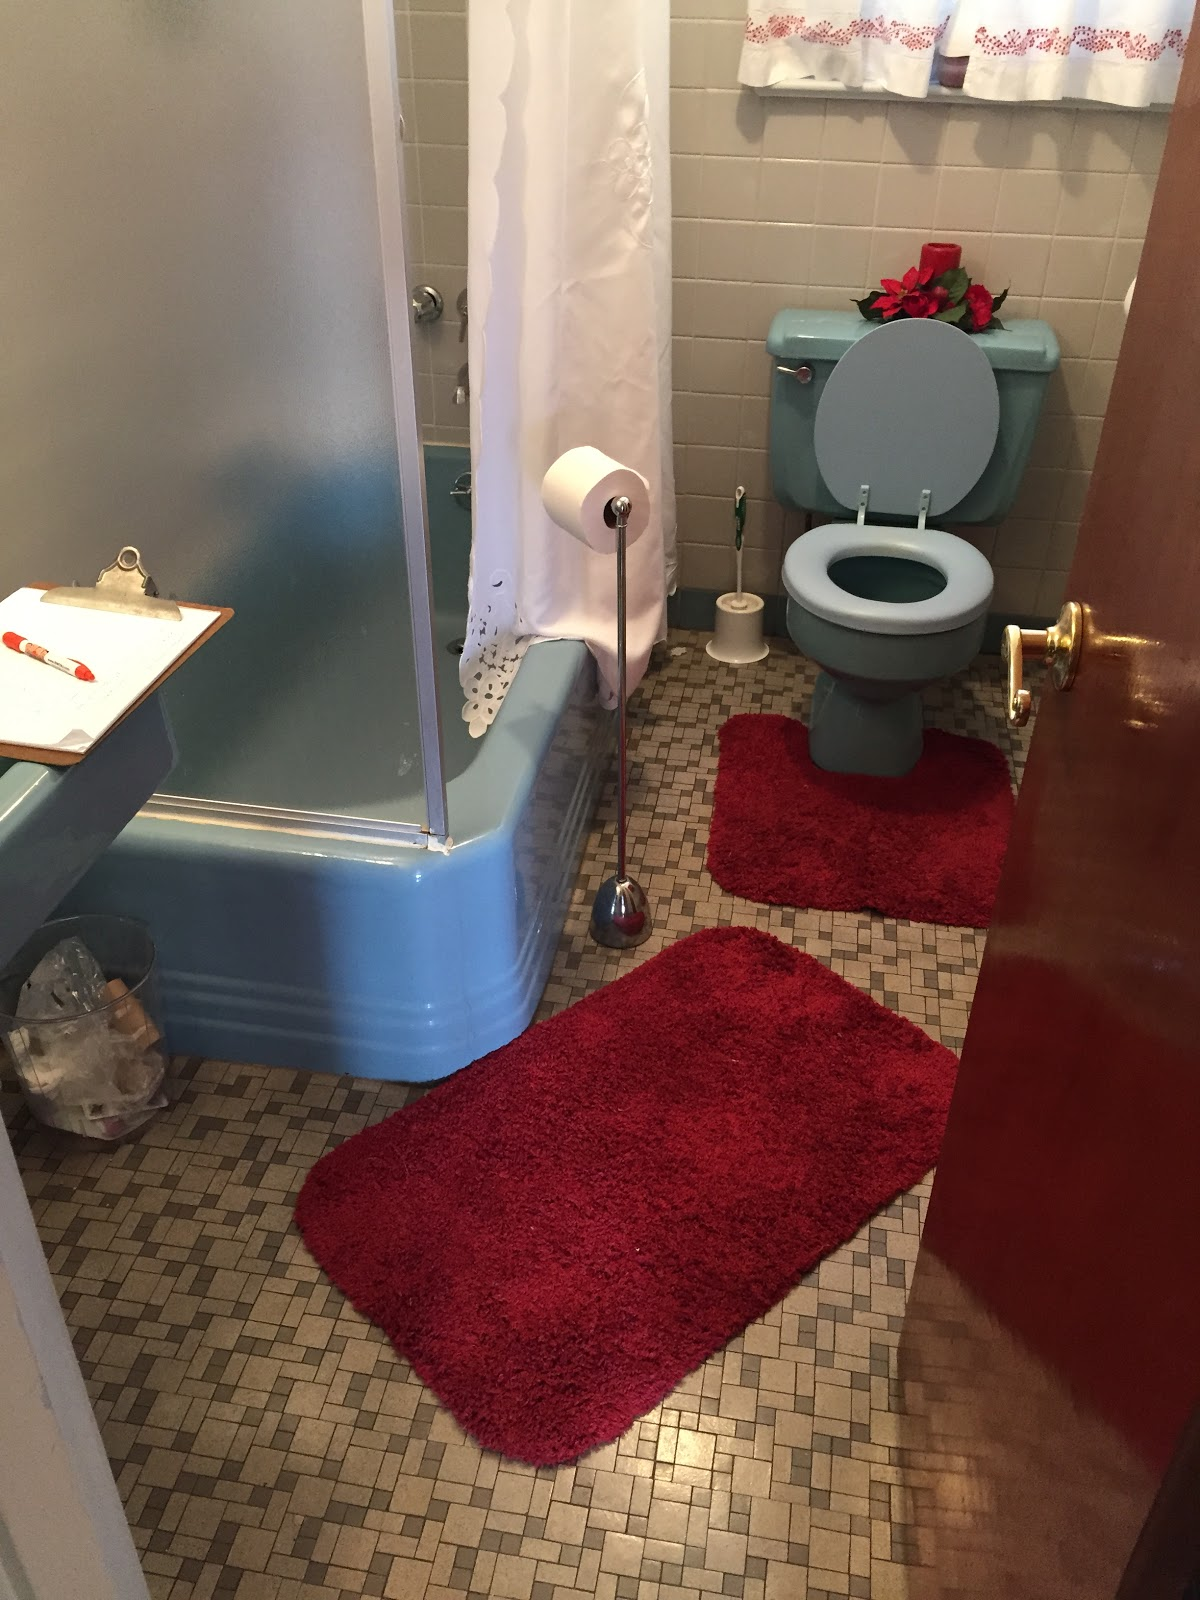
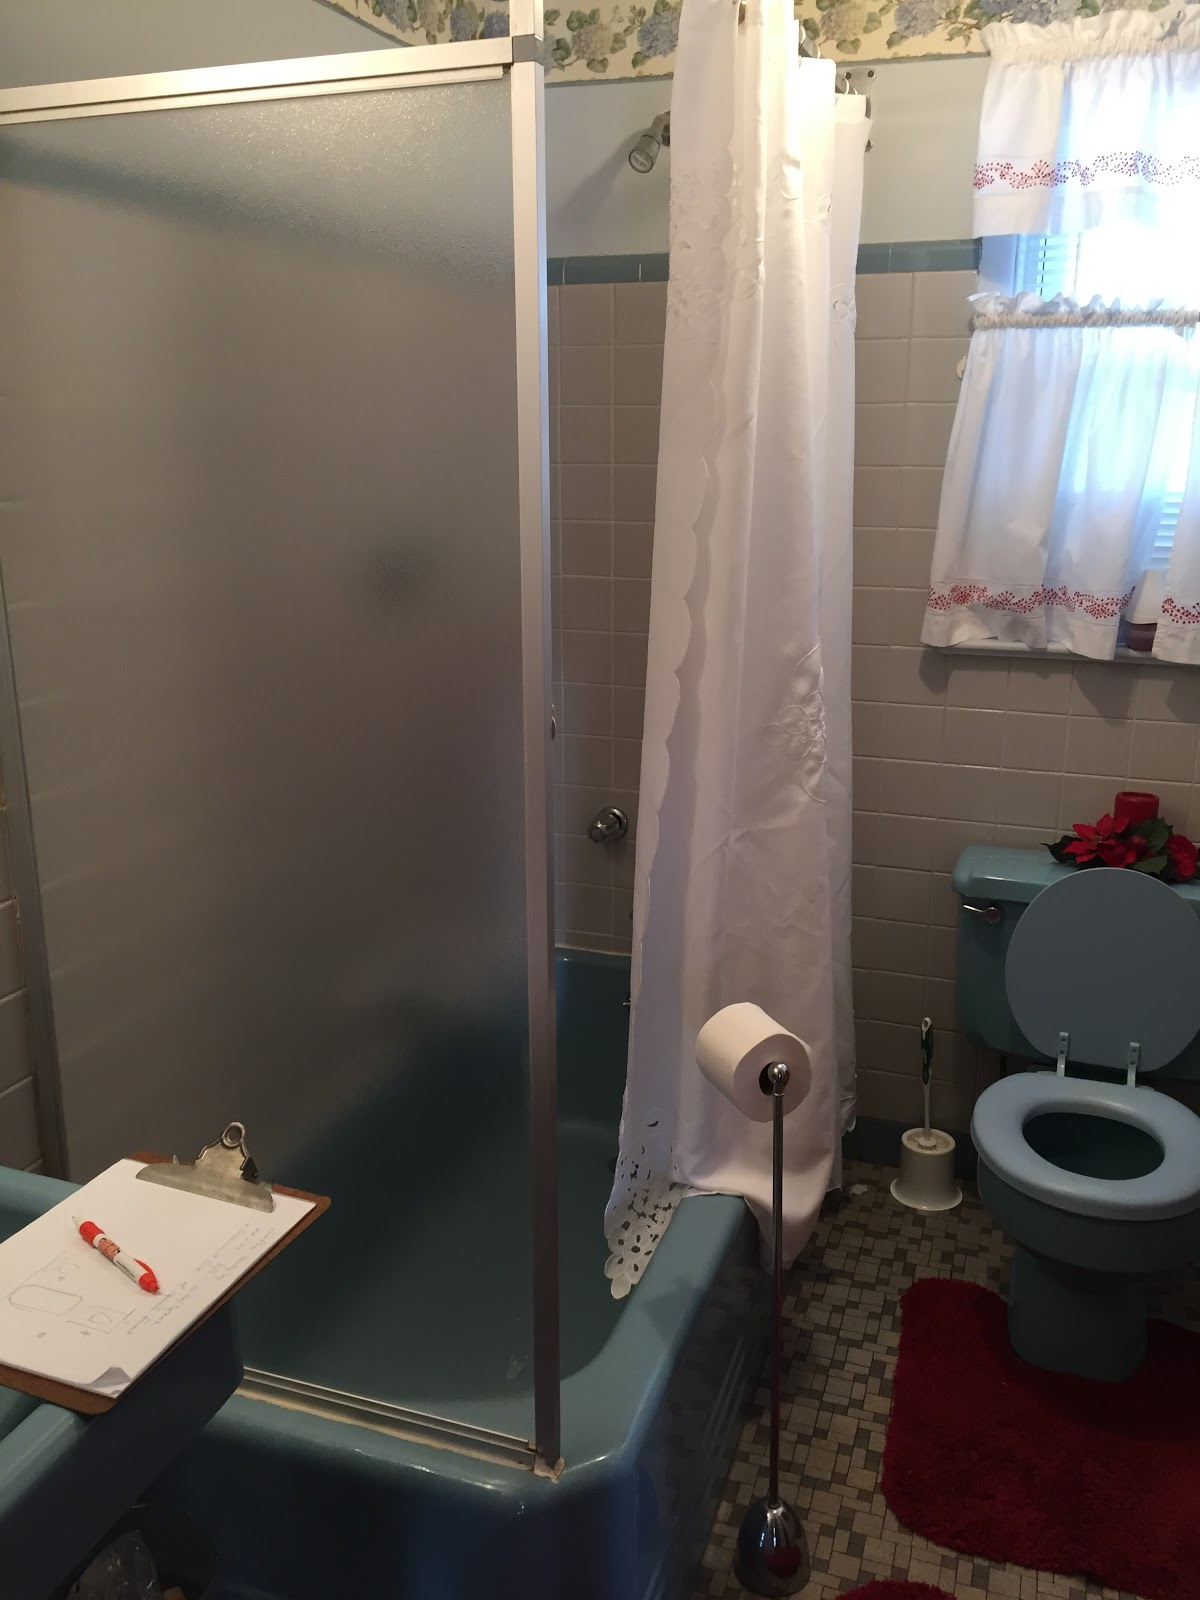
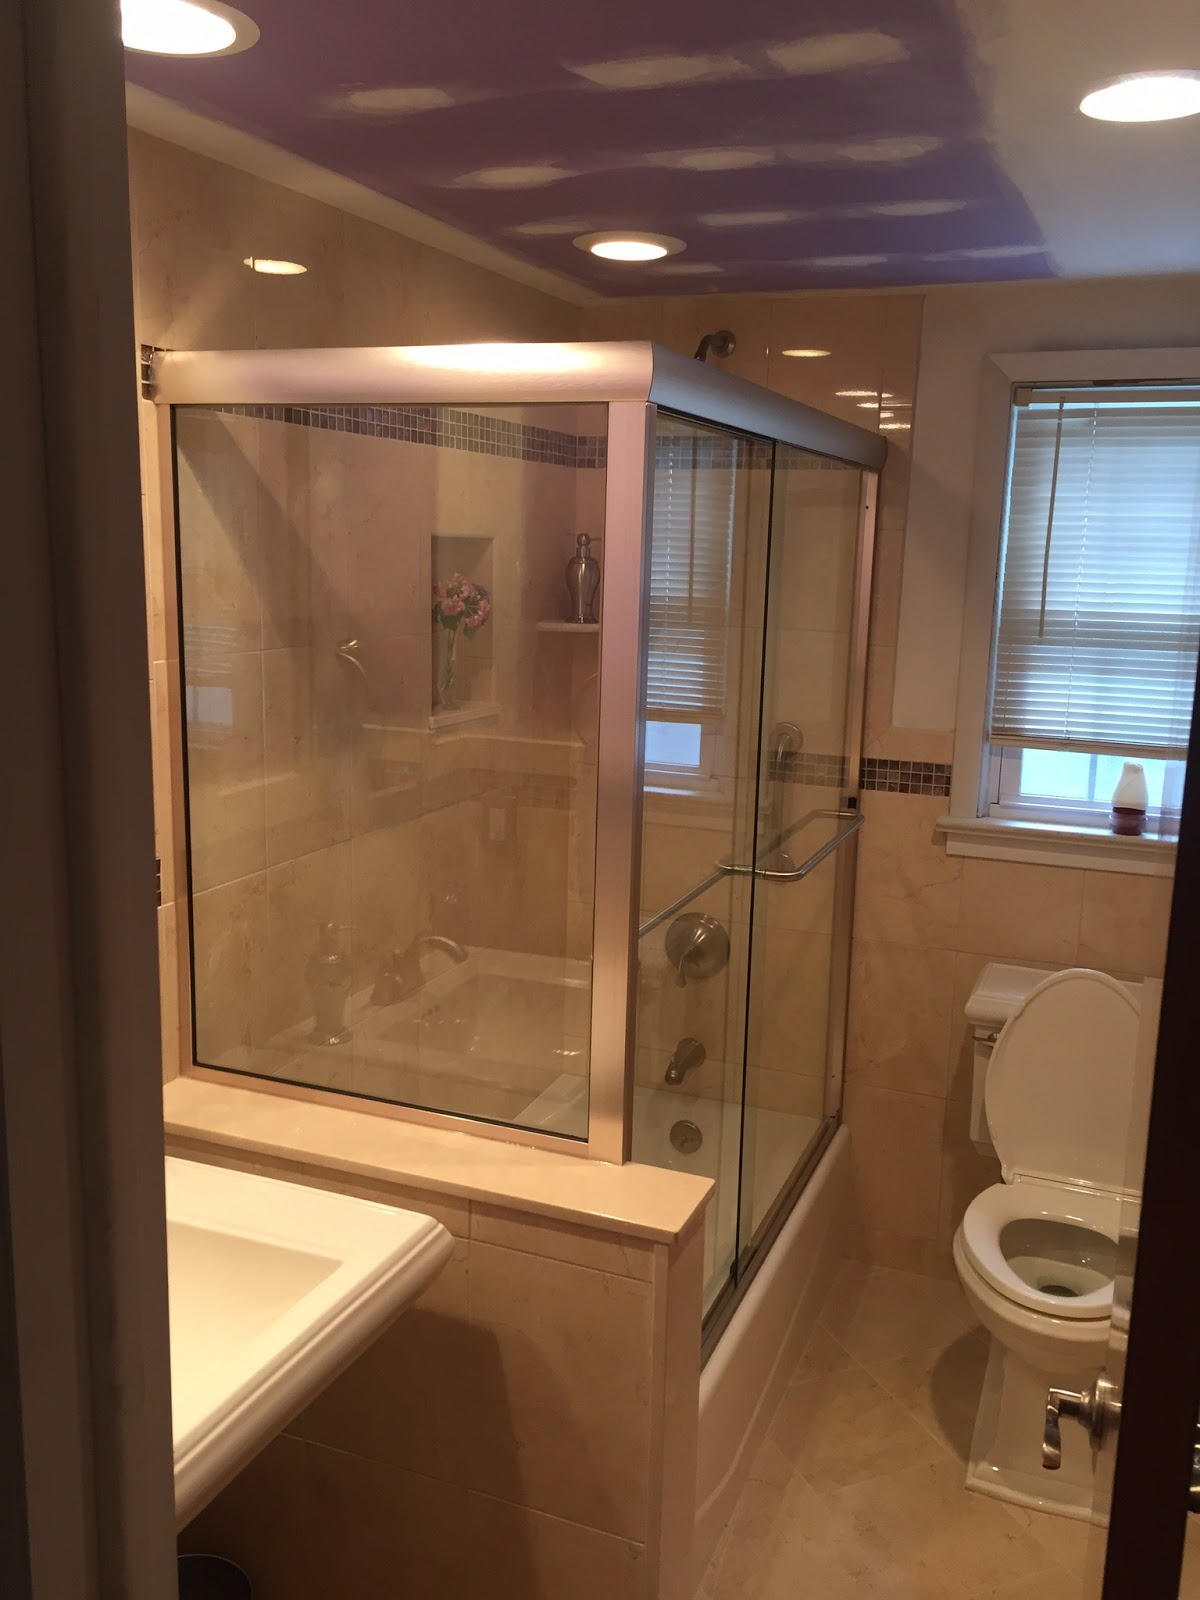
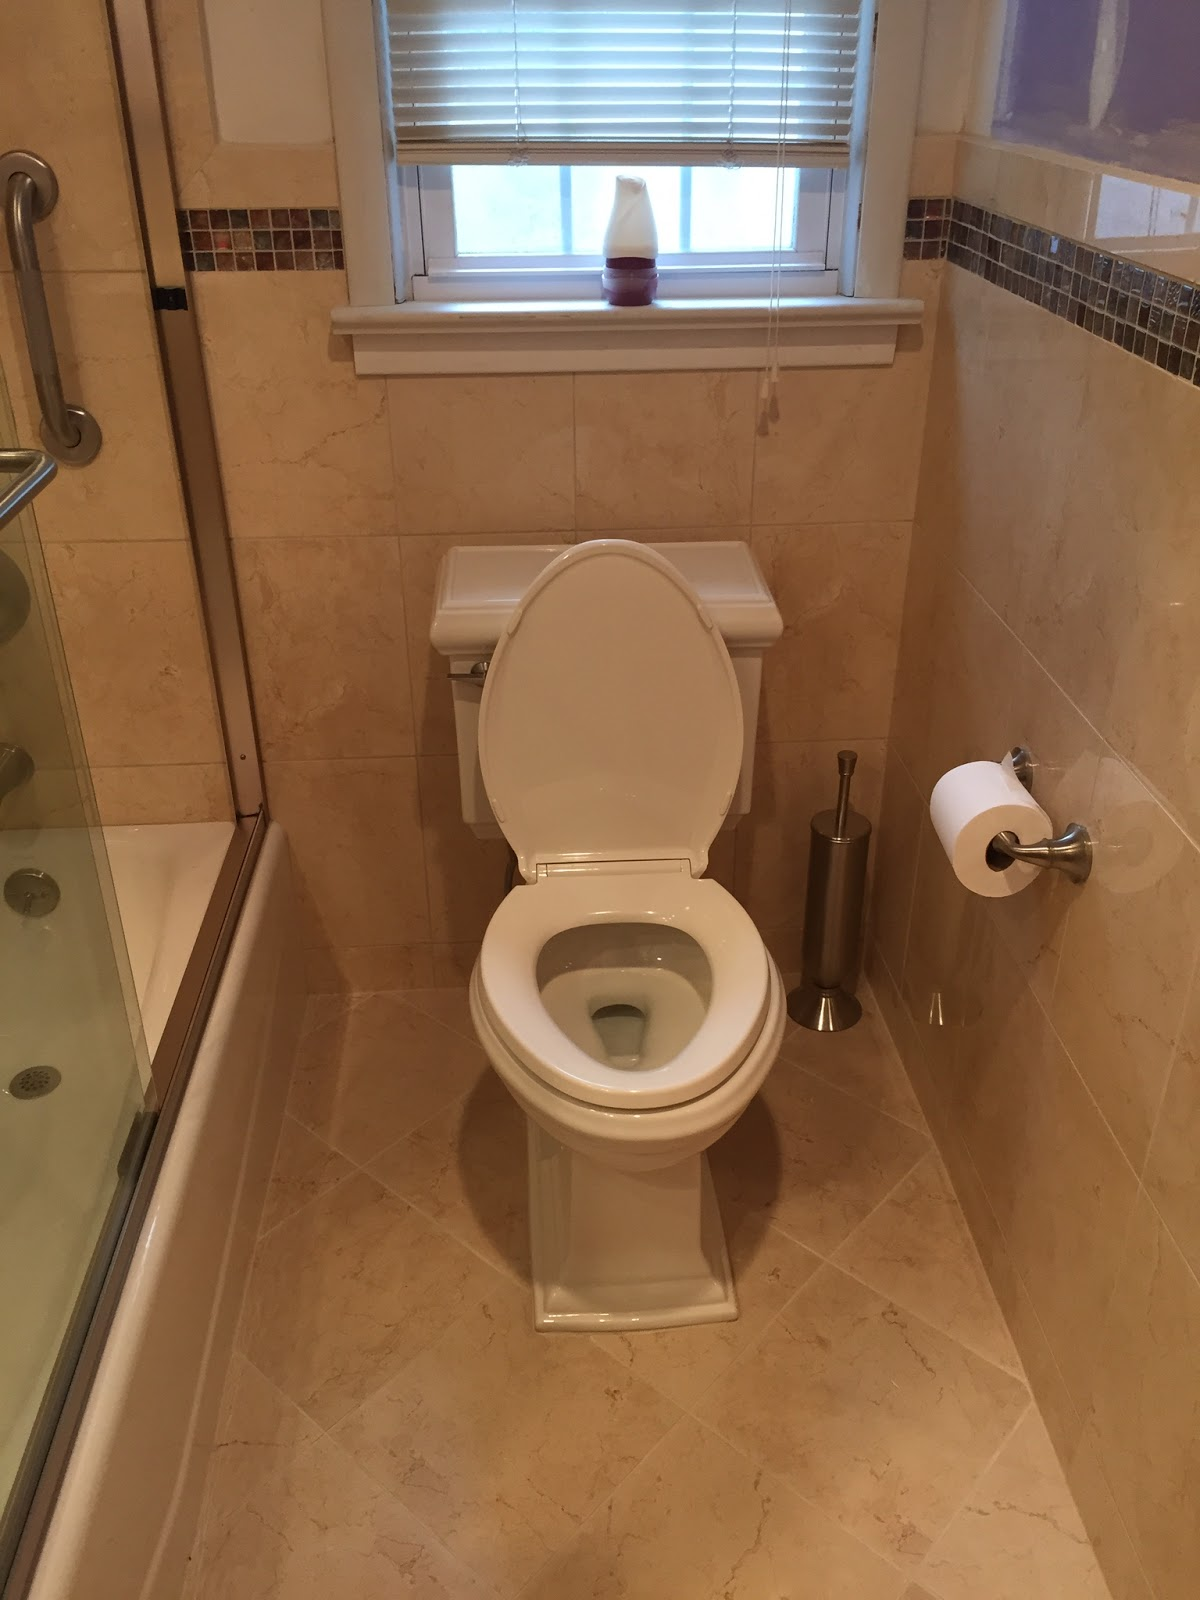
East Hanover, NJ Kitchen Renovation
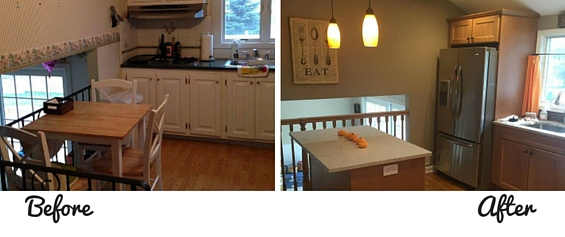
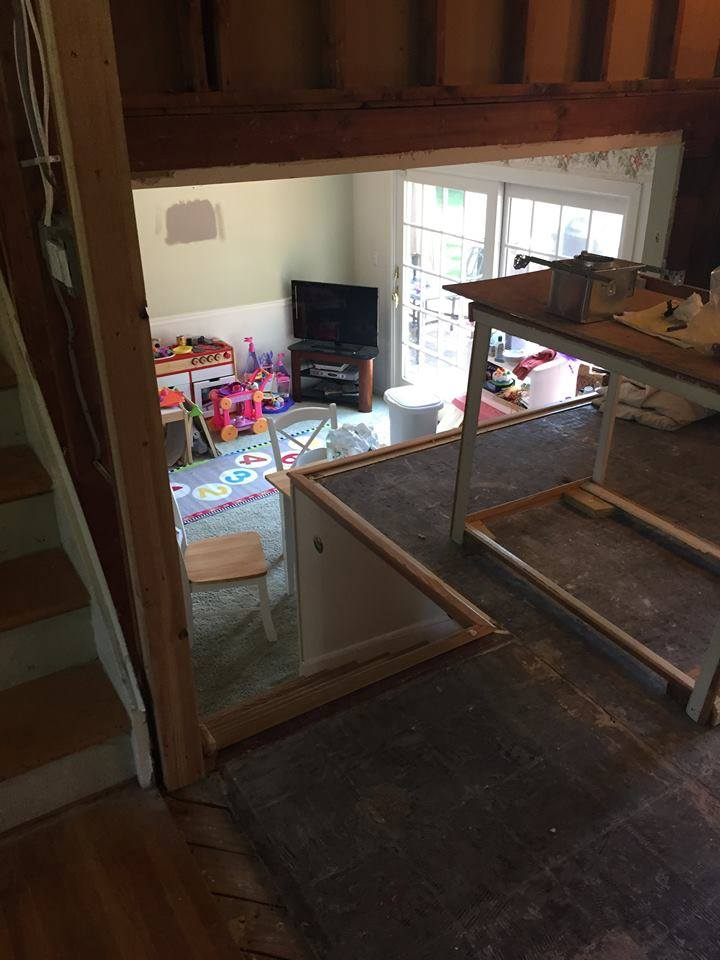
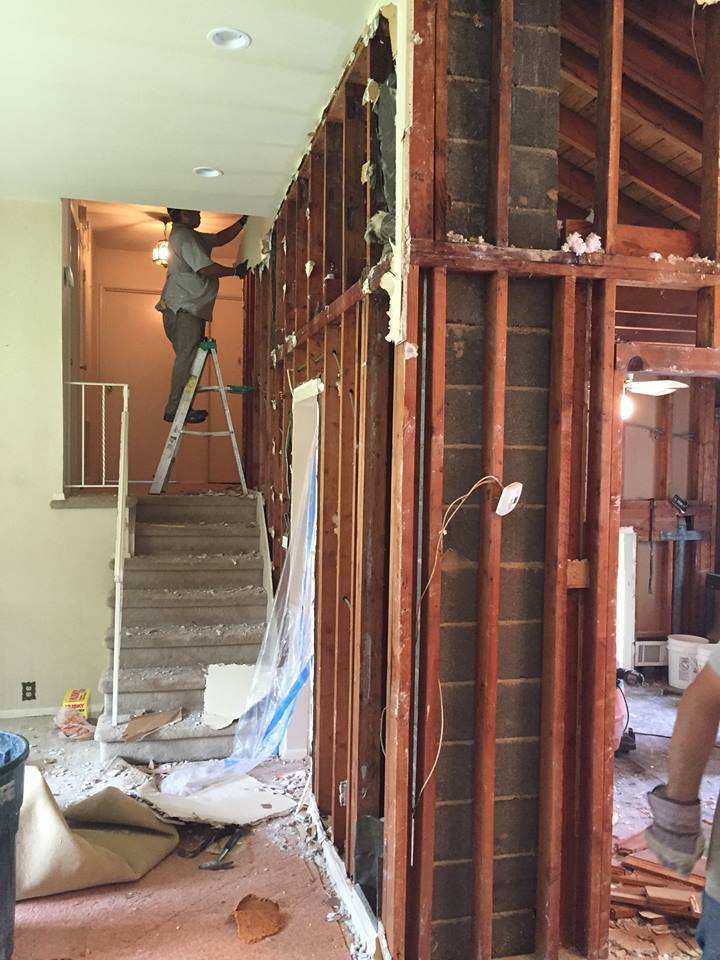
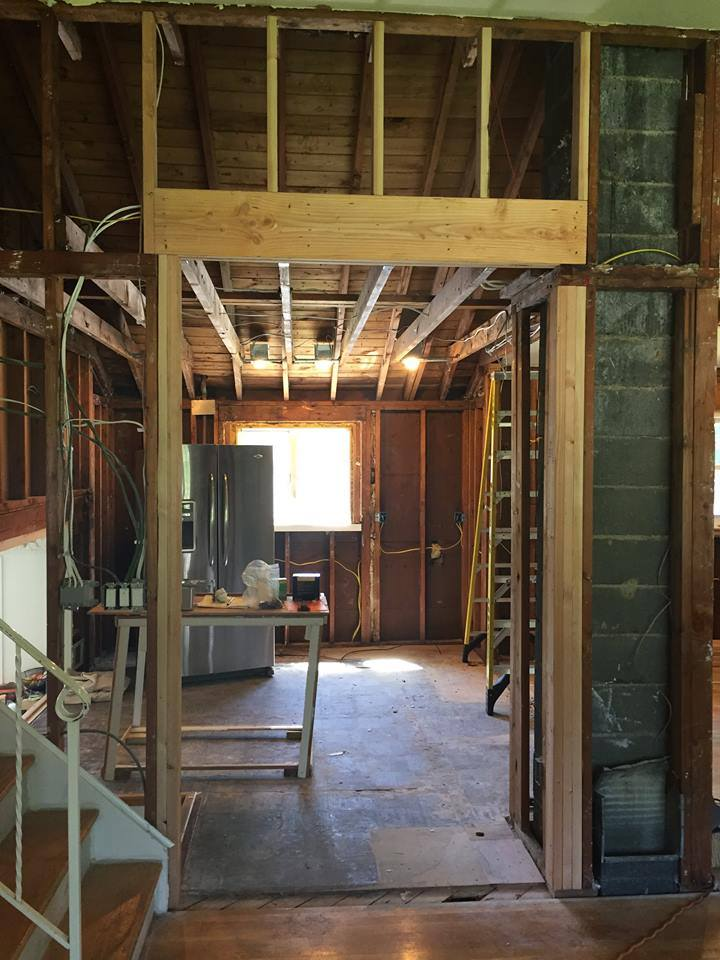
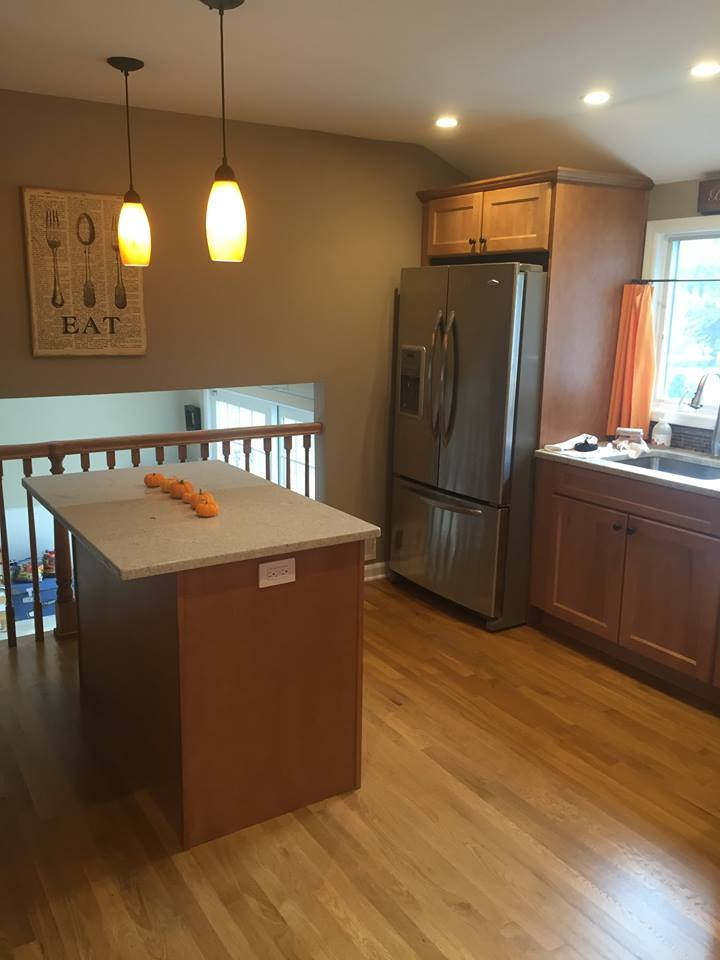
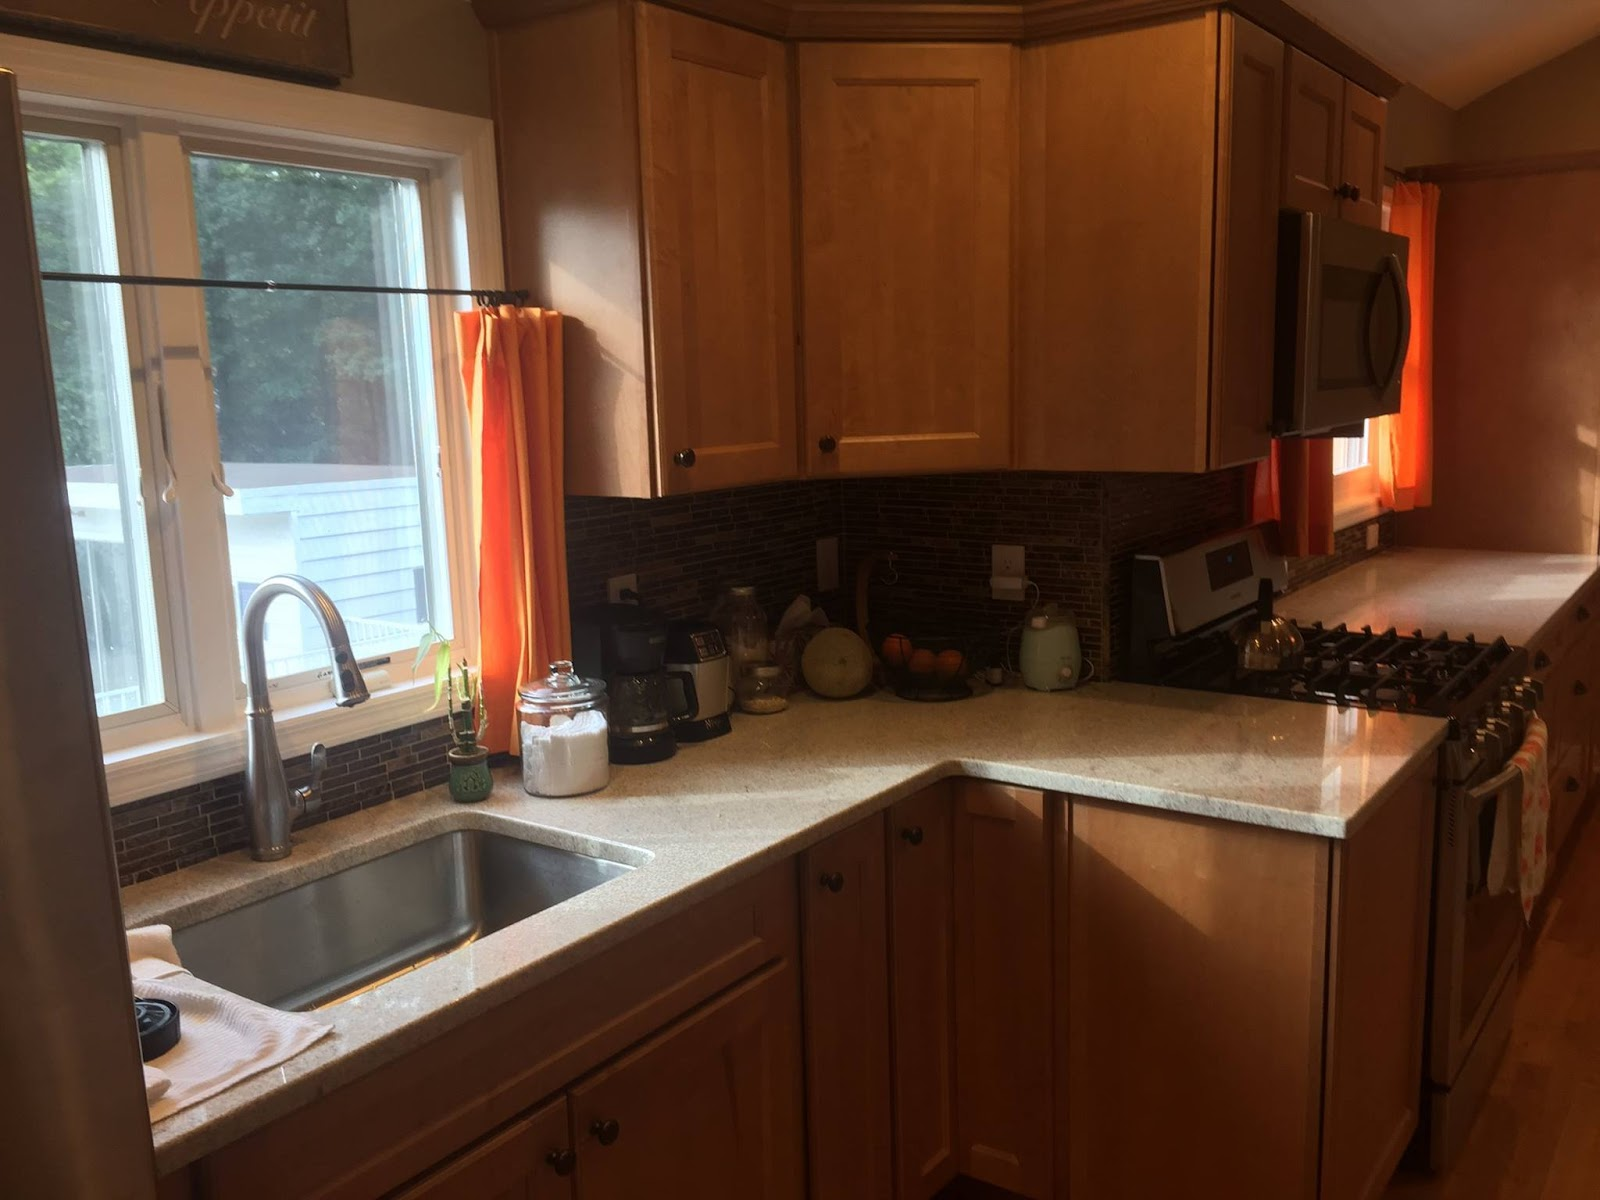
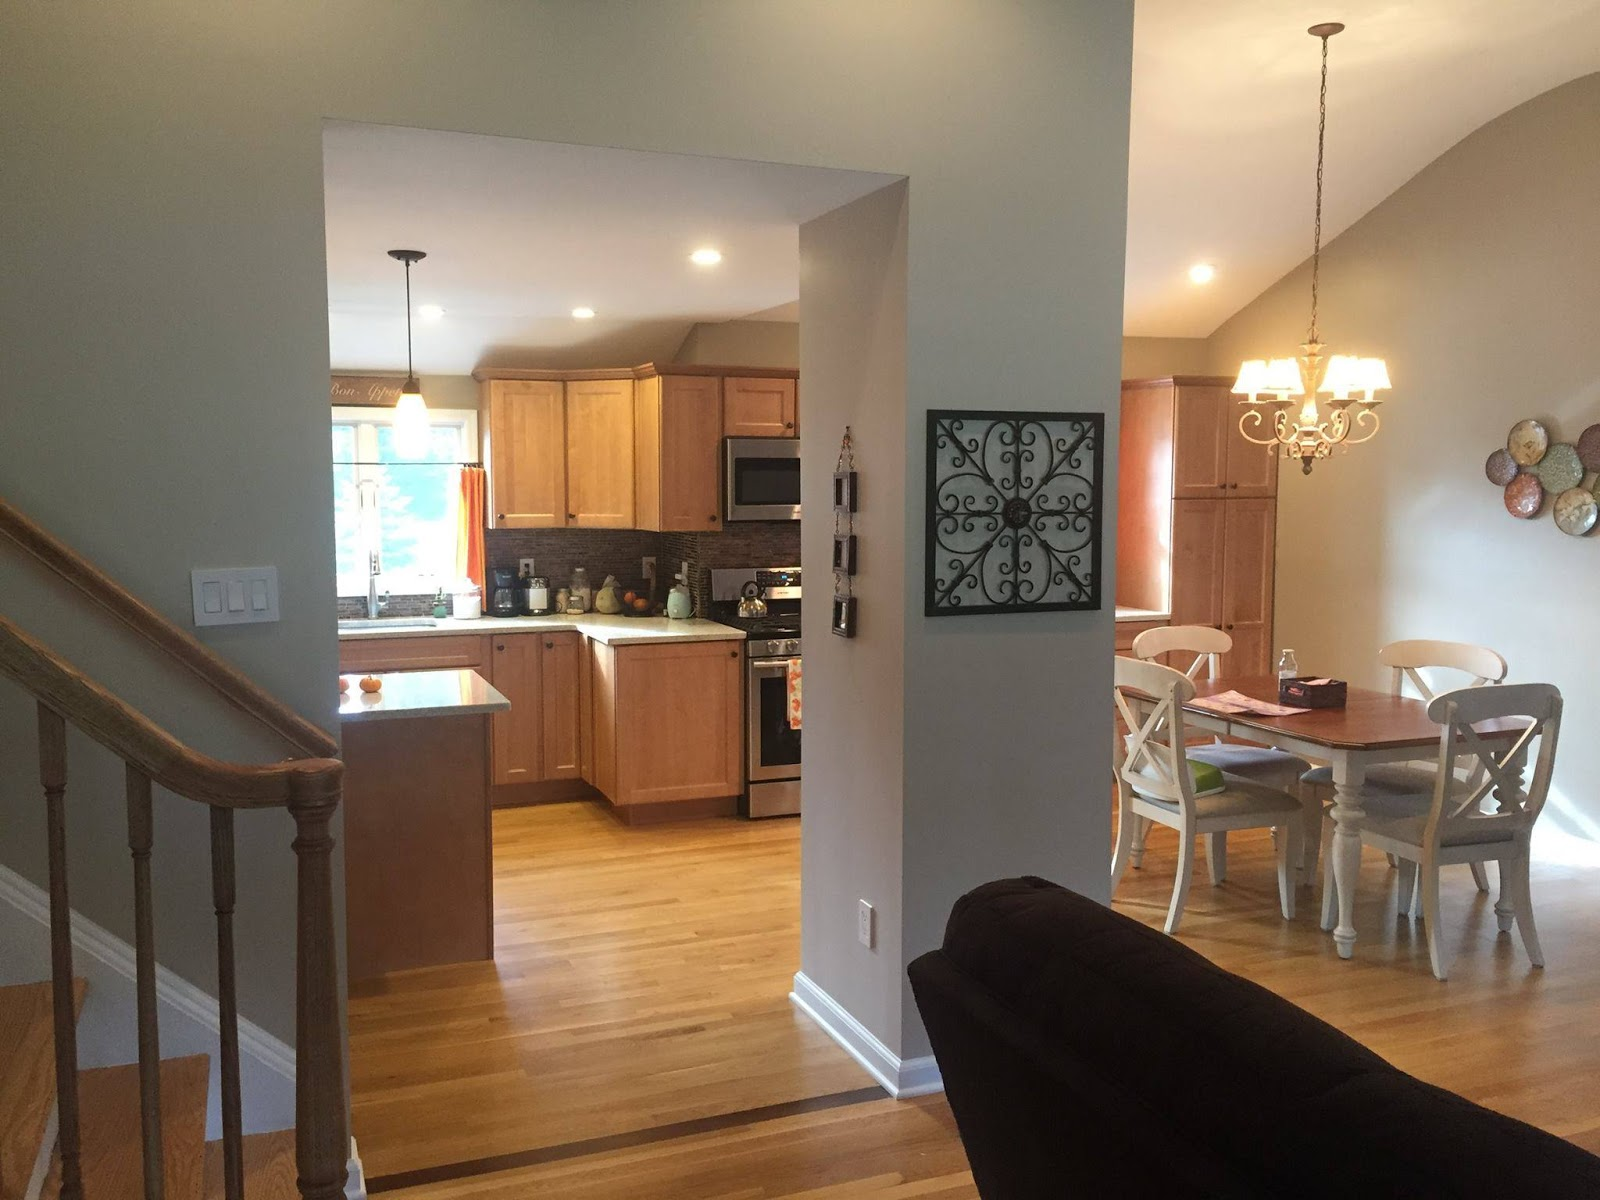
When this customer from East Hanover, NJ came in with architectural plans to remodel their second floor kitchen, living room and dining room, we jumped at the opportunity. The client requested that we rebuild the rooms so that she could see her children playing on the first floor, while she remained in the kitchen. How fun!
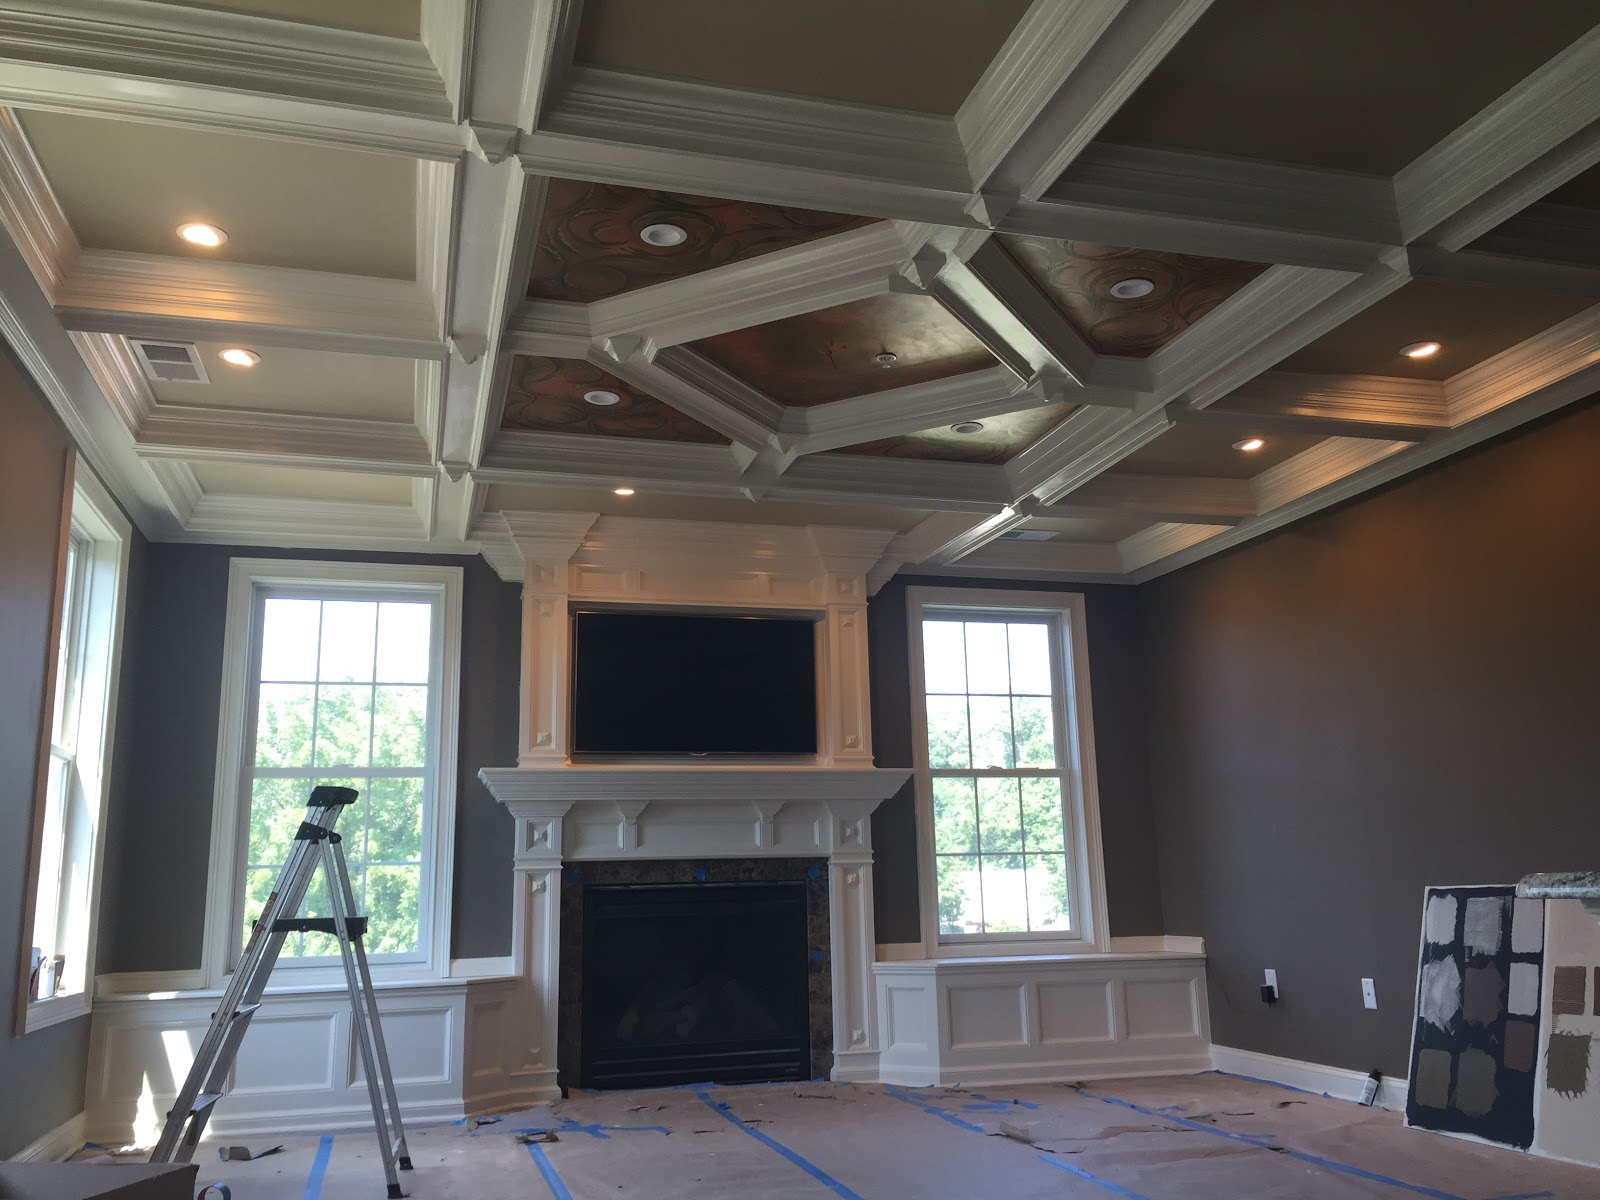
North Caldwell, NJ Coffered Ceilings and Full Remodel
This job was completed in conjunction with master carpenter, Ken Prehart, and Terriann Loverde, who is the Owner of Personal Space Interiors and an incredible interior designer. With Terriann’s immaculate design skills and Ken’s artistic ability and dedication to his craft, the job took on a life of its own.
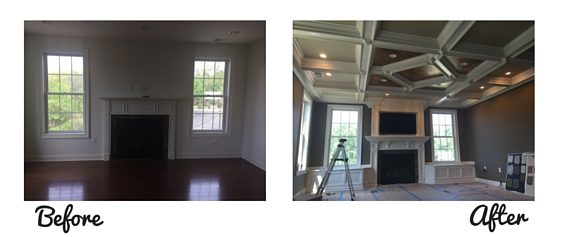
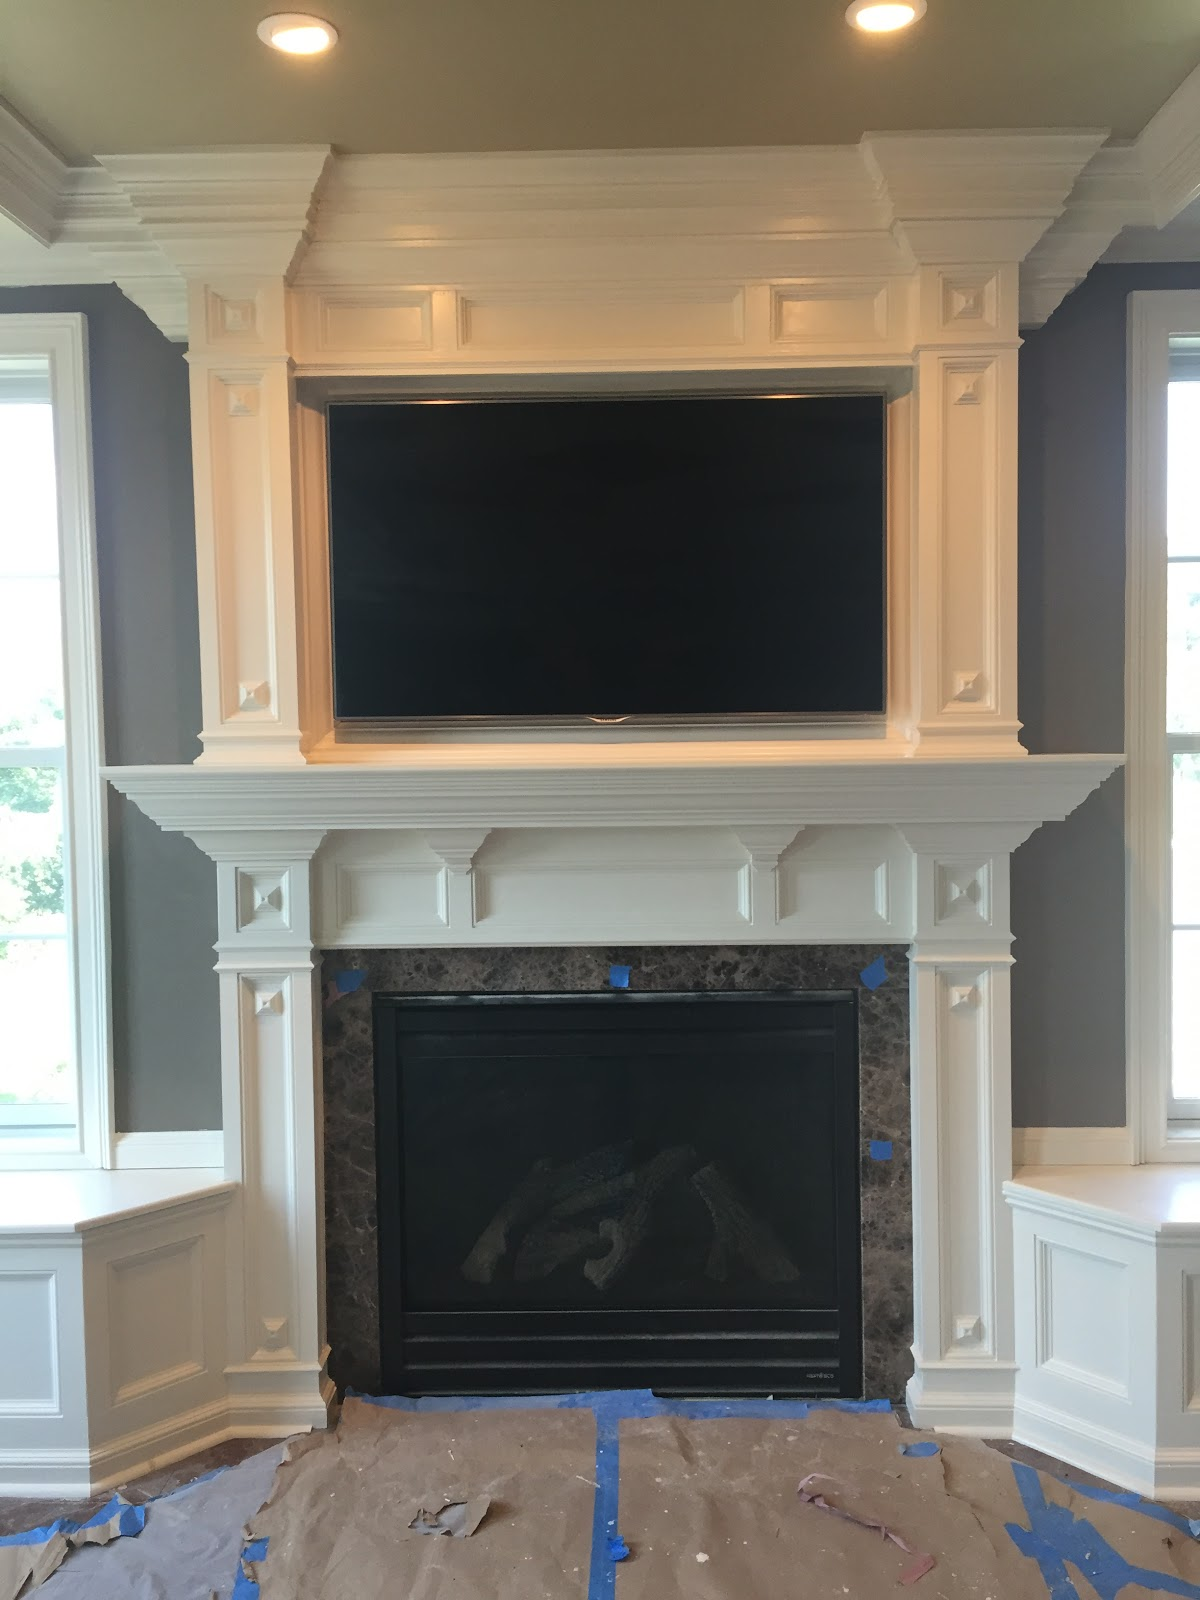
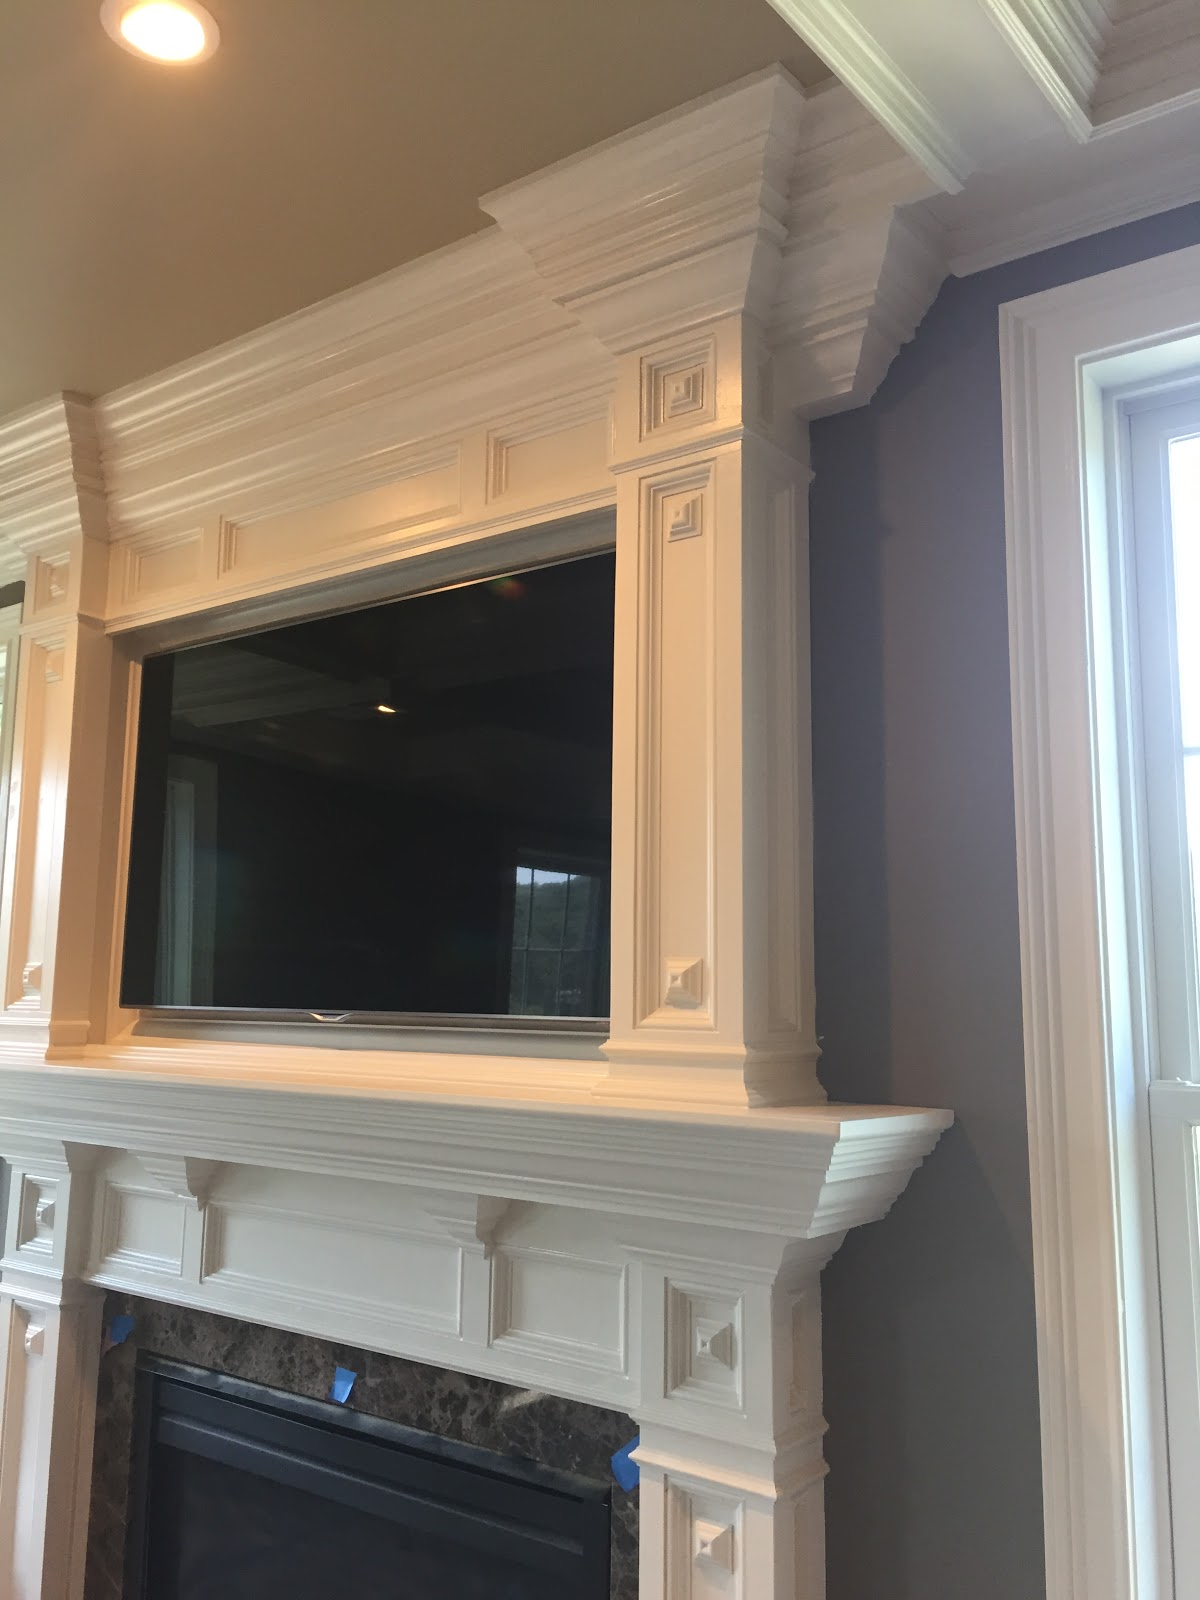
The customer asked that the RWC team design and build custom coffered ceilings in the kitchen and dining room. They also asked that we build a floor to ceiling fireplace surrounded by a mantle and window seats.
We hope that you enjoyed looking over these jobs as much as we whole-heartedly found pleasure in completing them. Each project was different - just like the clients who we had the opportunity to meet and get to know to thoroughly learn and fulfill their vision. Which each job we aim to make our customer’s dreams a reality while working within their budget and truly listening to them, It’s been a great year and we look to make 2016 even better!
Happy New Year my friends! And remember, we’ve been relieving home improvement stress since 1959 so if you like what you see or just want to call us for a free consultation, give this page a visit and contact us today!

7 Ideas to Decorate Your Home for the Holidays
The holidays are fast approaching, and what better way to bring in the cheer than by making your home a fun and festive place? Decorating, along with many of the other things that come with the holidays, can be a lot of fun. Here, we will give you seven awesome yet simple DIY decorating ideas that are perfect for adding a bit of magic to your bathroom, kitchen, doors, and windows.
1. Table Centerpiece
Start by taking a trip to your backyard or a nearby park. Gather branches that are not too long or wide. While you are at it, see if you can collect pinecones to bring inside. On their own, pinecones make a great decoration for your home, but you can also jazz these up a bit. Bring your branches and pinecones home and prepare your workspace for spray paint. Cover anything that you do not want to get paint on, and it may be best just to do this outside.
When you are ready, coat your branches and cones in gold and silver spray paint. You can even use glitter spray paint to add some sparkle to your project. Once you have covered the entire surface with paint, let your branches and cones dry. When everything is ready to go, arrange your pinecones in a clear glass vase on your kitchen table. Add the branches to the vase and hang lightweight ornaments on them. This rustic DIY decor will make the perfect centerpiece for your table!
2. Holiday Felt
Use felt to give your bathroom some holiday cheer. First, you want to find a sheet of felt that is big enough to fit as a rug on the floor in front of your toilet. Decorate the felt in holiday colors, or even make it look like Santa before placing it in front of the toilet. If you would like, you can even make a seat cover to match.
3. DIY Snowflakes
Also appropriate for your bathroom, or anywhere else in your home, you can make some DIY snowflakes using white paper. We all remember this one from elementary school. Simply fold your paper in half, and then fold it in half again. Cut whatever geometrical shapes you like, and unfold! Now repeat the process with several sheets of paper, making sure to cut different shapes out of each one.
When you are finished, you can poke a hole in the top of each snowflake and tie strings on each to hang them from your ceiling. You can also opt to tape these to the windows for a festive look that can be seen from the outside.
4. Ornament Wreath
Decorate your door with a DIY holiday wreath. For this project, you will need lots of ornaments, one wire hanger, and some pliers. At the dollar store, you can get packs of ornaments for 99 cents. Once you have your supplies ready, it is time to start. For the wreath shape, you want to take your wire hanger and bend it into a circle, but leave the hanger part intact and do not connect your circle ends yet. Use pliers to help you along.
Once you have your desired shape, you are ready to start stringing ornaments until you get to the end. Once your wire is completely strung with ornaments, you want to use your pliers to twist the circle closed. Your ornament wreath is now ready to hang!
5. Wine Bottle Decor
If you never knew what to do with those wine bottles you have yet to get rid of, this fun project just might be for you! You can paint your old wine bottles with acrylic paint, then decorate them and put them on your kitchen counter tops for a festive look. You can paint your bottles to look like Santa with red paint and a black horizontal stripe in the middle. You can also make Frosty the Snowman with white paint, three black buttons down the front, and a tiny scarf cut from felt.
6. Lights
Lights are always a great way to add some excitement to your interior. Try stringing lights along your windows to brighten up your home, or you could even add them around the perimeter of your door.
7. Paper Christmas Trees
This project is super easy and so fast that you can make tons of these in just a bit of time. To make these Christmas trees, simply form cones out of card stock circles and secure them with glue. You can decorate these cones by painting them with acrylic paint. They will be perfect to place anywhere in your home - once they have dried.
Decorating for the holidays is a fun, exciting project that is sure to add some happiness to your space. Take advantage of these seven projects for a fun, festive home this season.
Project Spotlight - North Caldwell, NJ Coffered Ceilings
It’s not every day that we get to work on a project like this and we are extremely proud of the outcome. We’d like to share our journey by providing you with a photo gallery and detailed descriptions of the renovation.
This job was completed in conjunction with master carpenter, Ken Prehart, and Terriann Loverde, who is the Owner of Personal Space Interiors and an incredible interior designer. With Terriann’s immaculate design skills and Ken’s artistic ability and dedication to his craft, the job took on a life of its own.
The customer asked that the RWC team design and build custom coffered ceilings in the kitchen and dining room. They also asked that we build a floor to ceiling fireplace surrounded by a mantle and window seats.
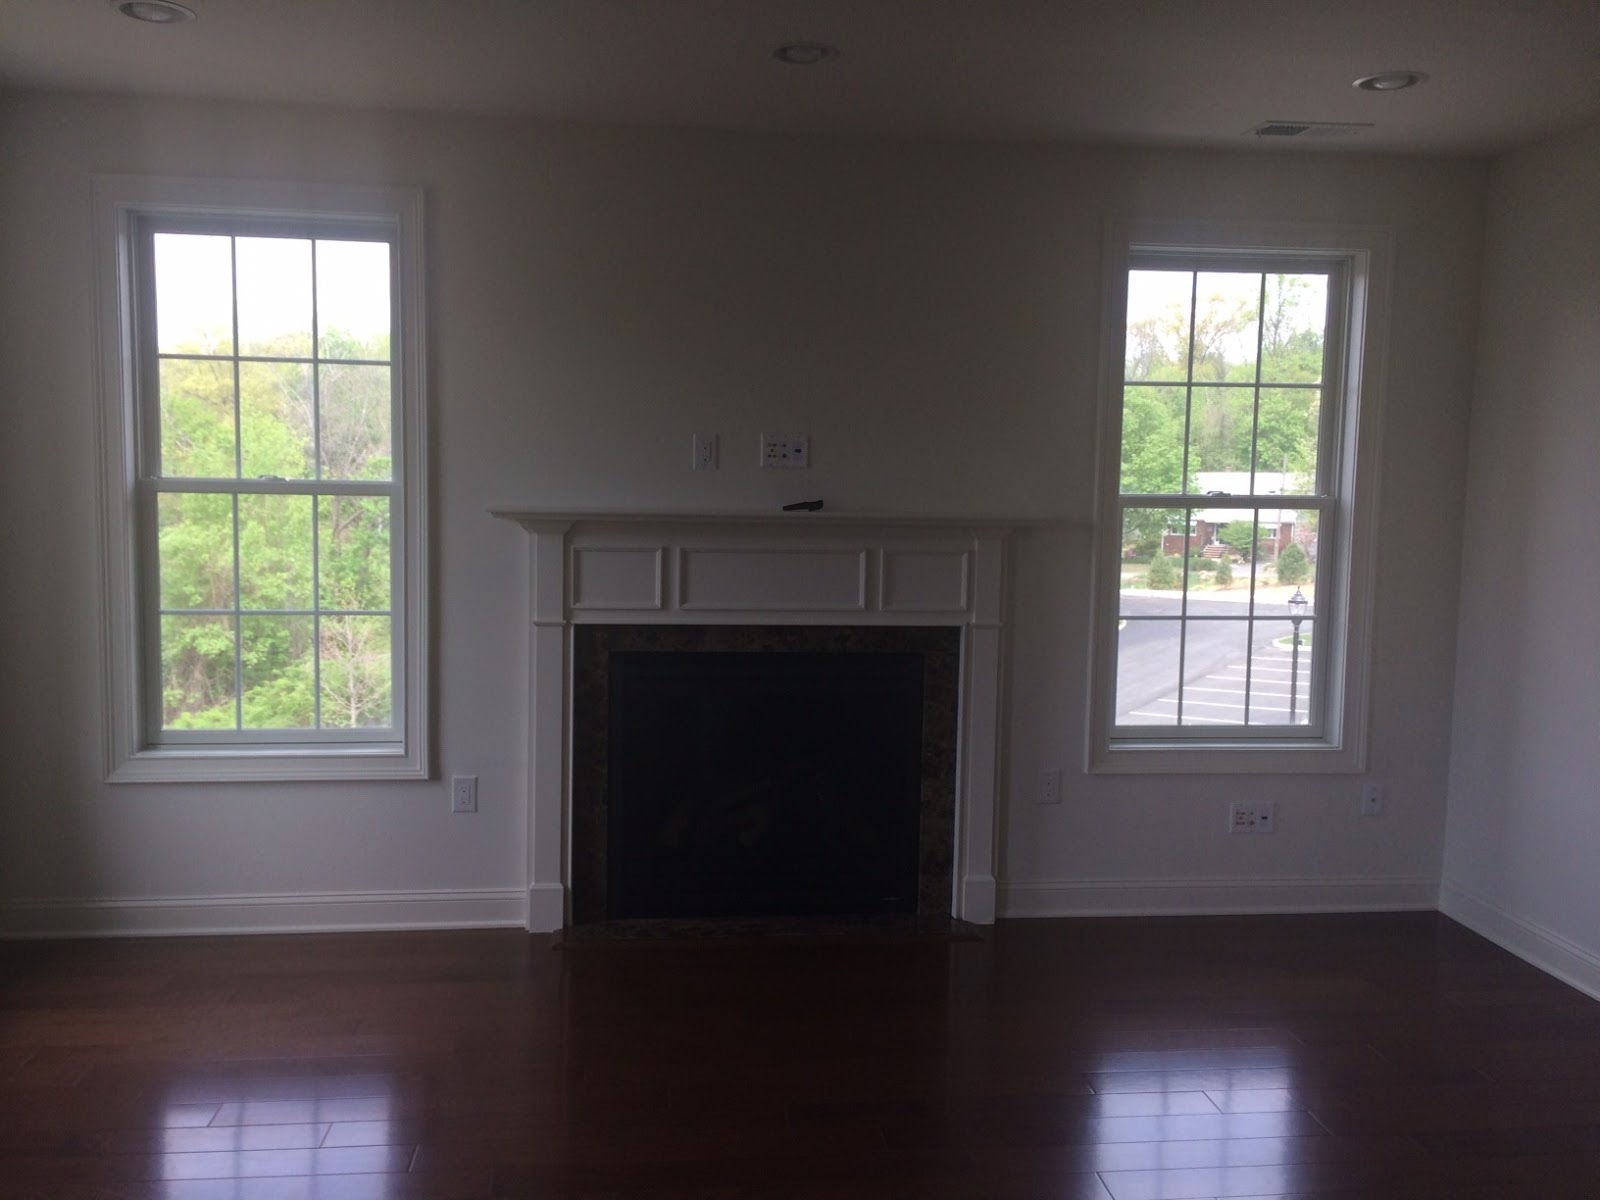
So you have an idea of what we started with, here is a before picture of the kitchen and fireplace before we started building:
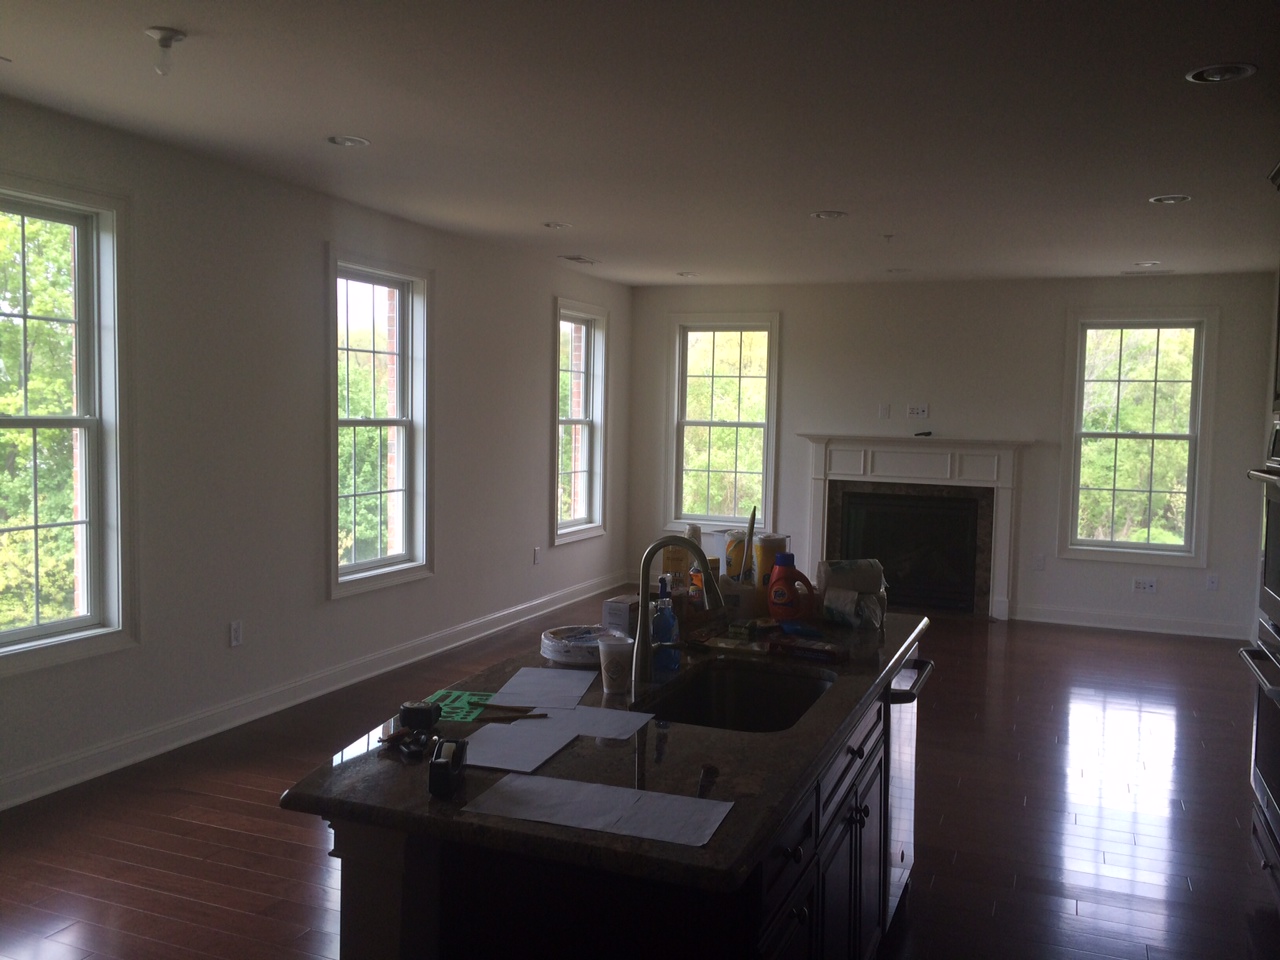
We definitely had our work cut out for us.
As you can see, the ceiling is flat and the mantle is bare. Here’s a close up:
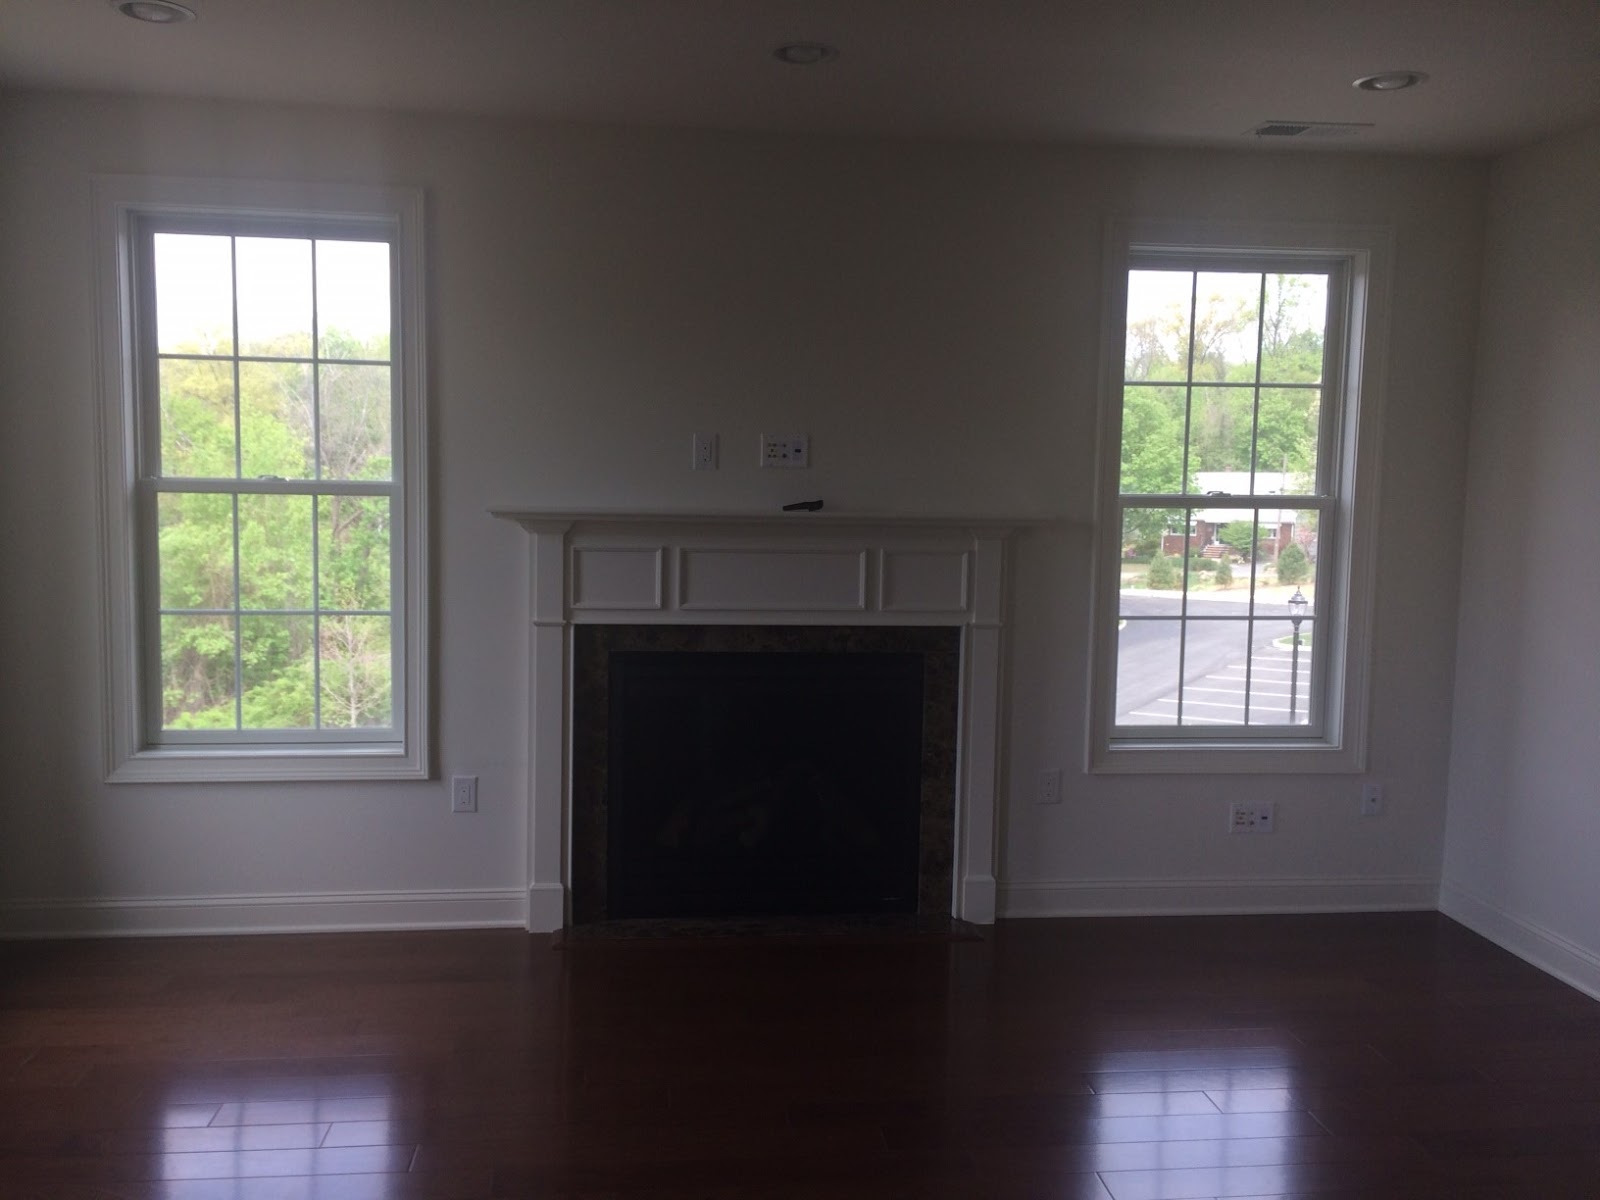
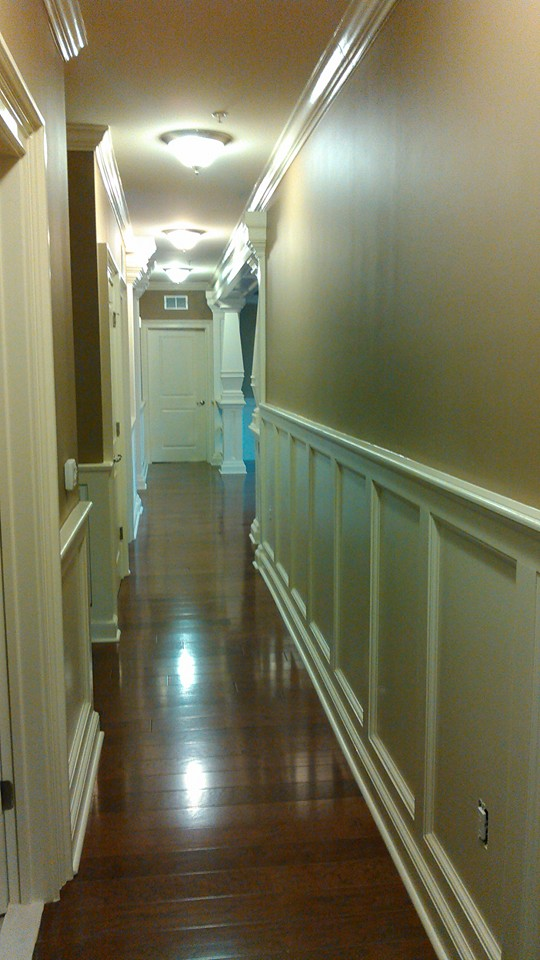
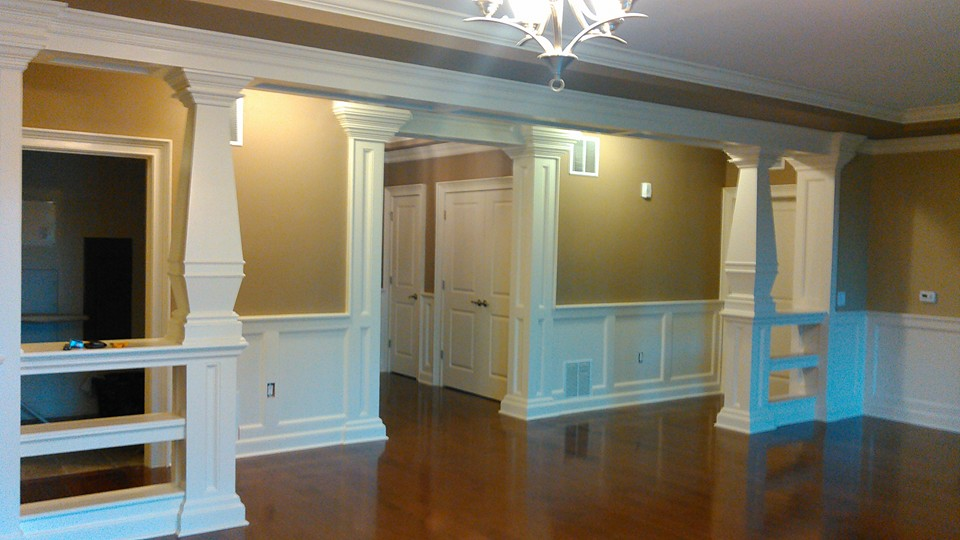
Custom built columns were installed at the entryway to the home with wainscot paneling throughout the house, which tied all of the rooms together.
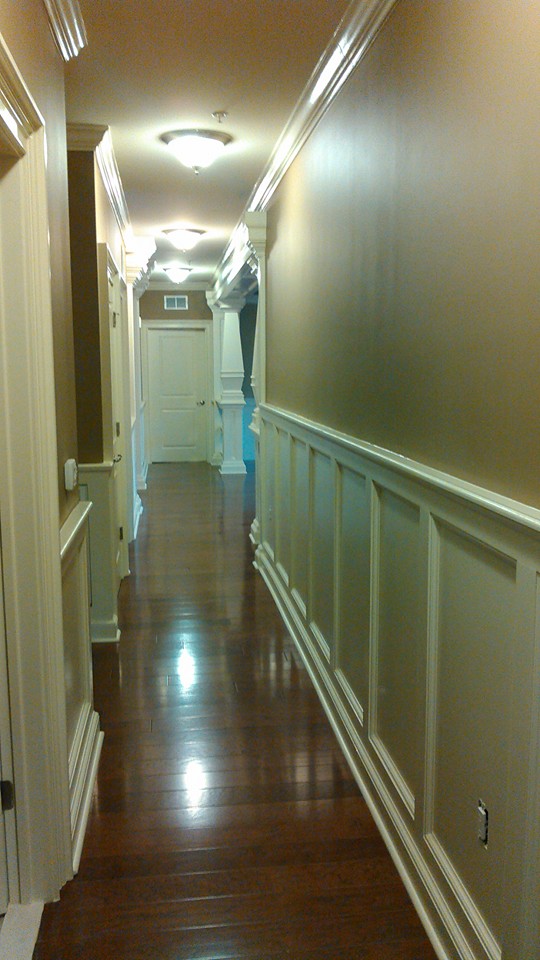
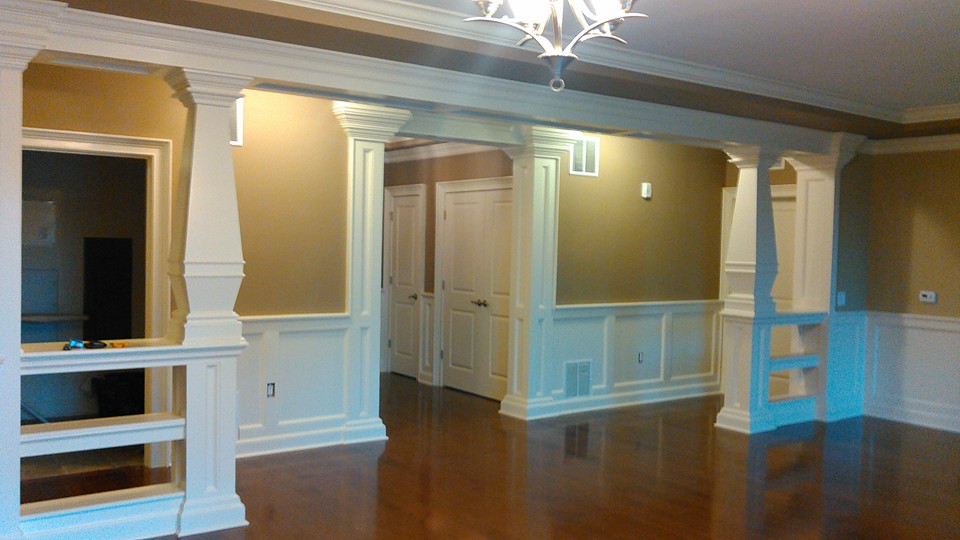
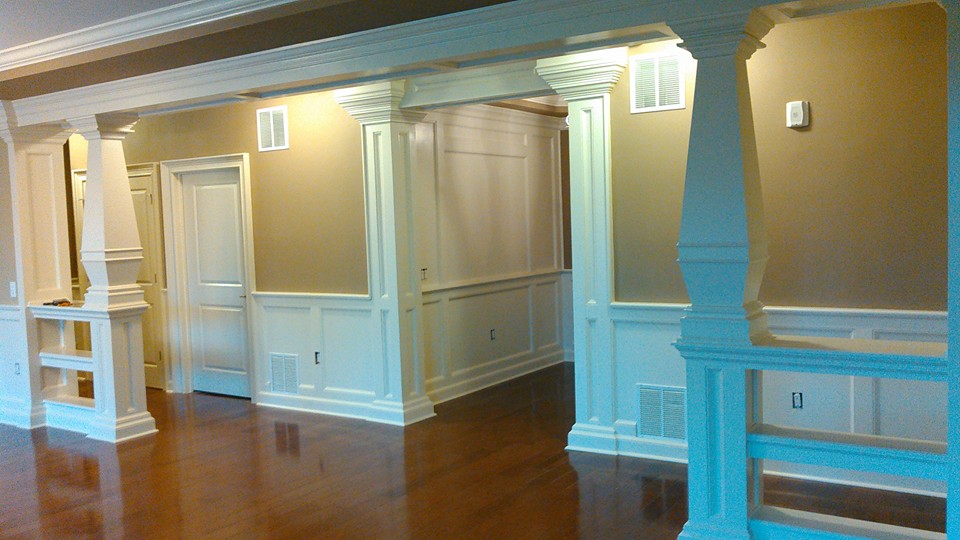
We built the mantle and window seats around the fireplace and left just enough space for a flat screen television to rest neatly inside:
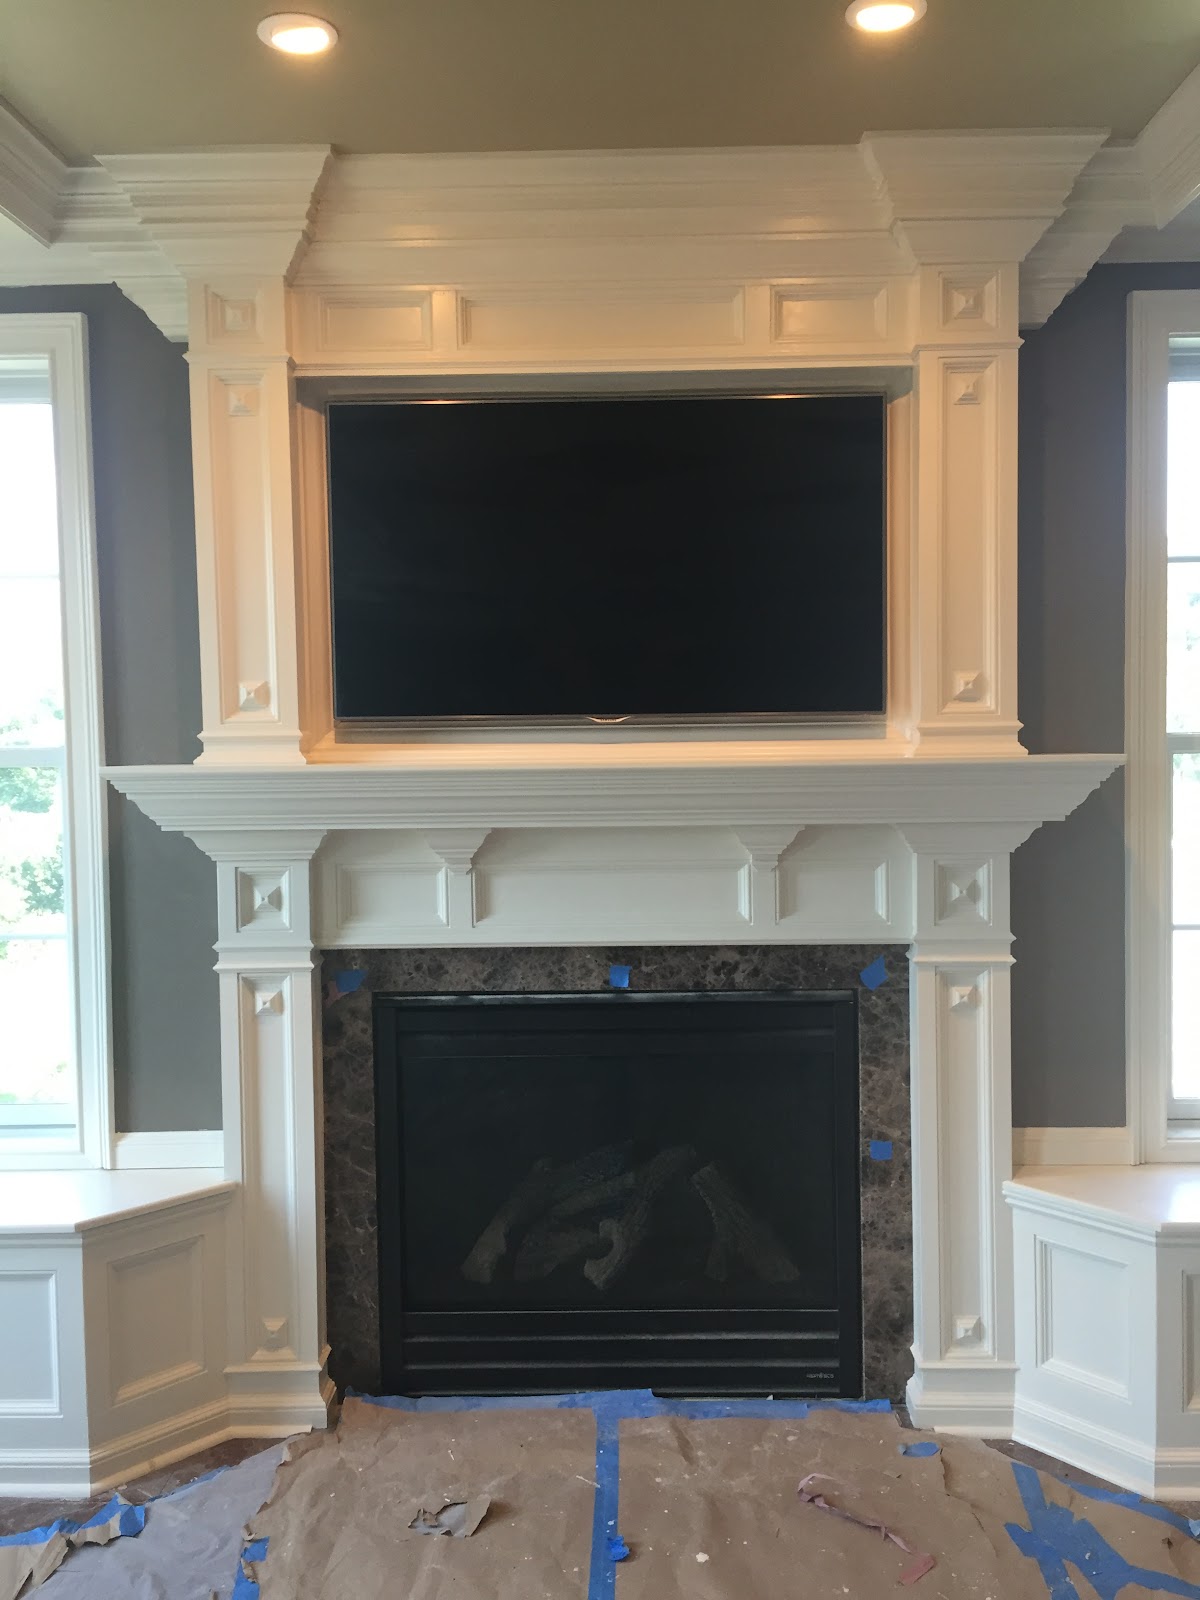
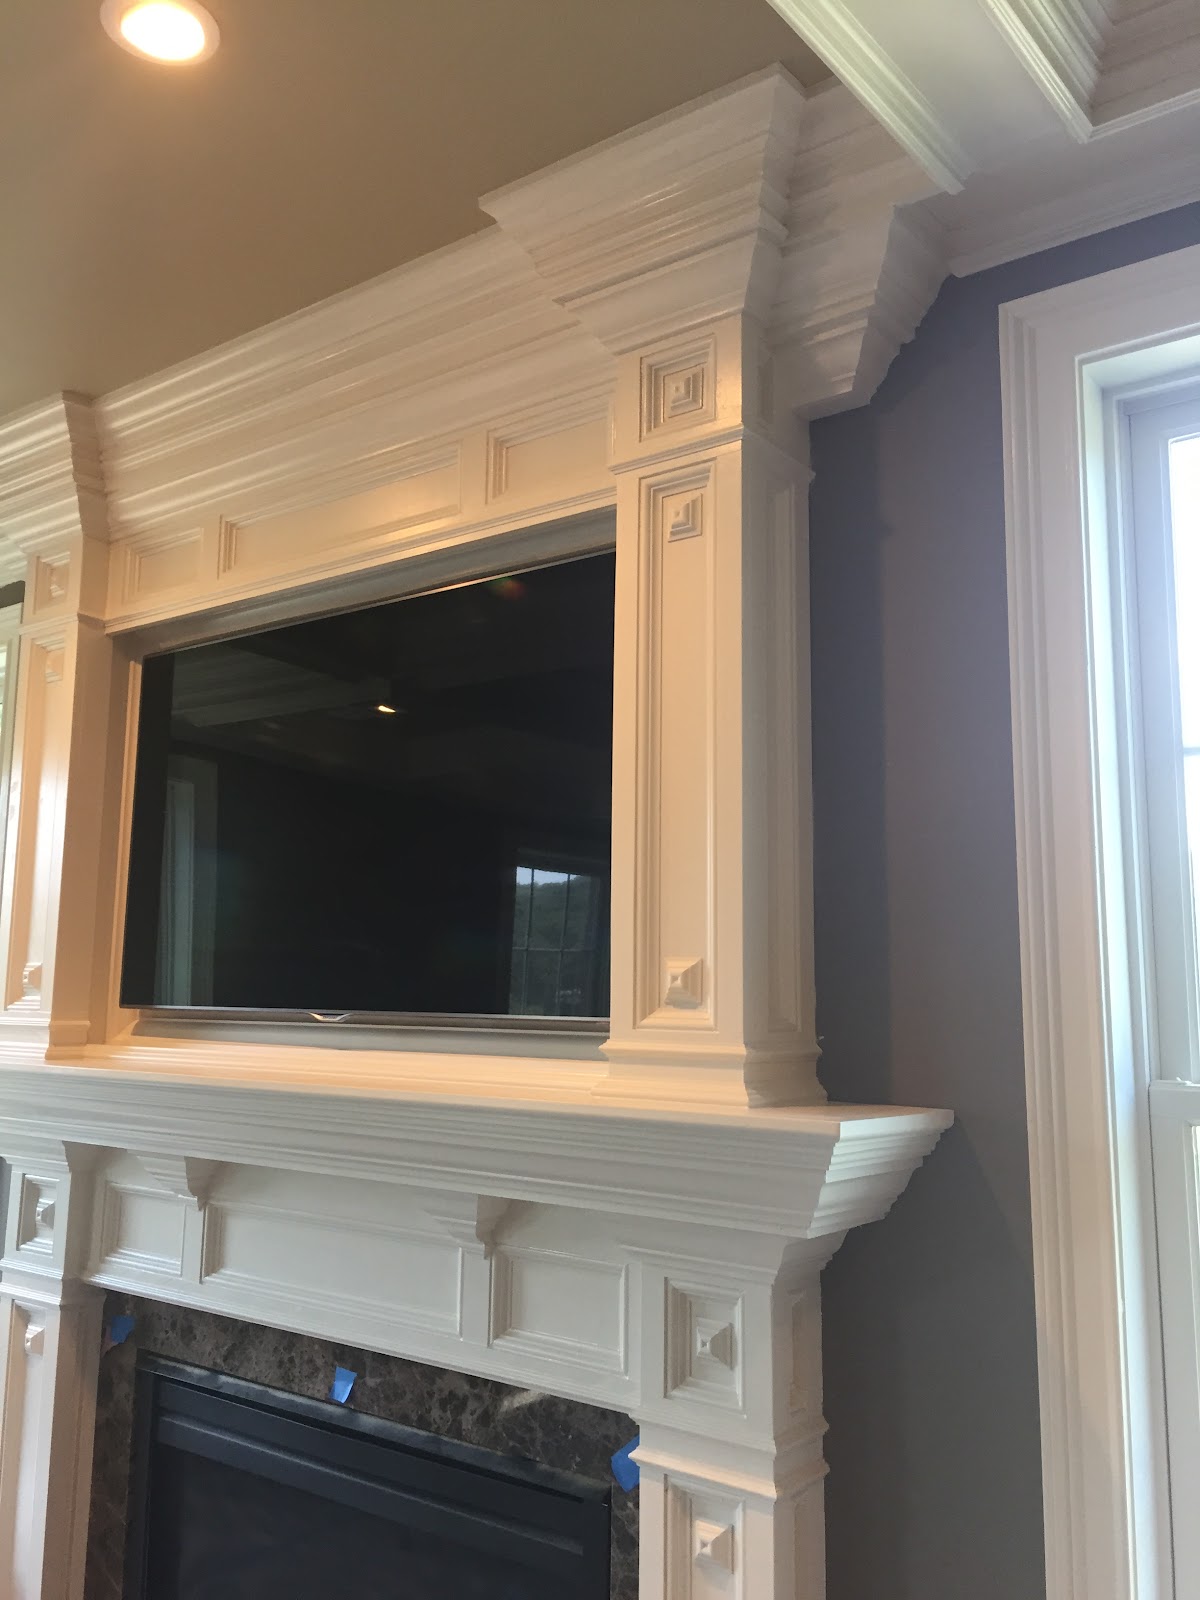
In the end, the customer and RWC couldn’t have been more impressed with the final result.
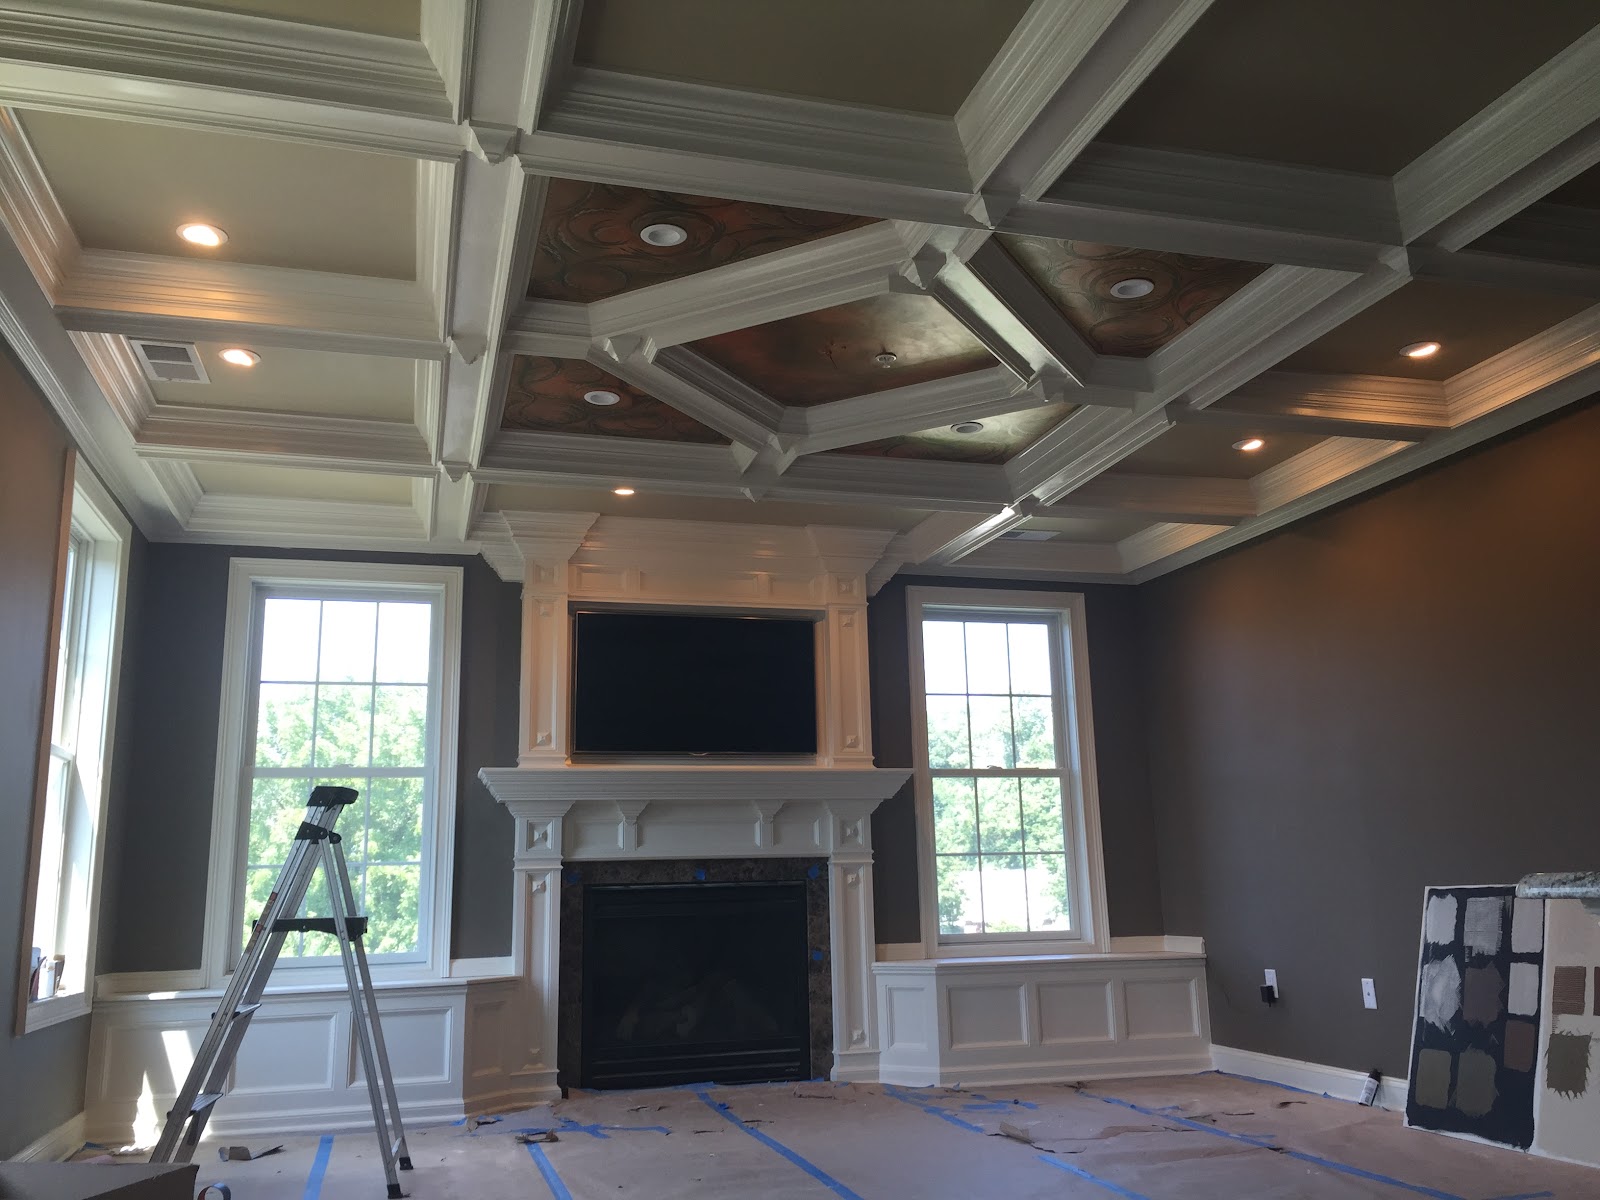
“Creativity and vision at its best” says Joe Giampapa of RWC.
If you like what you see, or have any questions about how to get started, feel free to give our friendly staff a call - we’ve been relieving home improvement stress since 1959, and we’d love to help you!
Five Ways to Organize a Kitchen for Maximum Storage
The kitchen is arguably the most important room in a home. Not only are meals prepared and eaten there, but it is also a common gathering space as well. The kitchen gets so much use, that it can be the victim of excessive clutter. Taking stock of the contents of your kitchen and spending some time reorganizing everything can breathe new life into the space. If you are overwhelmed by the clutter in your kitchen, follow these five steps from HGTV to bring some organization and sanity back to where it is needed, your kitchen.
1. Empty and organize the cabinets
This project is best left to a weekend day when you have some spare time on your hands. Pull out everything you have sitting in your kitchen cabinets. Go through each item individually and determine its usefulness, this will really come in handy when organizing your kitchen. Anything that does not get used or is a duplicate should be donated if it is in good working order and thrown away if it is not. Also, throw away any items that are broken or otherwise no longer functional. Once you have all the kitchen items you want to keep, group them into categories, putting similar-use items together. Group the items based on how it works best for you. Finally, reorganize the cabinets with the items that remain. Place the items where they make the most logical sense. For example, pots and pans should be placed near the stove.
2. Organize the containers
Containers can sometimes be the lifeblood of a kitchen. They have so many uses that they easily get integrated into the everyday workings of a kitchen and often get forgotten in the hustle and bustle of life. But, when they are out of place or missing altogether, they are sorely missed. So, they need to be treated with consideration. First, use as many clear containers for storage as possible. Clear containers are perfect for holding sugar and flour, and they are also great vessels for holding other items that need to be visible at a glance. A clear container is the perfect place to store small envelopes of seasonings that tend to get pushed to the back of the shelves and forgotten or small boxes of pudding or Jello that need to be contained. Containers are also essential for storing leftovers. While they are waiting to be used, these containers should always be stored with their lids. Get rid of any containers without lids and lids without containers. If possible, nest smaller containers in the larger ones to conserve space.
3. Find hidden space
Be an outside-the-box thinker. When you assess your kitchen storage space, do not forget to take vertical space into account. Making use of space that does not seem to be there can truly open up your entire kitchen. Install a series of hooks in your ceiling from which to hang pots and pans. This one change can clear out an entire cabinet that can be used for something else. Hang adhesive hooks on the insides of cabinets to allow for the kitchen storage of smaller items such as measuring spoons and measuring cups that take up a lot of space in drawers. Install a lazy Susan in a corner cabinet to make use of the space in back that otherwise is difficult to access. When you look at your kitchen through a different lens, it is amazing how much extra space suddenly appears.
4. Use drawer dividers
Kitchen drawers can become cluttered in the blink of an eye. It is just far too easy to mindlessly throw random items into a drawer with no rhyme or reason as to where they actually belong. Using drawer dividers can put an end to the needless act of haphazardly throwing anything and everything into a kitchen drawer and unwittingly creating a cluttered mess. Simply placing a divider in a drawer creates a “place for everything and everything in its place” scenario because a divider offers a specific place for all of those miscellaneous items that previously did not have a home. Immediately, everyone in the house will start thinking about exactly where every item should be placed. When everything in a drawer has a specified place, it is much easier to find whatever is needed at any given time.
5. Sort through papers
Even the most organized person can let simple pieces of paper begin to overrun a workspace. Since the kitchen is such a heavily-used room in the house, papers seem to come out of the woodwork. If there is not a specified place for all of the paper that is lurking about the kitchen, a disorganized mess is imminent. Thankfully, sorting through the various sources of paper is not difficult. Magnetic sorter boxes that can hang on a refrigerator are a wonderful solution. These boxes come in various sizes and are easily placed on the side of the refrigerator for easy access. Use these boxes to store items such as take-out menus, coupons, message pads, and even blank paper for jotting down notes. Don’t forget to throw a pen in there so you always have easy access to a writing utensil. Once all of these miscellaneous papers are off of your counters, your entire workspace will be clutter-free and organized. Plus, you’ll have the opportunity to remember what color you chose for your countertops.
The functionality of an organized kitchen can make or break its usefulness. The more organized a kitchen is, the better it will function. RWC has been helping homeowners in New Jersey remodel and reorganize their kitchens for decades. We haven’t met a kitchen yet that we have not been able to improve. If you are looking for organizational assistance in your kitchen, RWC can help you, too. If your kitchen is in need of renovation, check out our kitchen remodeling page.
We’ve been relieving home improvement stress since 1959! Call us at 973-227-7123 for a free consultation, or visit our RWC website to see how we can make your home improvement dreams come true today!
The Ultimate Guide to Choosing a Front Entry Door for New Jersey Homeowners
How to Choose a Front Entry Door
Have you ever taken the time to consider the effort that goes in to expertly choosing a modern front entry door? When faced with the task of replacing the door to a front entrance, many people go down to their local home improvement store and settle for whatever’s on the shelf. Sure, a pre-made and prehung front entry door will seem like the easy way out. However, that door will never be uniquely yours – there’ll always be someone else who has gone down to their local home improvement store and picked up that exact same door.
It’s a Comprehensive System
A front entry door has a multitude of functions – weatherproofing your home, providing a way for people to enter and exit your home, and keeping intruders out. The front entry door has design styles, lighting situations and privacy aspects to consider. It must not only be beautiful, but functional as well. What kind of locks do you intend on having? What kind of doorknob? Have you considered what type of glass the door may have? How about the sidelights or the transom? How about a kickplate or a knocker? We’ve only touched the tip of the iceberg here.
The Ultimate Front Door Guide
There’s so much to consider when choosing a front door that it goes without saying that you’ll be doing yourself a favor by putting some legwork and heavy planning into it. As you read this guide and plan how to upgrade your home’s most prominent feature, remember that this is just that – a guide. There are two goals here; the first is to be comprehensive, and the second is to be brief. On the surface, these two goals may seem to work against each other. Not today.
Common Entry Door Sizes
Have you ever wondered why local home improvement stores can offer pre-hung and pre-made front entry doors? This is because there is no standard front door size, front entry doors come in a small array of standard sizes. Of course, you shouldn’t feel limited by what you see here. It’s always possible to get your front entry door custom-made to your liking.
Standard Height: 80 Inches
Front entry doors have a standard height of 80 inches. That’s not the doorframe – that’s just the door. This allows enough room for most people to walk through comfortably without having to stoop over or lower their head to walk through. Your front entry door is also used to bring in all of your belongings. It is, for this reason that the front entry doors appear to be much larger than perhaps a bathroom door. I don’t foresee anyone ever having a need to carry a couch or dining room table through a door designed for a half-bath.
Single: 30, 32 and 36 Inches
The width of the door can vary. An ordinary bedroom door is either 30 or 32 inches. Single front doors are commonly 36 inches. This is what you see in 90 percent of the houses and apartments that you come across. Additionally, a door that measures 36” x 80” is what you commonly see at your local home improvement store on the shelf.
Double: 60 Inches (2 – 30 Inch Doors)
For a single front entry door, 30 inches can seem slimmer than most. That’s because most front entry doors are not 30 inches wide – they are 36 inches. However, a double door front entryway is commonly comprised of two doors that swing open on opposite sides. These doors usually come in the 30-inch size. Cutting off 6 inches from the width of a 36-inch door may not seem like a lot, but if you double it you’re actually cutting off and entire foot (6 inches X 2 inches = 12 inches) from the width of the entryway. Since you’re dealing with two doors instead of one, you don’t need that extra foot. Double doors are already almost twice as wide as single doors.
Front Door With Sidelights Configuration
How do you foresee your front door configuration? Do you know what a front door configuration is? As you can see below, there are nine different configurations you can have. Everything is considered – the exterior door sidelights, the transom and the door itself.
Square Top Entry Doors With Sidelights
A square top door is merely a door that does not have a transom. The transom is the little area directly above the door. It can be a panel, or it can be a window. It can give your door an arched look, or its design can be square and make your door appear much taller than it is. Sidelights, on the other hand, are windows that run the height of your door, and are placed on the sides of the door.
Single Door
This is the most common configuration because it is the most basic. It consists of one feature – the front entry door.
Double Door
Much like the single door, this is another typical configuration because of its simplicity. It also showcases a single feature – two doors.
Door with One Sidelight
Sidelights are usually placed on single door configurations – but not always. In this particular configuration, you have a front entry door with a window on the side of it. The window is narrow – usually in the realm of 6 inches wide. The height, however, runs from the floor and is as tall as the door itself.
Door with Two Sidelights
This configuration has an entry door with side windows on both sides of the door.
Two Doors with Two Sidelights
This is a double door configuration with two sidelights – one window on either side of the set of doors. Notice that we don’t mention two doors with a single sidelight. Two doors with a single sidelight is the least common configuration – but, if that’s what you want, it is more than possible.
Arched Top Doors
Doors with arched tops are not very common. They can certainly fall into the realm of custom-made front doors. However, an arched top door does not necessarily mean that your front door is arched. It can merely mean that your front door has an arched transom. Most arched top door configurations must be made so that the arc reaches from one edge of the configuration to the other edge – side to side. This means that the width of your arch will need it to cover the sidelights – not just your front door.
Single Door Arched Top
This is the configuration wherein you have a single door with arched top. The width of the arch is determined by the width of the door, plus the width of the sidelights (if any).
Double Door Arched Top
Just like the single door arched top configuration, the double door arched top is a configuration where you have two doors with an arch on top. You will never see a double door configuration with two arches. Instead, the width of the arch is the width of the entire door frame – plus the width of the sidelights if you choose to have any.
Square Top Doors with Transom
Transoms are generally square and flat on the top. They can contain a window to increase the amount of light that shines through, or they can be made to create the illusion that your door is much taller than it actually is. Transoms add a measure of depth to your front entry door.
Door with Two Sidelights and Transom
This configuration has a transom that is just as wide as the door and two sidelights. Adding a transom with this configuration adds a degree of sophistication and depth to your front door.
Double Door and Transom
Generally, if you have a double door with a transom, you have double doors and two sidelights. The width of the transom matches the width of your double door frame with the sidelights.
Entry Door Material
Now that you have an idea of front door configurations, let’s just take a second to talk about the materials that your front door can be made from. The materials that front doors are made from must meet a set of requirements. They must be strong enough to keep the elements out and sturdy enough to keep intruders at bay, yet at the same time be beautiful enough that people would want to use it as the entrance to their home. Front doors are often a prominent feature, focal point, of every home. You see, every home has a front door. Not every house has a garage, a front yard, or even a driveway. A front door is something that every single house has.
Fiberglass
Fiberglass is a manufactured material that is designed to be weather resistant, durable and is an all-around quality material for the front door. Exterior fiberglass doors won’t warp, fray or rust. It is also available in a variety of colors, making paint a thing of the past.
Steel
Steel is a very common material for front doors. However, solid steel doors are not. Usually, an exterior steel front door will be plated with steel on the front and steel on the back. Sandwiched in between these steel layers will be a layer of solid wood. After all, it’s much easier to drill through wood than steel. I bring that up because every front entry door must have holes drilled in it for the hardware. How else are you going to get a doorknob on there?
Wood
Wood is the most classic and luxurious of front door materials. It is also the most expensive to buy and the most costly to maintain. It must be weatherproofed – which usually means it needs to be repainted every couple of years. The same routine applies to stain. Whether you choose to stain your front door instead of painting, it doesn’t matter. You will need a fresh coat of whatever you choose every couple of years.
Flush Versus Paneled
This has to do with the look of your front door. A flush door is completely flat. It looks like someone just put up a board and called it a door. A paneled front door is extremely common because of its quiet and subtle beauty. It is most common for doors to have six panels. These are the six rectangles you see built into the face of the door for decoration purposes. They add a level of depth and shadow to the door.
Surface Type
Surface type is another consideration you have to look at when you are choosing your front door. Surface type has to do with the physical feel of the surface of the door. It will determine how your door looks and handles finishing materials like stain or paint.
Smooth for Paint
If you are planning on painting your front door, the smoother you can get the surface, the better. Woodworkers will always tell you that you need to sand a surface before you paint it. Furthermore, it will take several coats of paint – so the smoother you can get it, the better your front door will look and feel.
Textured for Stain
Stain is the other option for wood doors. Stains come in many colors. However, every color has one thing in common – you can see the wood grain underneath. This is actually why people choose to stain wood rather than paint it. The most expensive front doors have wood that is cut in a unique manner to bring out the grain in the wood and make it ideal for staining.
The Ultimate Front Door Style Guide
If you’re having a tough time choosing a material or configuration for your door, consider putting your selection through the style guide process. It’s a little more cut and dry. If you tell someone you want a particular style, then they instinctively know what you’re talking about.
Dutch Doors
A Dutch door is one that is physically split horizontally, in the middle. This allows you to open the top section of the door while leaving the bottom section closed. In other words, the upper and lower halves of the door swing open independently of each other. There is a bolt installed between the top half and the bottom half to lock them together so that the door can swing like a standard, single unit door.
Contemporary Entry Doors
Contemporary doors are those that have a minimalistic look. Many people attribute them to the 1950s era. This is a style that usually incorporates custom-made glass panels for the door. You’ll notice that many of these doors are flush, off-center and are built with simple lines for an unpretentious design. Although these doors can be stained, they much more commonly painted with a bright, offbeat color.
Craftsman Style Front Doors
Craftsman style front doors are often called Bungalow doors, Cottage doors, Cabin doors, or even Arts and Crafts doors. These doors are often stained and made of wood. You’ll recognize these doors because of the exquisite, classical design built right into them.
Decorative Doors
Decorative doors often fall within the vicinity of custom-made doors. These are the doors that are made of materials such as wood, wrought iron and glass. You may see a door that has ornate woodwork on the bottom half and an exquisitely designed top made of frosted glass with an iron inlay. The wood is often stained a rich, dark and warm color.
Classic Doors
Classic doors have been used on homes for several decades. Manufacturers have figured out a way to make several different designs from a few configurations. For example, you may see a double door front entryway wherein each door has an oval shaped piece of glass in the middle. It is in this piece of glass that the true design work shines through.
Rustic Entry Doors
Rustic doors are fun to have. They often have an Old World charm to them. You’ll see a mixture of wood and iron – but no windows. You’ll also see doors that contain nothing but straight lines. Even the most well-made and robust, rustic entry doors can be made of nothing more than a few boards. You’ll recognize the rustic entry doors because their simplicity is highlighted in the design.
The Ultimate Front Door Glass Insert Guide
Glass inserts are one of the most common ways manufacturers take classical designs and redo them to make it look like it has been custom made. They do this because the finished product can be strikingly different from anything else they’ve ever created. There are several different ways to make this possible.
Design Considerations
When you’re talking to a front door company about the possibility of owning and installing a brand-new front door, glass inserts are something that they will most certainly go over with you. If you want to be informed beforehand, or if you’re just curious about how they do it, then these design considerations are for you.
Clear
Clear glass is the most common glass available. This is the kind of glass that you can see right through. As a result, it also lets the most light in and has the least amount of privacy.
Decorative
Decorative glass is often custom-made and is gaining popularity in American homes today. It can be a combination of textured glass, colored glass or inlaid with iron – called caming - to keep the pieces of glass together. Having decorative glass in your home can result in a higher perceived home value due to having something aesthetically unique.
Textured
During the manufacturing process, glass is impressed with a distinct texture, and left that way. Textured glass falls right in the middle between translucent and opaque. Every piece of textured glass is unique and comes in a wide variety of styles, opacity, and even comes tempered.
Baroque
Baroque glass is unique in the fact that in its manufacturing process, it creates swirls of texture, enabling a series of lighting situations that can inspire a sense of beauty within the glass. Just like the textured glass, every piece is unique. However, Baroque glass appears to be custom-made, while textured glass does not.
Stained
Everybody knows about stained glass. This is where you take several pieces of colored glass and inlay them with iron to create a picture or design. Historically speaking, stained glass has been popular in churches, buildings and front entry doors.
Caming
Caming is the process of using iron to connect two or more pieces of glass together to create one solid piece. As a whole, this piece of glass is used as a glass insert for front doors and can be customized.
Performance Considerations
Front doors have many jobs. Being able to perform its function as a front door is one of them. Who would have thought? Glass is often seen as a delicate and decorative material. With that in mind, the glass must meet certain standards before it is installed in front entry doors - no matter which style you choose.
Safety
When you add glass to your front door, there is an assumption that that the door still offers both safety and security. In the case of glass, safety usually refers to the risk of injury one can incur when the glass is broken or shattered. It can also refer to the ability to keep inclement weather out of the house and protect the house’s occupants. This is especially true if you have children in the house – either tempered glass or impact resistant glass works best. Tempered glass is four times less likely to shatter than standard glass. On top of that, when it does shatter, it shatters into uniform, small, blunt pieces instead of the long, thin, sharp shards that we are accustomed to associating with broken glass.
Privacy
We can’t have it all. A privacy rating for glass has to do with its translucence. On one side of the scale, you have a translucent, clear piece of glass. On the other hand, the glass is opaque and doesn’t let any light through. Your glass will need to fall somewhere in the middle and be somewhat transparent. A measure of privacy is usually desired, but then again, so is the ability for the glass to let light in the house. You’ll have to pick your battle on this one.
Energy Efficiency
The most energy-efficient glass inserts you can have consist of more than one pane. A single pane of glass is not energy-efficient, as it can quickly allow the outside temperature to seep into the house. However, double paned – or even triple paned – glass inserts have space in between the pieces of glass that are filled with either pressurized air or gas for thermal insulation.
Curtain Care
The sun’s rays have a damaging effect on cloth. We can see the effects of that in the fading color of our cars, carpets and our curtains. To protect the curtains you hang to cover the sidelights of your door from fading, make sure that your glass is coated with something called “low-E” or “low emissivity.” This special coating acts as a semipermeable layer that blocks out the sun’s harmful rays and lets the rest of the light in the house.
The Ultimate Front Door Color Guide
What color should your front door be? Before you decide on a color, let’s look at it the rest of the colors surrounding the front door. To really dive into this issue, let’s look at it over time. Summer colors are very different from winter colors.
What Type of Home Do You Have?
The kind of home you have plays a large role in the color you should be choosing. Often, you may need to seek out the expert advice of an interior decorator. I know what you’re thinking. The front door is an exterior piece. So, why do you need to hire an interior decorator to help you choose? Interior decorators are experts at picking the right color and bringing the most value to your home. Home styles usually influence the door type and color.
Country
In America, the most popular style of home is the country home. It epitomizes America’s history with its dual levels, classic angles and roomy designs. These homes usually have porches, lap siding and shuttered windows.
Colonial
Evolving from European influences from the 1600s, these homes often emphasize the front door. Most colonial homes often share a set of characteristics. They are generally rectangular in shape, symmetrical, and feature the front door in the front middle of the home.
Ranch
Unlike the country style or colonial style, ranch-style homes have one story. They are built wider than they are tall. If you look at one of the floor plans for ranch-style home, you’ll notice that it can be distinctively divided into the living areas and the sleeping areas.
The Current Color of Your Home
The present color of your home can influence the color of your front door. Your door needs to match the color palette for the rest of the house. It needs to stick out and be prominent, but not be an eyesore. Doors are supposed to be elegant – and they can be that way if you do it right.
Primary (Body Color, Roof Color)
The primary colors of your home consist of the main body color and the roof color. Although the body the house may be a vibrant color, you will usually find the roof to be a shade of gray or another neutral color.
Secondary (Trim)
The trim is designed to complement the primary color of the house. Look for this color on the edges of your home, window frames and doorframe.
Other Color Considerations (Yard, Seasons, Natural Surroundings)
Consider the other colors that are prominent in your yard. These include the color of the leaves, flowers and other plants. It may be summer or fall now, but what about in the winter? What will your yard look like then? How will seasonal colors influence the decision you make on your front door color?
The Ultimate Front Door Hardware Guide
We’ve talked about colors, materials, styles and everything in between. We have yet to speak about hardware options. What type of lock are you planning on getting? Are you considering a door knocker or a kickplate? Do you want a doorknob or a door handle? What type of material are you looking for? Have you considered the kind of finish the hardware will have?
Definition
Just like the rest the front door, carefully consider what kind of locks, knockers, or other pieces of hardware you want on your front door. The right series of hardware will add a sense of elegance to the entrance of your home. The pieces you choose need to stand up to the elements, keep out intruders, and add to your front door – not take away from it. Carefully consider all your hardware options before you make any purchasing decisions.
Locks or Locksets
One may think that the only piece of equipment the front door needs is a lock. After all, how are you able to keep people you don’t want in your home on the outside? Don’t you want a sense of privacy? A quick trip down to your local hardware store will instantly tell you that there is a slew of options to choose from when it comes to locking your front door.
Tubular
Tubular locks are the most common locks. They’re installed on virtually every door. If you look on any interior door of your house, chances are you have a tubular type doorknob on it. As you twist the door handle, the piece of hardware that sticks out of the door gets pulled into the door, allowing you to open the door.
Mortise
Mortise locks are considered heavy-duty residential locks. A successful installation is complex and usually requires professional installation. They have a wider and thicker deadbolt connected to the entry latch which engages when the door is locked. If you plan on spending any kind of money on your front door, consider the mortise lock – you won’t be disappointed. Note that on mortise locks, you don’t have the standard door latch that catches in the doorframe when the door is closed.
Electronic (Keyless)
Electronic locks are characterized by the electronic keypad that has a code programmed into it to engage or disengage the deadbolt. Not all electronic locks are keyless – however, all keyless locks are electronic. After all, something has to give you the ability to lock and unlock the door, right? As its name implies, electronic locks are battery-operated. If you’re going to go this route, make sure that your electronic lock can also be operated with a key. If the battery dies, you always have your old-fashioned key to keep yourself from being locked out.
SmartLocks
SmartLocks are something else entirely. These are relatively new devices that can be accessed remotely. For some people, that’s OK. For others, these locks imply a degree of danger because they can be accessed by other people remotely. These are often Wi-Fi enabled locks that can be accessed through the Internet using your tablet or smartphone. Some people like the ability to control the lock on the front door with their phone.
The most impressive features of smart locks include Bluetooth recognition, one-touch entry, flexible security with key codes, customization that allows you to turn on and off various codes at different times of day, a code-based greeting when someone enters the home, email notifications whenever someone enters your home, and smart home integration.
Deadbolts
The deadbolt is the piece of metal that sticks out and goes deep into your door frame, preventing your door from being opened. When you’re looking at deadbolts, try to get one that has a separate, tubular piece of metal implanted in the center of the deadbolt. This makes it much tougher for someone to force their way through a deadbolt using a saw.
Handles or Handle Sets
This is where you can go crazy in your design choices. There are a million and one different handle set designs you can choose from for your front door. They can be very ornate or very plain. They’re made of different materials like brass or polished nickel. Ultimately, you’re going to want your handle or handle set to match the rest of the hardware on your door. This is commonly a purely aesthetic decision.
Levers and Knobs
Along with the handles and handle sets, you can choose from various levers and knobs. For any handle or grip that you choose for your door, installation is twofold. There is a plate on the inside and a plate on the outside. A sectional entry set has a separate plate for the deadbolt, the top of the handgrip, and the bottom of the handgrip. A monolithic entry plate has a plate that spans the length of the deadbolt and the grip and then a separate plate for the bottom of the handgrip. A full-length entry set has one single plate that attaches the deadbolt, top of the handle grip and the bottom of the handgrip.
Hinges
Your hinge selection is often secondary. Make sure that your hinges can only be accessed from inside of the house, not the outside. This prevents forced entry. The only thing you need to do here is to make sure that the finished metal on the hinges matches the rest of the hardware of the door.
Accessories
Now that we’ve talked to you about almost everything there is to know concerning locks and handles, let’s go on to the accessories that are available for finishing the look of your front door.
Door Bumpers
Door bumpers prevent your front door from damaging other parts of your home as it swings open and closed. You can find door bumpers installed in the baseboard to prevent the door handle from damaging the drywall, or you can find a door bumper installed in the hinge of your door to keep it from damaging the drywall that way. That’s the whole purpose of the door bumper – to prevent damage. When the door opens, the door will hit the door bumpers safely, instead of putting a dent or hole in your wall.
Door Stops
Door stops come in two varieties and can be installed at the bottom of the door and placed on a hinge so that all you have to do is use your foot to engage the doorstop to prevent the door from closing. The second variety is the third party doorstop. This is usually a triangular piece of rubber or wood that you place in front of the door to prevent the door from closing on you. Doorstops are much safer than using heavy objects such as bricks or chairs.
Doorbells
The only door in your house that gets a doorbell (usually) is the front door. Doorbells let the occupants of the home know that someone is at the front door. The most basic type of doorbell emits the familiar “Ding Dong!” sound that we have all grown to know and love. That sound is usually made mechanically. However, doorbells can also produce this sound (and more) electronically. Electronic doorbells usually come with a range of options. Some even play songs!
Door Knockers
Before the era of doorbells, people had door knockers. Nowadays, door knockers are not as prominent as they used to be. As of late, door knockers are usually reserved for decorative purposes. However, they can still be used to knock on your door. Door knockers are usually placed at eye level and they are typically on hinges. When you lift the door knocker up, you can let it fall or use it to knock on the door manually. The effect – you guessed it – is that it knocks on the door so your hand doesn’t have to.
Leave the Hard Stuff to the Experts
As you can see, front doors are not simple creations. They are complex and eloquent machines that require a high degree of precision and sophistication to install correctly. They are large pieces of hardware that protect you – the home’s occupant – from the outside world. Since it is the main entrance to your home, it is opened in all seasons. Therefore, your door needs to be sturdy enough to provide protection and insulation from the heat, cold, and whatever storms may come your way.
As a homeowner, it is up to you make the aesthetic decisions for your front door. You can choose how everything looks – from the manufacturing material, the color, the finish of the hardware and more. Because of the degree of precision that’s involved when installing not just the front door but the hardware as well, hiring an expert is a must. Don’t endanger your investment by trying to do this yourself. Quality front doors are not cheap. They can range from $600 on the low end to $5000 on the high end. If you’re anything like me, you know that money doesn’t grow on trees.
The first step to protecting your investment is taking a step back and contacting RWC. We’ll handle the installation and everything else so you don’t have to.
Energy-Saving Window Treatment Ideas
Energy conservation is something that many people want to achieve but are not sure how to go about it. A great way to turn your house into an energy-saving machine is to install energy-efficient window treatments. This simple change can allow homeowners to reap untold benefits. Keep reading to learn about some energy-efficient window treatment choices.
Awnings
Installing awnings over your windows is a fabulous way to conserve energy. Energy.gov states that awnings can reduce heat gain in the summer by as much as 65% on south-facing windows and 77% on west facing windows. Awnings can be installed over just one window, or they can be custom-fit to suit all the windows on one side of the house. Today's awnings are made of synthetic fabrics that are water-repellent and treated to resist mold and mildew, as well as fading. So, they are designed to last a long time. It is important to note that awnings must be ventilated, so hot air does not get trapped around the window. Also, homeowners should choose light-colored awnings that will reflect more sunlight than the darker-hued counterparts. Homeowners who install adjustable or retractable awnings can keep them rolled up in the winter to let sunlight into the house, which can also help to conserve energy.
High-reflectivity films
High-reflectivity film helps block heat gain in the summer months. This product works best in climates that have long cooling seasons because they also tend to block heat in the winter. The effect of high-reflectivity films can vary, and is dependent on a number of factors including to following:
- The size of the window glazing area
- Window orientation
- Climate
- Building orientations
- Whether the window has interior insulation
Homeowners that choose to go this route are better off purchasing silver, mirror-like films than the transparent, colored ones, as they are more effective. Homeowners should also note that these window treatments do not work well on north-facing windows. There are a few other disadvantages to these window treatments as well.
Insulated panels
Insulated window panels consist of a rigid foam board that acts as insulation. Typically, they can be installed by simply pushing them into place. They can be sealed with either magnetic tape or Velcro. A bonus to this type of window treatment is that it requires no hardware such as hinges or latches to install. Insulated panels have R-values, which measure resistance to heat flow, ranging between 3.8 and 7. They are also inexpensive. The only downfall of these energy-efficient window treatments is that the homeowner needs some place to store them when they are not in use.
Storm panels
Storm panels can be added to single pane windows to prevent winter heat loss. This type of window treatment can cut heat loss by as much as 50%, which can result in a drastically reduced heating bill for a homeowner. This option is less expensive than investing in double- glazed windows. Further, storm panels can be added to either the exterior or interior side of the window.
Exterior panels - There are two types of exterior panels: single and combination. Single storm panels are meant to be installed in the fall and taken down in the spring. They are generally made from glass, plastic sheeting, or rigid plastic. Combination panels are comprised of two window panes and a permanent screen over the window. The panes can slide up and down for ventilation in the summer. Exterior panels must be custom-made to fit the windows.
Interior panels - Interior storm panels are made of flexible or rigid plastic. They are mounted using materials such as Velcro or snap-in seals. Flexible panels are easy for a homeowner to install. However, they are not as clear as the rigid ones. Interior panels are meant to be installed before there is a need for running the heat in the house and should be taken down before the air conditioner needs to be used.
Shades
Window shades may seem like ordinary window treatments, but they are actually an easy and effective way to conserve energy in the home. To be the most effective at saving energy, they should be installed as close as possible to the glass with the sides of the shades close to the wall to create a sealed air space. Shades should be lowered in the summer, especially if they are in direct sunlight. Dual shades that are highly reflective on one side and heat-absorbing on the other are the most ideal. Other types of shades that help a house to be energy-efficient include quilted roller shades, roman shades, and pleated shades.
An easy way to conserve energy in your home is to install energy-efficient window treatments. Making a conscious effort to make even a small change such as installing new window treatments can help homeowners save both money and the environment.
Thanks for reading our blog. If you need to speak with a professional about new windows, please contact us today.
Project Spotlight - East Hanover, NJ Kitchen, Living Room & Dining Room Remodel
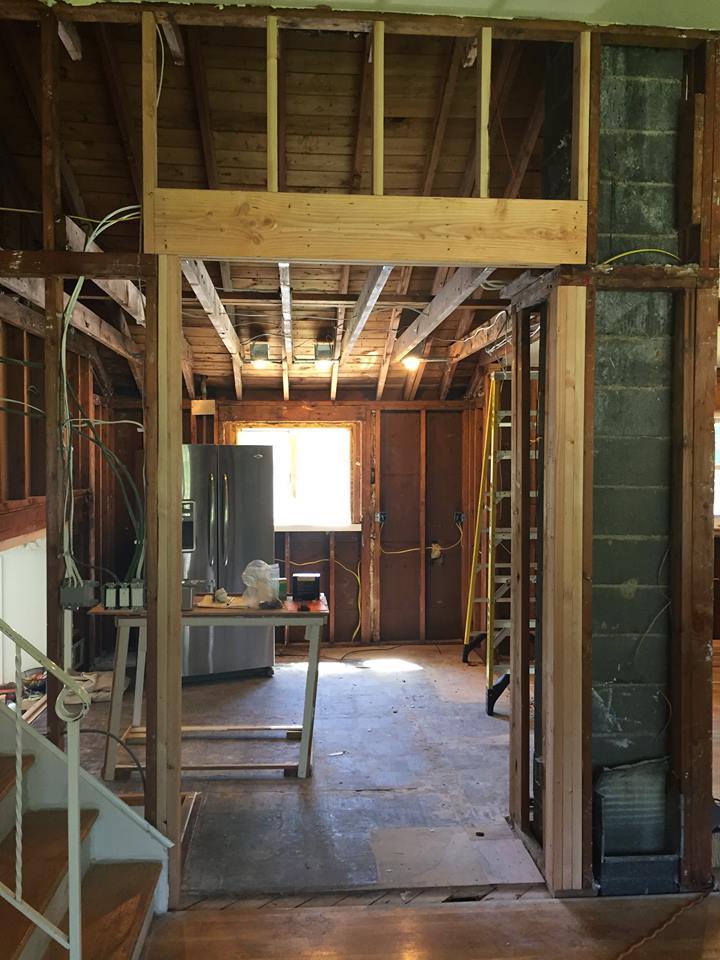
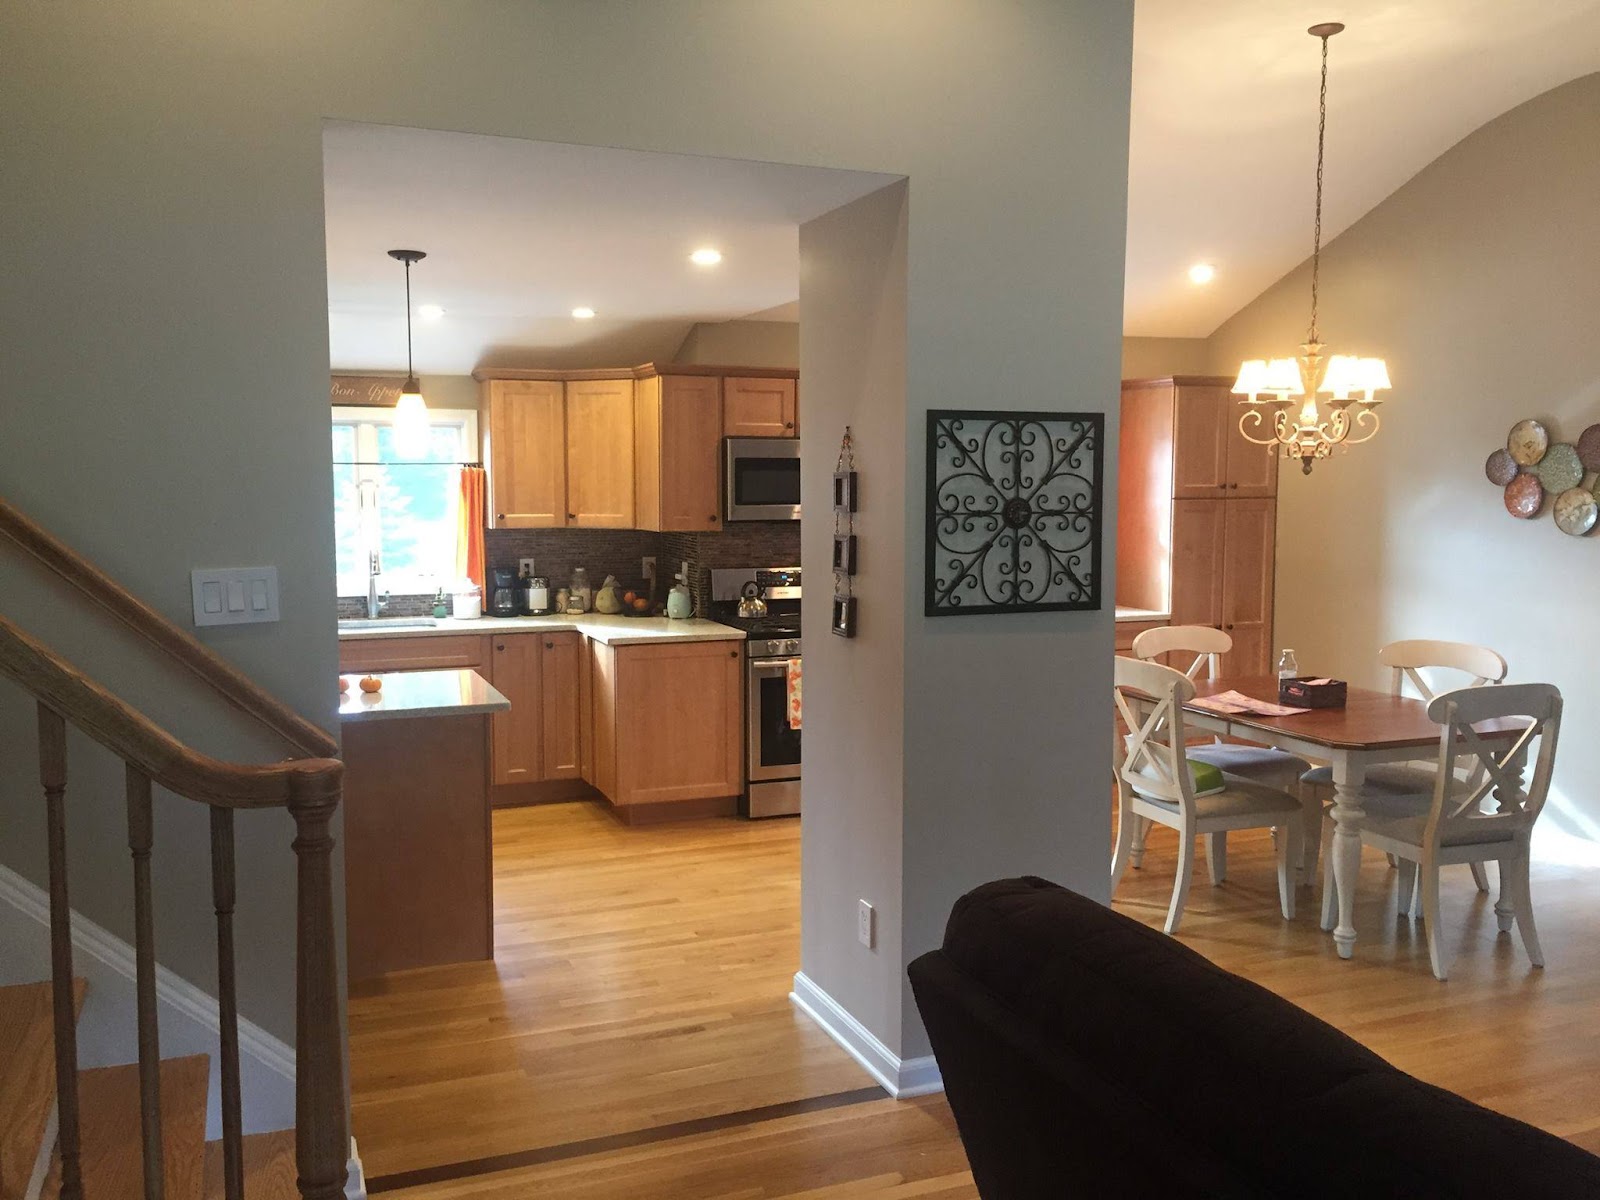
When this customer from East Hanover, NJ came in with architectural plans to remodel their second floor kitchen, living room and dining room, we jumped at the opportunity.
Our goal was to make the space open, flowing and continuous, however, it was one of the more challenging designs to create.
Execution and forward thinking were key.
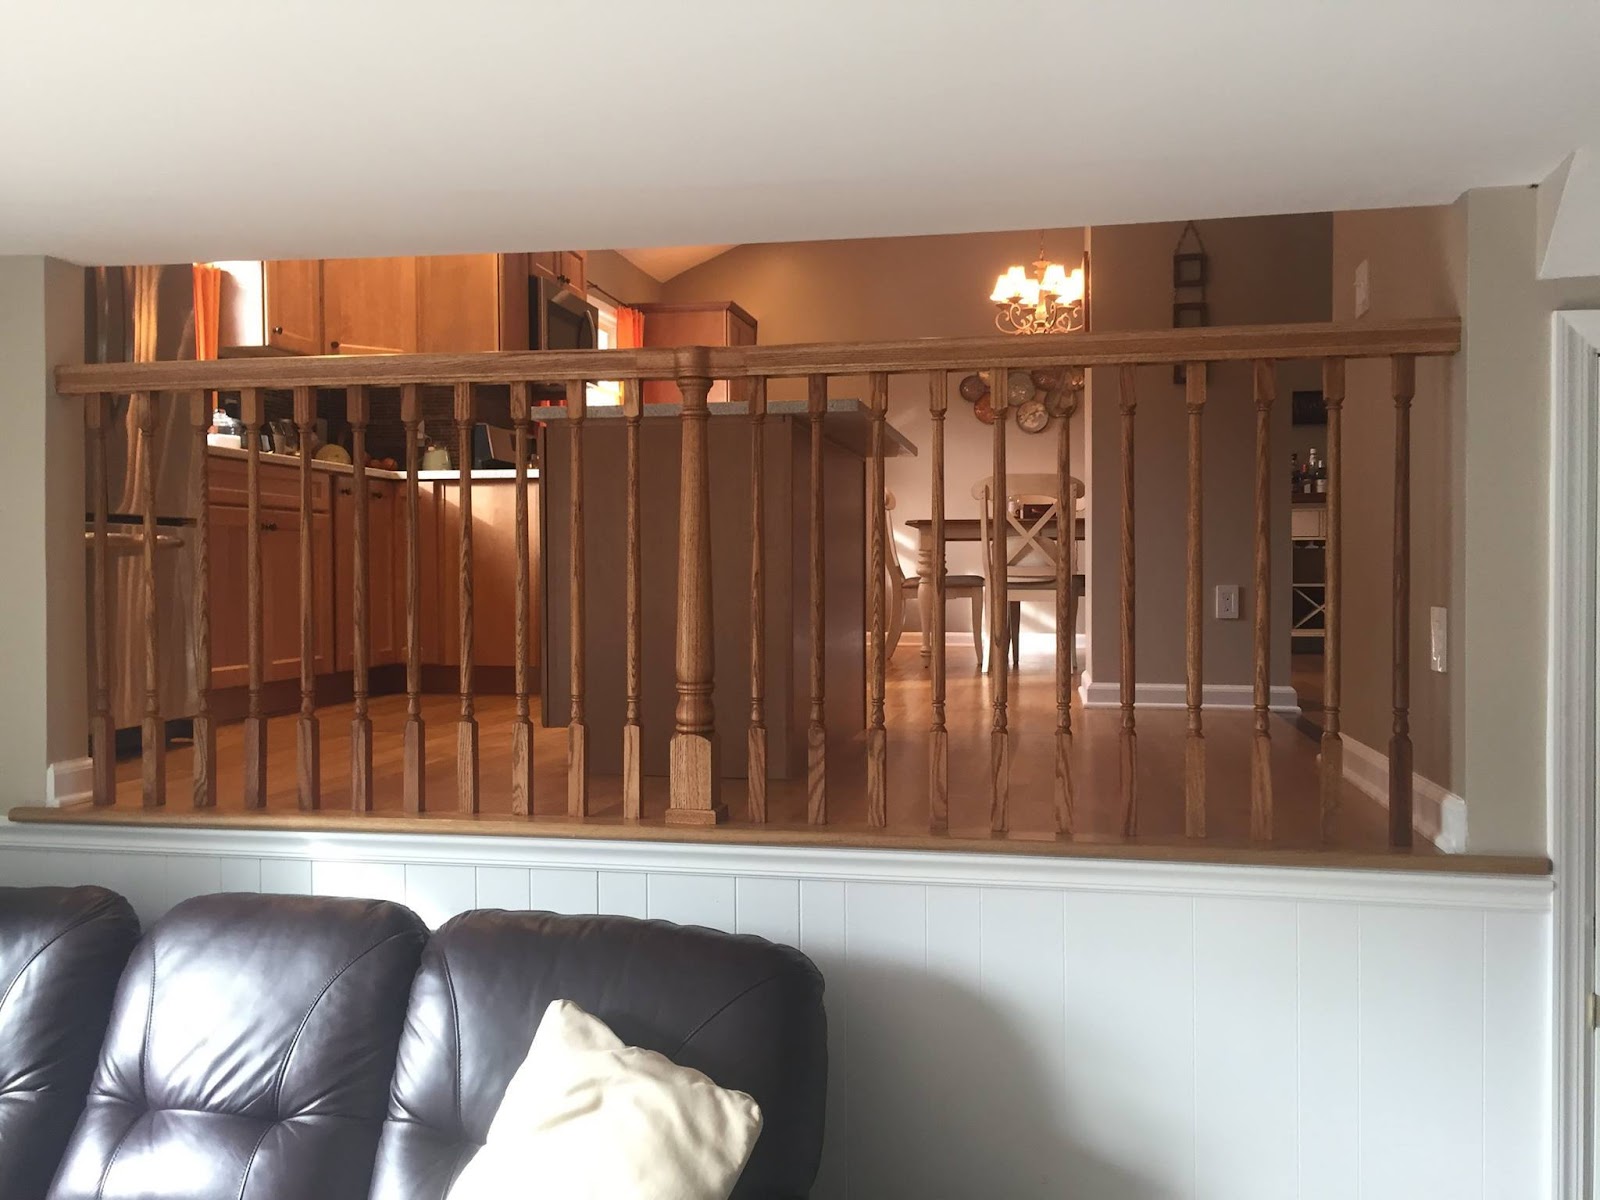
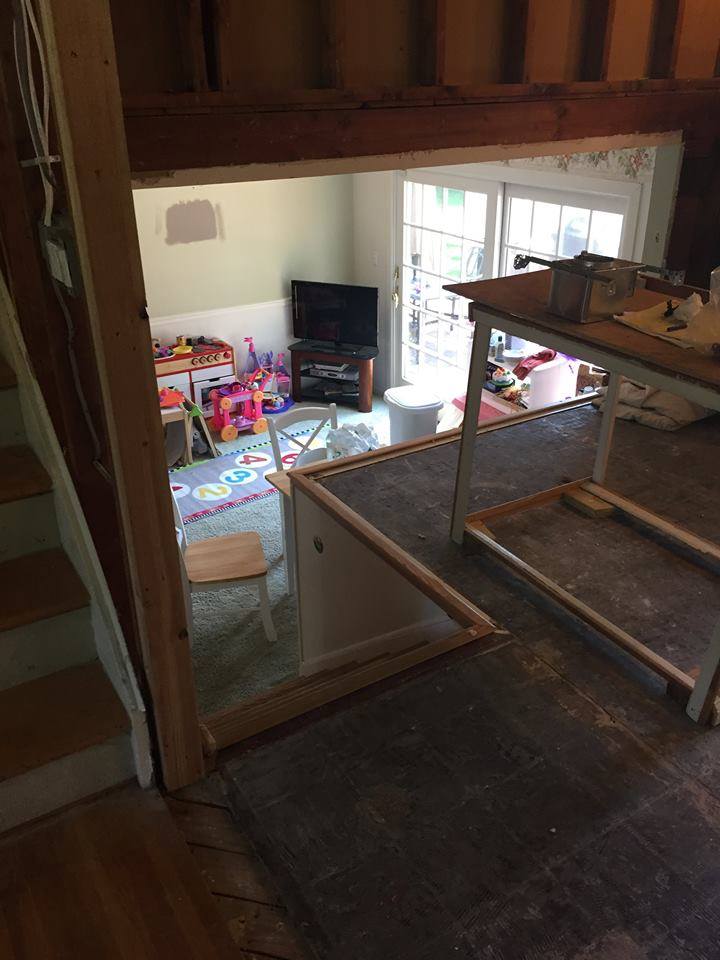
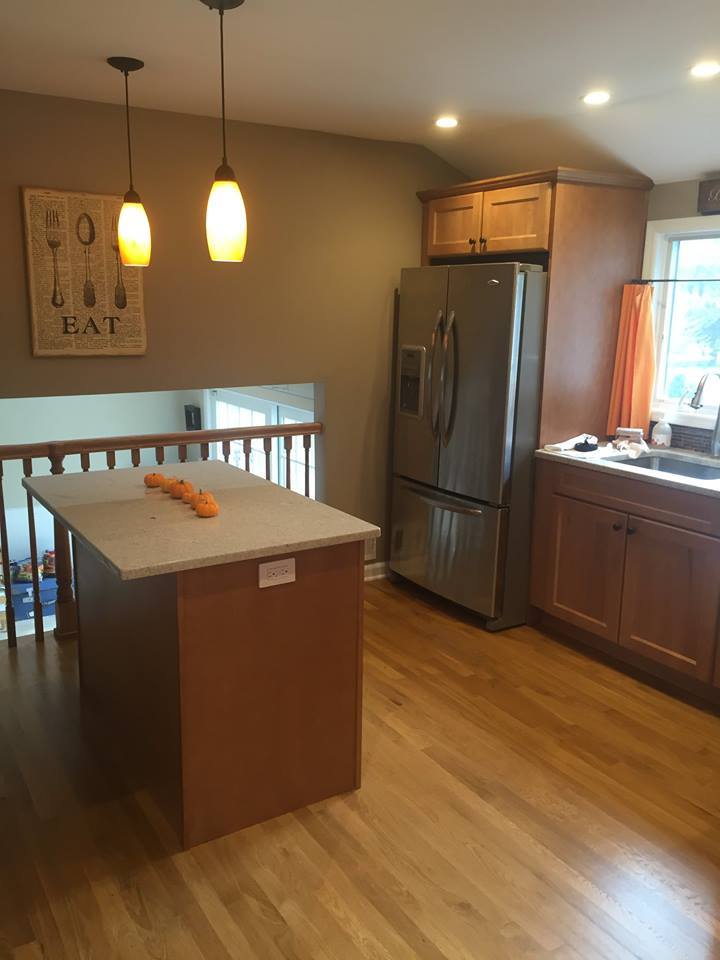
The client requested that we rebuild the rooms so that she could see her children playing on the first floor, while she remained in the kitchen. How fun! And so it began…
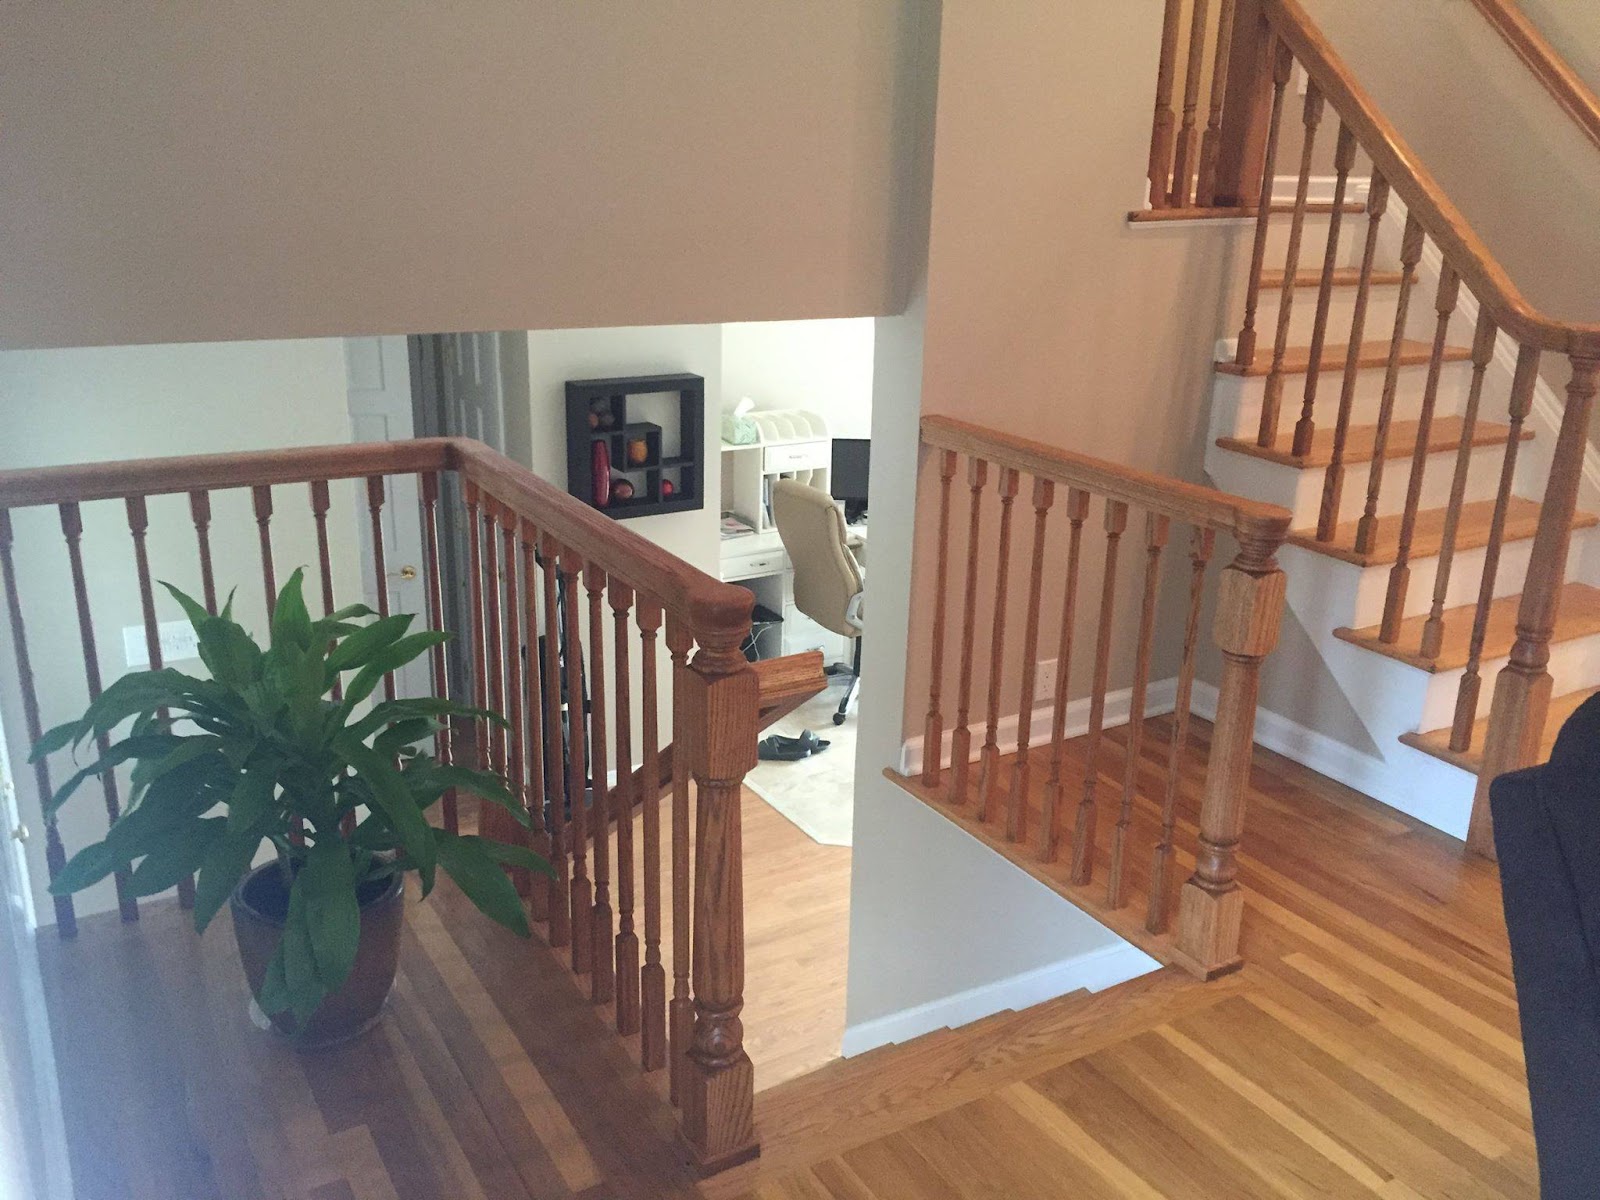
We closed off the stairway from the kitchen and finished it off with newly stained and finished oak railings.
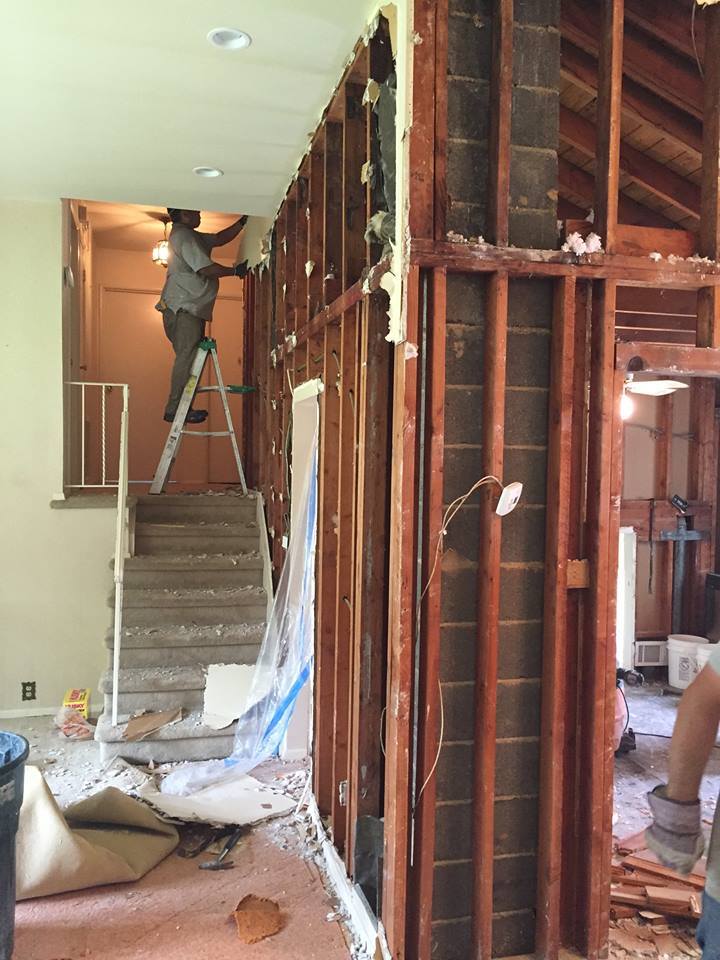
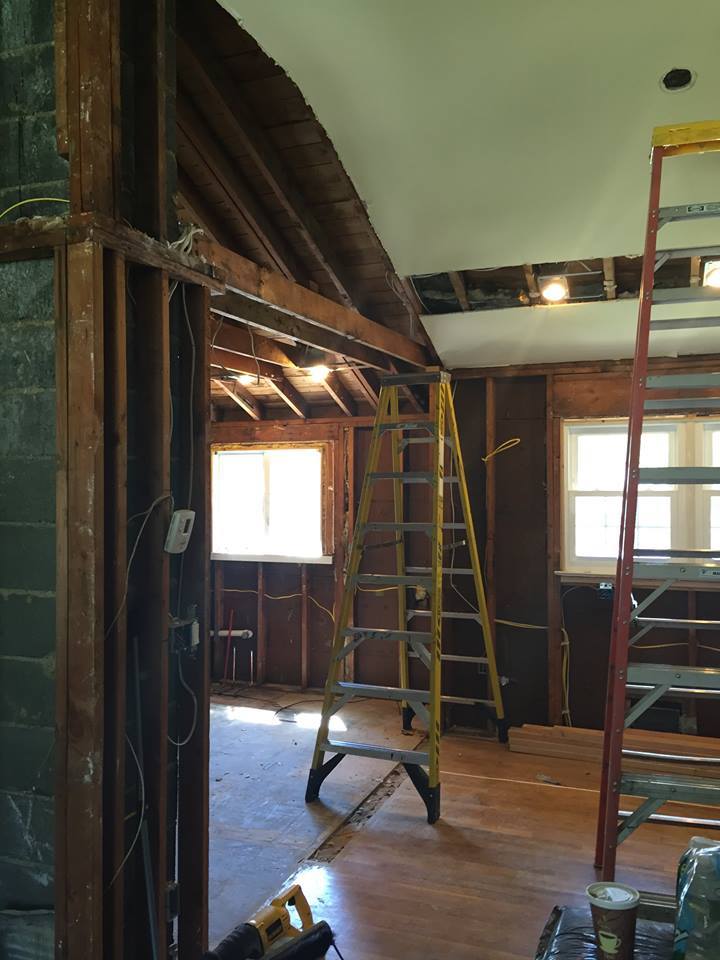
Ta-da!!! ...
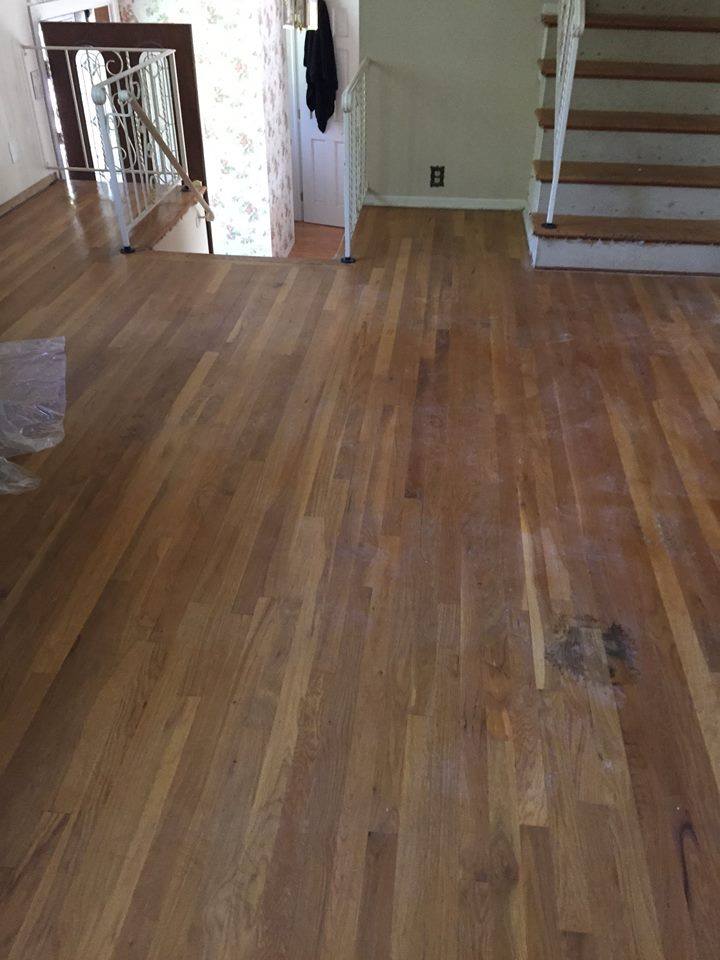
After pulling up the carpets, we exposed the original oak flooring which was sanded, refinished, and in some spots, replaced.
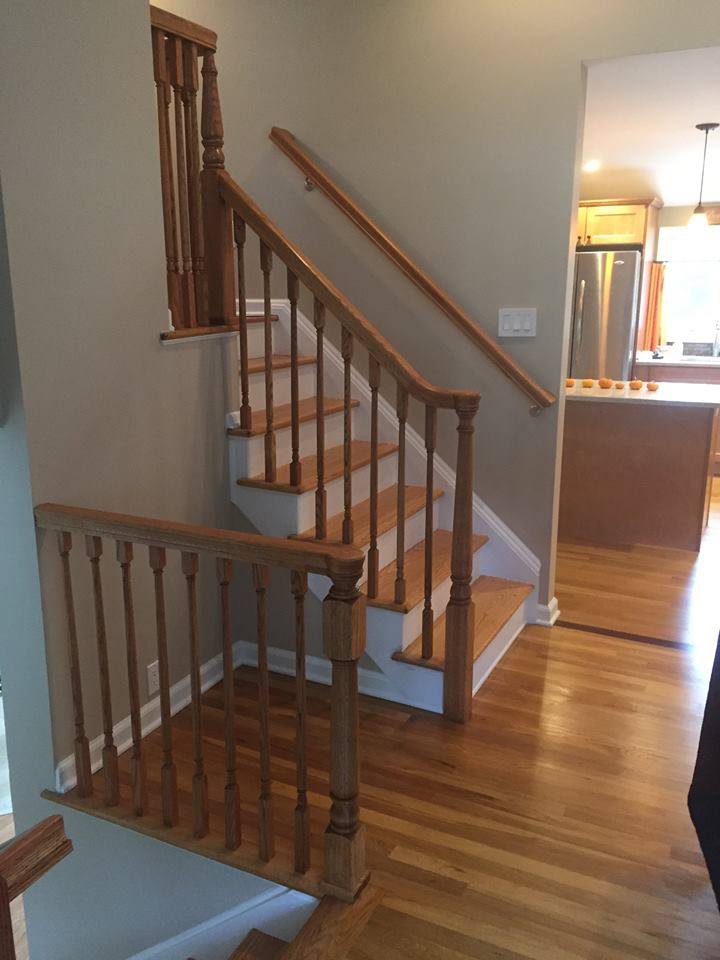
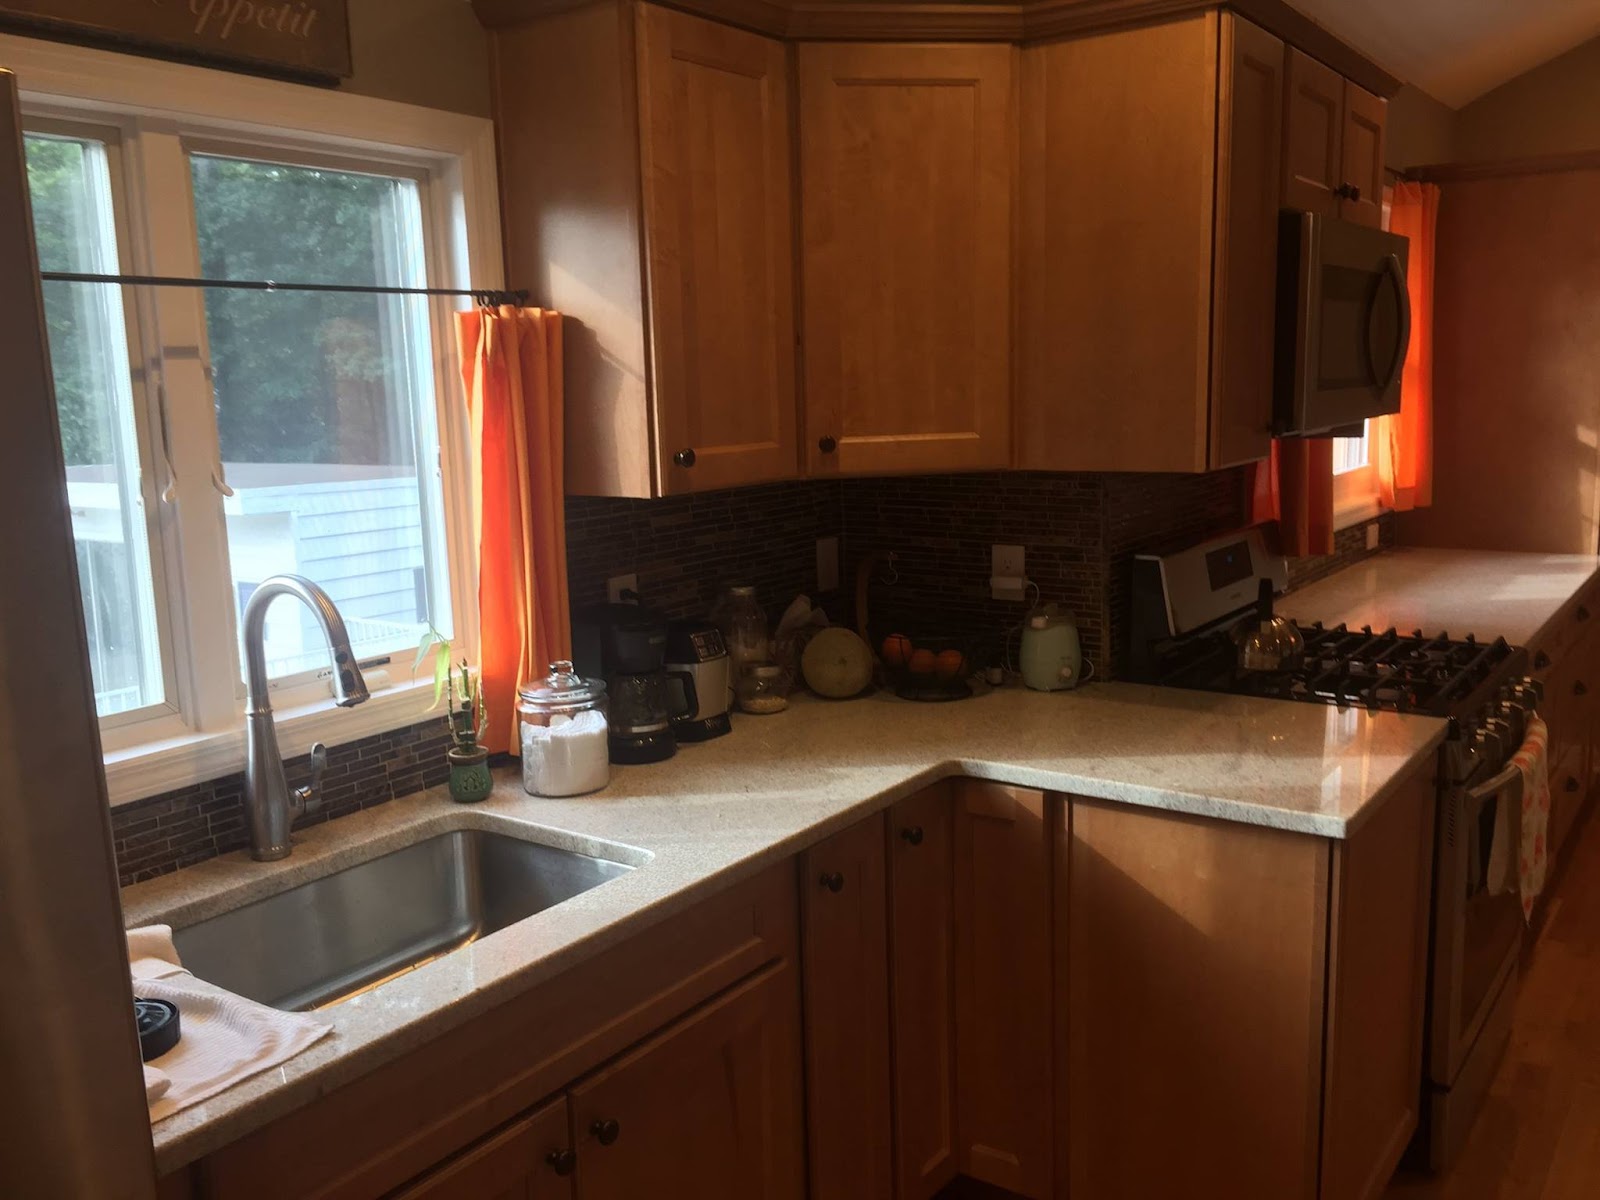
We added color compliments to the cabinetry to match the newly finished railings and flooring, and finished it off with new stainless steel appliances, under mount sink, recessed LED lighting and granite counter tops. This brought everything together!
Joe Giampapa of the RWC team says,
“We are extremely thankful and proud to have been the ones to take the lead on this project and yet again bring the homeowner’s dreams and wishes to reality.”
Another flawless job from the company that’s been relieving home improvement stress since 1959!
If you like what you see or you’re interested in visiting our showroom for a free consultation, give us a call, contact us online, or simply stop in!
5 Kitchen Design Mistakes to Avoid
A well-designed kitchen can be the perfect cornerstone to a well-designed home. The more you love your kitchen, the more time you will want to spend there. This can lead to more home cooked meals, more family bonding, better health, and a general positive impact on your life. But, when redesigning your kitchen, there are lots of ways that things can go wrong. If you aren’t careful, your dream kitchen redesign project can turn into a nightmare, costing you a fortune or resulting in a less inviting kitchen than you started with.
If the anxiety of tackling a kitchen redesign has you worried about getting started, you aren’t alone. But, all of the common mistakes you can make in your kitchen redesign can be avoided with a little foresight and planning. Here are the top five kitchen redesign mistakes, and how to avoid them.
1. Planning as You Go
Think about all of the functional elements in a nice kitchen. Countertops and storage space take up a lot of room, but let you utilize your kitchen effectively. Dishwashers and high-end refrigerators will give you modern convenience, but at premium dollar for top models. The little details, from small appliances to appropriate decor, all make a huge difference. With all of these variables and factors in play, one of the worst mistakes you can make in a kitchen redesign is planning as you go. To avoid this mistake, take a lot more time than you think you need laying out a very detailed plan for what you want your kitchen to look like.
2. Forgetting the Golden Triangle
The “Golden Triangle” is an element of kitchen design to help you be very strategic in the layout of the elements of your kitchen that you will use the most; your sink, stove and refrigerator. When redesigning your kitchen, think about how these three parts of the room will work together. Make sure that you can access your sink while someone else is at the stove, to allow for multiple users. And, make sure that your refrigerator door will be able to be reached quickly from your stove top, so you can get to supplies with minimal effort. Forgetting about the “Golden Triangle,” and not being intentional about how you lay out these three key kitchen elements, is a mistake you will most likely regret every time you cook.
3. Skipping a Consultation
If you don’t have the time and energy to invest into your kitchen redesign as a DIY project, there’s nothing wrong with that at all. Kitchens have a lot of moving parts that all have to work together perfectly, and since you use your kitchen so often, it’s a project that has to get done quickly as well as effectively. Keep in mind that any good contractor or interior designer should provide you with the opportunity for an in-person kitchen redesign consultation to talk about your goals for the space and your budget. If you skip an in-person consultation, there’s no way you can be sure that you and your hired help have a similar vision in mind for your kitchen space - which is a mistake that will cost you a whole lot of money to repair down the road.
4. Opting for Bright and Catchy Flooring
Kitchens are the perfect place in your home to express creativity with flashy colors and designs. A bright and vibrant kitchen color scheme will make your food prep feel more fun and cheerful. But, keep the bright colors on the walls: one of the biggest mistakes you can make in redesigning a kitchen’s color scheme is opting for colorful flooring. That’s because no matter how beautiful and vibrant your bright white or yellow floor tiling looks today, kitchens must contend with constant spills, high foot traffic, and a lot of other “messy” opportunities that will have your bright flooring looking drab rather quickly. If you are set on bright flooring, just keep in mind that it will take a lot more effort to maintain and won’t look vibrant forever.
5. Sticking with Convention
Since kitchens are highly functional, there are a few things your kitchen will need. But, that doesn’t mean you have to follow an assigned template in your kitchen redesign. Don’t make the mistake of lacking courage and sticking with conventional layouts: the more you experiment, and give yourself room for creativity, the more possibilities there are to design a kitchen that you never imagined you could have. Just remember to consult a professional, and you should feel comfortable throwing convention out the window.
RWC has been providing top quality home renovation services since 1959, and all of that time in the industry has taught us a few things that you can’t learn overnight. Investing in our staff's education, putting customer service first, and offering unparalleled product selection is a winning formula for any remodeling, redesign, or renovation project.
To hear all of our thoughts on your redesign ideas, and get our advice on any potential pitfalls you could be headed for, contact us today!
How to Remodel Your Bathroom Into a Relaxing Retreat
While you may spend less time in the bathroom than you do in other rooms in your home, that doesn’t mean you shouldn’t put just as much effort into the perfect lavatory as you would into your dream bedroom or kitchen. Today, your bathroom may seem only useful for its Spartan functions, and you may think of it as a corner of your house with a singular purpose. But, tomorrow your bathroom could become a prized cornerstone of a relaxing, beautiful, and well-rounded home. Here are five things to keep in mind if you want your bathroom remodel to result in a relaxing retreat.
1. Don't Leave Anything off the Table
Just because you’ve always had a certain tub or sink doesn’t mean that you always need to. When renovating your bathroom, the more leeway you give yourself to make improvements and the more things you consider worth working on, the better. There’s a whole lot in your bathroom that you can switch up, from tiles, fixtures, vanities, and finishes, to sinks, tubs, commodes, faucets, and whirlpools. If you approach a bathroom renovation by only planning to work on a few things, you won’t give yourself the opportunity to create a real change. So, leave nothing off the table, and think about your powder room as a blank canvas where anything could happen.
2. Use All of Your Space
Even if your bathroom isn’t huge, that doesn’t mean there isn’t room huge possibilities - you just have to be comfortable with thinking about ways to use your entire space. For smaller bathrooms, think about how small decorative elements like premium fixtures could make a big difference. Or, get bold with the colors you put on the walls to give your bathroom a whole new look. When decorating large bathrooms, think of more space as more opportunity, and think about how you can use every inch to create a room you can be proud of. Installing mirrors, creating adequate storage space, and painting two-toned walls are all tried and true ways to utilize the extra space in big bathrooms, but don’t stop there. Think about how every corner could be utilized for something - even if using every inch means leaving some spaces empty.
3. Balance Your Needs
Remodeling a bathroom doesn’t only have to be about function or form: good bathroom remodels balance your needs, and give you the chance to create a restroom that is both highly functional and spiritually rewarding. Before buying a tub, sit in it and see if it feels right. Before investing in cheap flooring, price out a more durable and slightly more expensive option, and see if you can afford springing for the quality choice that will last longer and avoid functional issues down the road. Don’t think that you have to invest entirely in things that look nice or entirely in the most practical options when remodeling your bathroom: keep both in mind, and balance your needs.
4. Don’t be Afraid to Call a Pro
Since the bathroom is often one of the smallest rooms in a home, aspiring DIY home improvers can make the mistake of thinking that it will be an easy project to tackle. But, there may come a time when you need to call a pro when remodeling your bathroom, and knowing when it’s a good option to call for an expert’s help is critical to the success of your remodeling project. Unless you have a lot of experience with plumbing, you should never attempt to move water lines or handle the intricacies of piping. And, unless you are qualified, you shouldn’t deal with electrical issues either - even if it’s for something as simple as wiring a heating control. Trying to do it all yourself can lead to disaster down the road, so call an expert before tackling any issue that you don’t feel totally qualified to handle.
5. Splurge!
For most home remodeling projects, price is a limiting factor. But, if you want to create a bathroom retreat you can be proud of, think of just one thing you can splurge on. Whether that’s the high-end toilet or a brand new tub, splurging on one item can make your whole bathroom feel luxurious. Don’t feel like you have to reach for the premium option for everything in your bathroom remodeling project, but give yourself the freedom to reach high for at least one aspect of your new lavatory. Your bathroom retreat will feel a lot more special.
RWC Windows, Doors and More has been family owned and operate for three generations, and our unique dedication to a high-quality home improvement experience is reflected in our craft. We leverage our deep and experienced education, our informed and practical take on product selection, and our unparalleled devotion to customer service to make sure that your home improvement project turns out exactly like you want it to.
To learn about how RWC can relieve your home improvement stress and help you create the bathroom sanctuary of your dreams, contact us today!
The Benefits of New Doors and Windows
Curb appeal is an important aspect of any house. Whether you are looking to sell your home or just want to have the best-looking house on the block, it is important to do whatever you can to increase its aesthetic appeal. One way to do so is by replacing your doors and windows. These features of the home can easily be overlooked, but in reality add so much to the charm and character of the house. Following are some ways adding new doors and windows can add to the curb appeal of your home.
Saving money
For many people, there is nothing more appealing than saving money. Adding new doors and windows to your home not only makes it more aesthetically appealing, but it also helps you save money as well. Updating old and drafty doors and windows results in more comfortable indoor temperatures since cold air is not seeping in throughout the winter (and the same goes for warm air in the summer). Further, new doors and windows are more energy efficient than their older counterparts. New windows have the added benefit of keeping sunlight out, which protects furniture from becoming faded from constant exposure to the sun. The money you save from lower utility bills and not replacing expensive furniture can be spent adding additional aesthetic appeal to your home by expanding your garden, updating the garage door, or upgrading the siding on the house, all which will enhance the overall curb appeal of the home.
Installing a new door and windows can immediately give your house a facelift. Over time, exposure to the elements of weather can cause doors and windows to become run down and tired-looking. Since the damage happens slowly, it is easy to miss it even though you look at your house on a daily basis. But, all of a sudden it will hit you that the exterior of the house does not look as good as it used to. At that point, it is time to start thinking about replacing the doors and windows. Once the new and improved features are in, you will be able to see the immediate difference and the positive impact these few changes make to the entire appearance of your home. Try to choose a door that reflects your true personality or the character of your home. Don’t forget, your front door is the entryway to your home, and you want it to make a statement to everyone who enters it.
Added security
The curb appeal of a home goes beyond its aesthetic appeal and spills out into the security of it as well. Despite how beautiful a home’s exterior is, if its security can be infiltrated, and its inhabitants are put in danger, any assumed curb appeal goes down the drain. Adding new doors and windows to your home can increase your security level and allow the beauty of the home to shine through. Both doors and windows are made better and stronger than they were years ago, so they are harder to penetrate. New doors and windows also come with stronger locks and other security features that make them difficult to break into, even by the most experienced intruders, thus giving a homeowner an added sense of safety and security. That sense of relief makes everything look better.
When doors and windows start to age, they become less reliable. Exposure to rain and snow can make them warp and buckle, which can cause them to lose effectiveness and functionality. Windows and doors that do not work properly make for a weak selling point for folks who wish to sell their homes. It also reduces the resale value of the home, which affects not only the homeowner but also everyone in the neighborhood. New windows and doors are made with updated materials that are weather resistant so there is no need to worry that they will be adversely affected by the weather. They also have much longer anticipated lifespans so you can rest assured that the doors and windows you buy today will last you for decades.
Older windows and doors are great for letting in extraneous noise. Over time, the seals on the doors and windows loosen and let the noise in, reducing the homeowner’s comfort and privacy. New doors and windows reduce the likelihood of the people inside the house being disturbed by bothersome noise coming from outside. This feature is especially beneficial for those who live in town homes, row homes, or otherwise live in close proximity to their neighbors. A quite domicile has great amounts of curb appeal after a long, hard day.
If it is time for you to replace your doors and windows, RWC is the place to go. Contact us today for a quote and you’ll soon be on your way to stress-free curb appeal.