What to Consider Before Installing Open Kitchen Shelving
From hanging and floating shelves over the main food prep area to freestanding shelves situated on the wall in place of cabinetry, open shelving in kitchen design has truly come alive in the last few years. Once implemented into kitchens as the bare beginnings of kitchen storage solutions, open shelving is more tied to farmhouse-style kitchens and minimalist design ideas these days. As attractive as these modern open-storage solutions may be, they are not a good fit for every kitchen or every kitchen user. Here are a few things to consider about open kitchen shelving and whether or not they are the best kitchen shelving option for you!
Closed Cabinetry Does Have Its Perks
Things evolved from crude shelving to closed cabinetry over the years for good reasons. With closed cabinets, you can tuck away all the clutter and keep the kitchen looking tidy. For the most part, regular cabinets are a logical shelving concept. Before you start thinking about how to style open kitchen shelves in your kitchen layout, it's best to consider if you really want to eliminate all your cabinets or just a few.

Open Shelves Require a Bit of Forethought
You know how you currently unload the dishwasher quickly and slap everything in the cabinets? If you are going to be using open shelves for something like storing dishes, some old habits will have to change. Everything that you place on your open shelves will have to be carefully considered and organized. Otherwise, your kitchen wall shelving could end up with a mess of clutter that makes your entire kitchen look messy. Some people like the idea of using open shelves to display things like pasta and ingredients, such as flour, sugar, and spices. This can look nice, but, again, you'll have to be careful with what you choose to have on open display.
Open Shelving Must Be Properly Installed
This is a huge thing to consider. If you have picked up a DIY kit and are wondering how to install open shelving in kitchen areas, you may want to reach out to a professional to get the job done right. There are all kinds of ways shelving can be installed, but the shelving has to be completely stable, anchored securely, and capable of holding heavy weight. Consider just how many pounds a shelf full of glasses would weigh and now think about how easy it will be for such weight to strip a good screw right out of the wall. With this in mind, installing shelves is better left to the experts.

You Must Pick the Best Location
Houzz provides a good list of open shelving kitchen idea locations, but the real good options are going to change according to your kitchen layout or design. For example, open shelving over the sink may be nice for some homes, but a lot of kitchens have a window over the sink, so this placement might not work.
Takeaways to Remember Before Installing Open Kitchen Shelving
- Closed cabinetry will always have its perks; a collaboration of open & closed shelving is always a good mix.
- Open shelving installation is usually not a DIY task.
- Picking the best location will make all the difference in how happy you are with the end result.
- Once installed, your open shelving becomes a design element of the space, along with everything on the shelf.
Open Shelving Installation in NJ
Many people are perfectly happy with the unique open shelves they have installed in their kitchen, but this is a major change to make and should be carefully considered. For more help with how to pick open shelving or cabinetry for your kitchen remodel, reach out to us at RWC Windows, Doors & More.
Window Cleaning Tips
When you consider all the ways your windows can collect grime and dirt, you may realize that even windows that may look fairly clean - are not! Dirty or damaged commercial or residential windows stick out like a sore thumb. The collection of environmental, airborne pollution on exterior surfaces and the accumulation of grease, dust, and fingerprints inside will require window cleaning techniques that will deep clean glass surfaces. According to the EPA, your home furnishings that are manufactured with man-made materials are a source of poor indoor air quality and can also leave an invisible film or oily fog on windows.
Tips on Window Cleaning
Good window cleaning removes built up grime without leaving dirt or water streaks. The best window cleaner is made at home using 50% white vinegar and 50% tap water. Mix this solution in a spray bottle and add just a 1/2 teaspoon of dish detergent like Dawn. The acid in vinegar will cut through the greasy, filmy residue while the soap will collect the dirt to be washed away.
If you don't have vinegar handy, some good substitute combinations with include distilled water and Vodka, cornstarch and ammonia, warm water and lemon juice, or dish soap and rubbing alcohol. You can find the recipes here.

Cleaning the Outside of Your Windows
Most double hung window sashes will tilt in for easy exterior cleaning. If your windows are single pane windows or sliding windows, a soft bristle brush on an extension pole (or a microfiber cloth wrapper around a Swiffer mop) can be used to reach upper window sections.
For second level windows, you don't really need a ladder if you have a garden hose. Purchase a spray bottle that can be attached to a hose (similar to the liquid fertilizer bottles). Add your solution and begin spraying upper level windows with a strong force of cleaning solution. Follow by using the water hose to rinse windows with clear water, before the solution dries completely.
Interior Window Washing Tips and Tricks
When cleaning interior windows you may want to lay a large bath towel on the floor for protection. Begin your project by cleaning the window tracks where dirt and mud can accumulate. Clean window tracks with a butter knife wrapped in a microfiber cleaning cloth and dipped in a baking soda and vinegar solution will speed up the process.

Spray windows and allow the solution to sit for a minute. You can use a sponge, microfiber cloth, or newspaper to wipe the windows from the top to the bottom. Use a separate cloth for a final, streak-free wipe down.
Your grandparents may have used newspaper to wipe clean interior windows. This is still an excellent way to get smear-free windows, as long as the newspaper ink is not petroleum based which causes the ink to transfer and smear. Not to worry, 90% of all newspapers use the cheaper, soy-based ink which does not smear.
Use the bristles of a small brush (like a toothbrush) to get into joints and hardware to remove built up grime. This also a useful tool for cleaning the lower portion of your window screen.
Frame and Window Sill Cleaning Tips
The last steps in cleaning the interior windows is to clean the frame and window sill which will have gathered much of the dirt you've washed away from the glass pane.
You may want to scrub your metal window frame with a toothbrush and your window cleaning solution. If window frames are really grimy, sprinkle baking soda on the frames first (getting into the grooves and corners). Follow that by spraying with your vinegar and water solution, then scrubbing with a toothbrush. Wipe your window frames clean and dry with a microfiber cloth.
Finally, wipe down your window trim and sills with clean soapy water, followed by wiping with a damp cloth, then drying with a clean cloth. Avoid allowing the water to sit on the wooden sills for too long.
Take-Aways
- A 50-50 solution of white vinegar and water will leave your windows clean and streak-free
- When cleaning windows, also clean the window tracks, frame, and window sill
- Allow cleaning solution to sit a minute - but do not allow to dry
If your window frames are rusty or damaged and your windows panes discolored or show signs of mold growth, consider replacement windows installed by RWC Windows, Doors, and More. RWC also provides bathroom and kitchen remodeling, along with door installation and window replacement to homeowners in northern New Jersey.
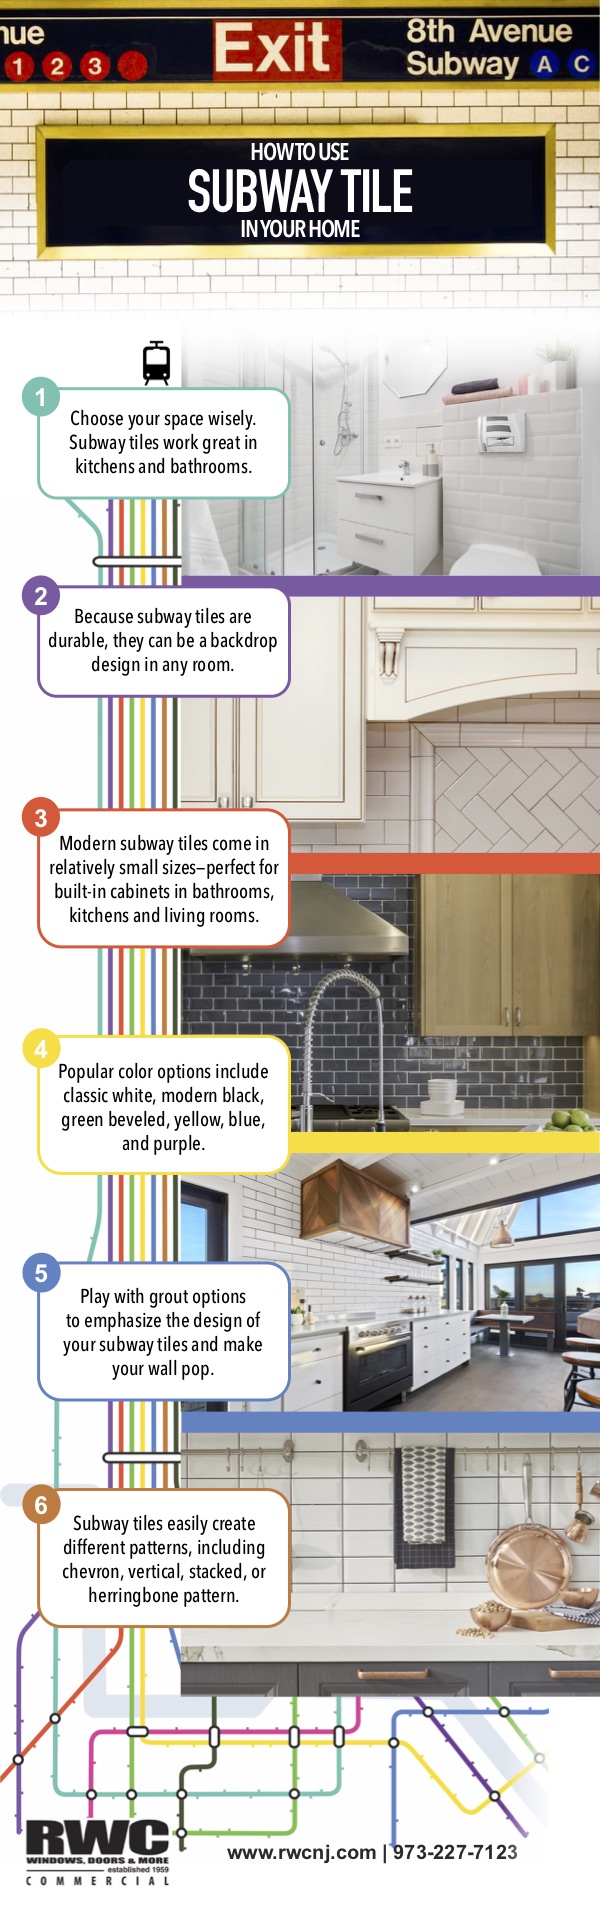
How To Use Subway Tiles In Your Home [Infographic]
Subway tiles were first used in the early 1900s when the New York City Subway was being built. These clean and bright ceramic tiles were ideal for reflecting light within the subterranean transit system and creating a welcoming space for the city’s commuters. Today, subway tiles are used everywhere from chic hotel restrooms to the modern family kitchen. This classic style is a favorite of designers and homeowners because it offers a crisp and simple feel. And while many choose to go with the traditional white subway tiles for their kitchen or bathroom, they can now be found in a variety of materials, sizes, and colors.
 Subway Tiles And Your Space
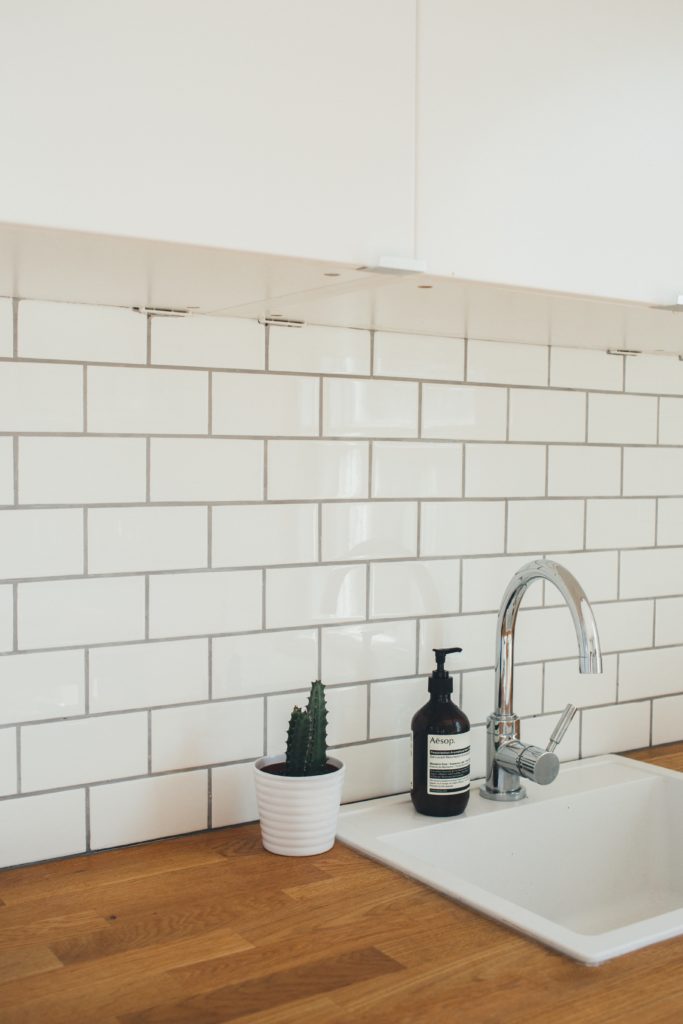
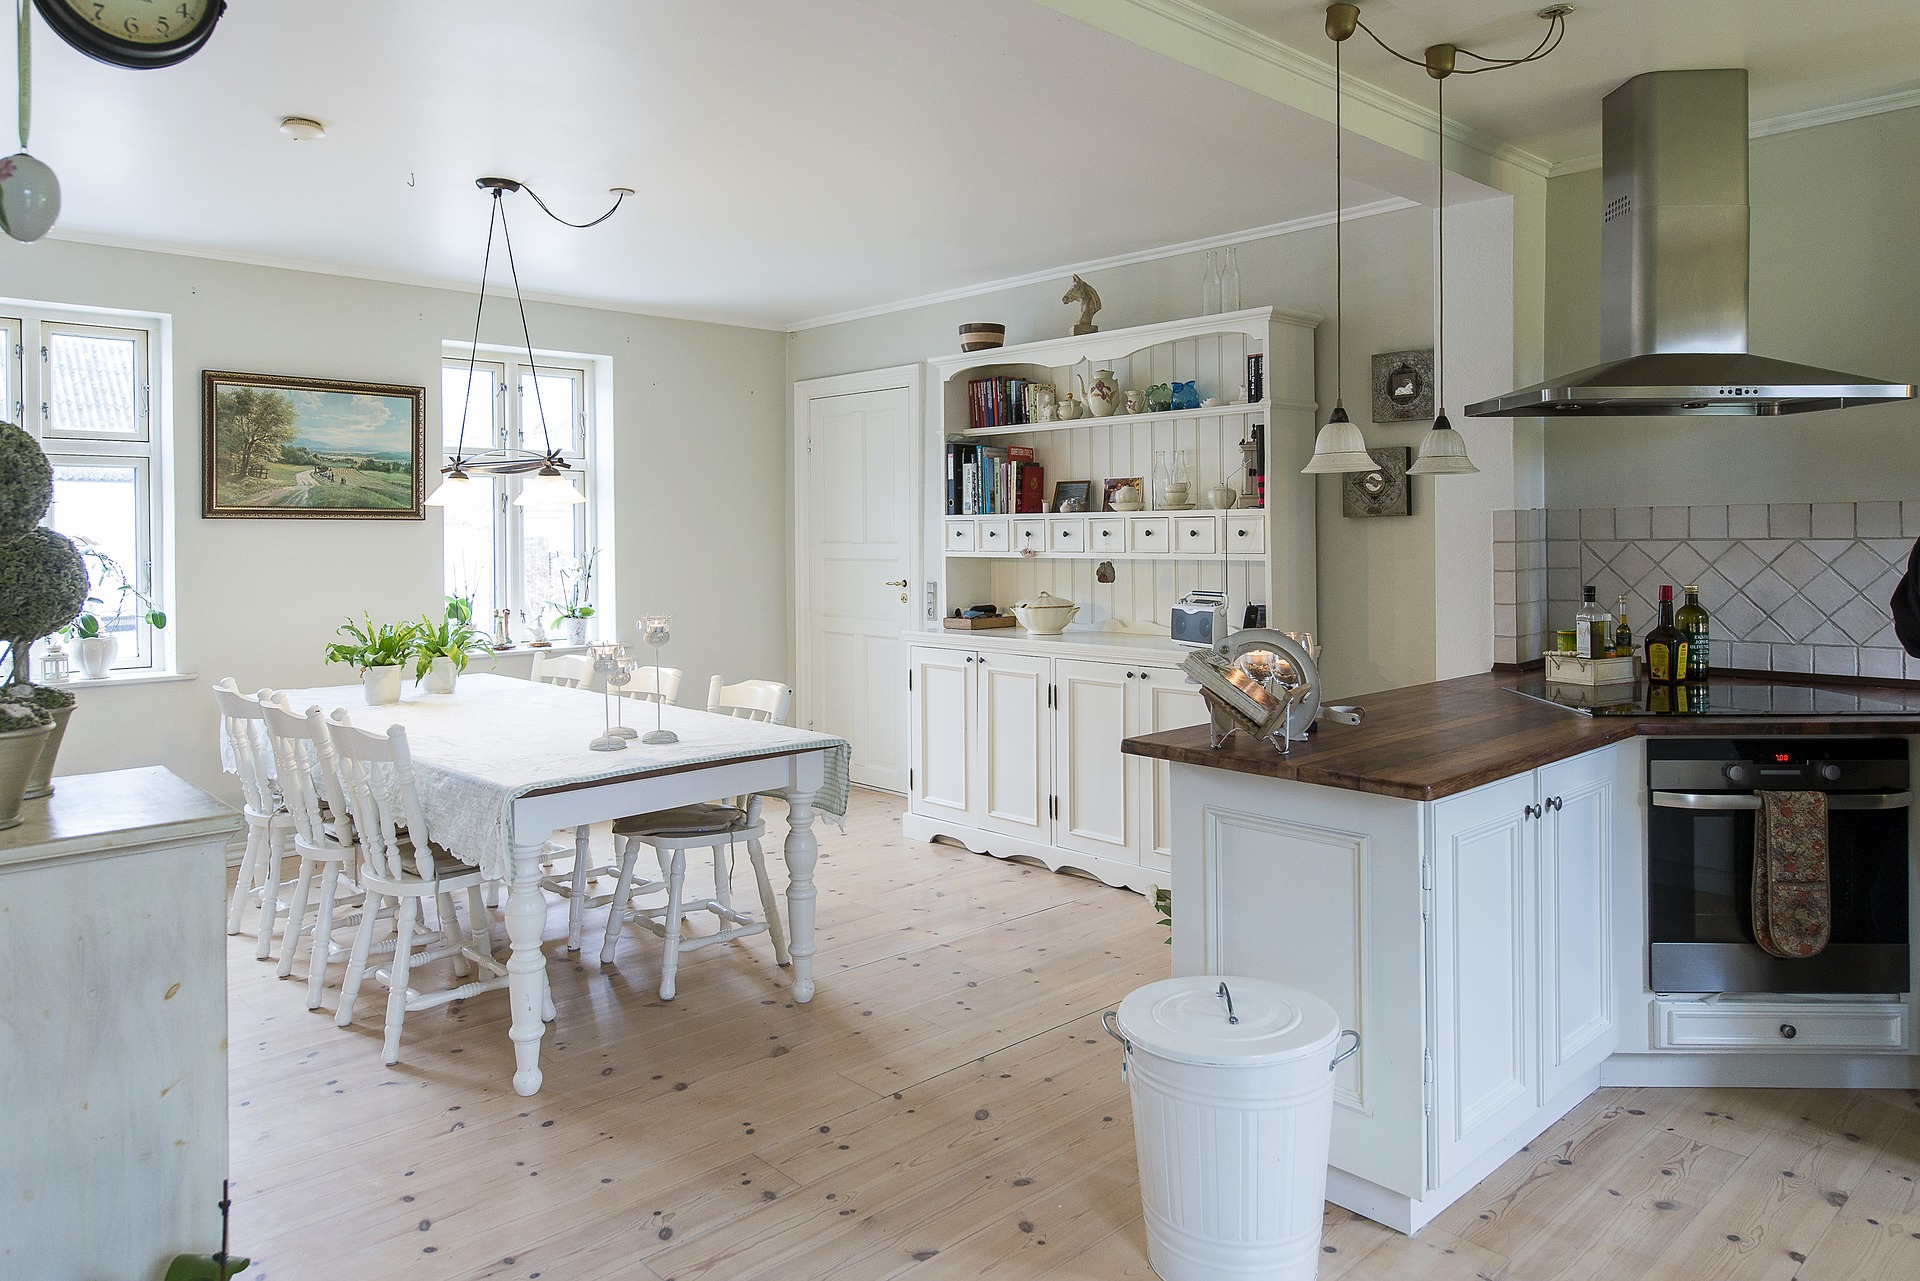
Choose your space wisely, but don’t stress too much — subway tiles work great in kitchens, bathrooms, and every other room. Because subway tiles are durable, they can also be used as a backdrop design in just about any room – including bedrooms and living rooms. Most modern subway tiles still come in relatively small sizes, so they are great for putting in around built-in cabinets in bathrooms, kitchens and living rooms.
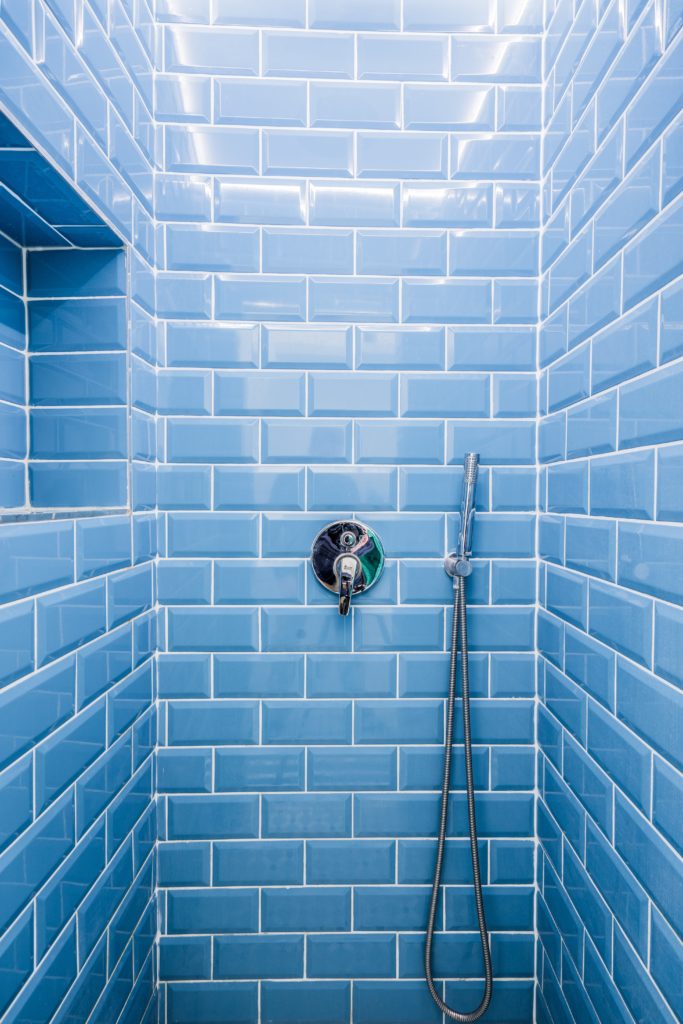
It’s acceptable to play with different colors and sizes when choosing subway tiles in your bathroom or kitchen. The original subway tiles created by designers George C. Heins and Christopher Grant La Farge in 1904 were 3-by-6-inch rectangles. But since then, times have changed, and homeowners can choose from a wide variety of different sized subway tiles. The most popular sizes for modern subway tiles include 3×6, 4×12, and 4×16. Some popular color options include classic white, modern black, green beveled, yellow, blue, and purple.
Great Grout!
Standard-edge and beveled-edge subway tiles always look great with traditional white grouting, allowing for clean lines and a uniform design. Another option for updating the look of your subway tiles while still keeping the clean design that they offer is to change up the grout color. A classic white subway tile can instantly look more modern and chic with the addition of grey grout work. Subway tiles in a bathroom can really pop when used with different grout colors. Playing with different grout options is one way to emphasize the design of your subway tiles and make your tiled wall pop!
Alternating tiles or developing a unique pattern using different tile colors is a simple way to create contrast in any space. A good tip? Try laying your favorite tiles down on the floor or countertop and try using a different color or contrasting tile every 5 to 10 tiles to come up with a pattern you’ll love.
 Mix It Up With Pattern and Color
Subway tiles make it easy to create many different patterns. So, if alternating tiles aren’t your favorite, you could also try laying them down in a chevron pattern, off-center, vertical, stacked, or in a herringbone pattern to create more dimension. Subway tiles for a kitchen can be used in backsplashes, walls or counters.
Tired of traditional ceramic? Try these alternative ideas to spice up subway tiles:
- While many homeowners choose to use traditional ceramic subway tiles, there are a variety of different material options available on the market today. Some alternatives to ceramic subway tiles include porcelain, glass, and metal.
- Additional pattern options include diagonal, basketweave, vertical basketweave, corridor horizontal, corridor offset horizontal, and brickwork vertical.
In Summation
- Subway tile is good everywhere in your home – bathroom, kitchens, backsplashes and more.
- Change up your grout color to make subway tile different in every room in your home.
- You have almost unlimited pattern and material options! Check out some design ideas for your home here to draw inspiration.
Whether you’re interested in creating a fabulous design for an entirely redesigned modern subway tile bathroom or you’re limiting the home renovation to a classic subway tile shower, the possibilities are endless when you go with such a classic material. And with so many styles, colors and pattern options, you can really have some fun with the design process. No matter the size or style of the subway tiles that you choose, your final home renovation project will certainly have lasting appeal and help to transform your kitchen or bathroom into a welcoming and timeless space in your home. For more subway tile options and installation information, call (973)-227-7123 or visit the team at RWC Windows and Doors online today to request a quote.
3 Ways Vertical Storage Can Help Reduce Clutter In Your Home
Reduce Clutter In Your Home
Whether you live in a small apartment or a home that is a bit short on storage space, clutter can be a major issue. From all the small appliances you use daily in the kitchen to the tons of accessories and supplies you keep in the closet, all those everyday extras need a place to go. If your closets are overflowing, your cabinetry is stuffed, and you're running out of places to stick all that extra stuff, it's time to start looking at storage from a different angle—a vertical one. Check out these cool vertical storage ideas to help you find out how to reduce clutter in a new way.
Implement Vertical Kitchen Storage Racks
People struggle to have ample storage in their kitchen perhaps more than any other room in the house. Vertical kitchen storage racks are a good solution, and these can be found in a range of styles and sizes. These racks can reach all the way to the ceiling and give you multiple tiers for stowing away your excess items, but they can also function as a designer element. You can pick up storage cabinets or create your own out of an old wardrobe and make the new storage an attractive part of your overall kitchen design.
Take Advantage of Vertical Plastic Storage Containers
Storage containers are not at all hard to find, and there are tons out there which are designed to be stackable and stable even if several are stacked on top of one another. You could use something like these stackable storage cube shelves from Home Depot and create new storage possibilities on empty walls in your bedroom, utility room, or kitchen. Even small and inexpensive plastic storage containers can be stacked, and even though these aren't the most attractive, they can be concealed in a closet or behind a decorative wall.
Utilize Vertical Storage for Small Space in a Creative Way
Even if you have a small space with an empty wall, there are ways you can implement vertical storage. For instance, a narrow pegboard can be installed in a small closet or bathroom to create a space where you can hang everything from tools to kitchen utensils. For instance, if you have a small pantry in your kitchen with a free wall, covering this wall with a pegboard would give you a spot to hang small baskets to house single-serve pouches of food, spare utensils, or even pots and pans. You could also pick up some of these creative knobs from IKEA to add a few ways to hang items in a vertical space. In a closet, for example, a series of knobs could be used to hang up coats, ties, belts, and purses.
Takeaways to Remember About Vertical Storage to Reduce Clutter
- Implementing vertical storage can be done without a big budget
- Blank walls give ample opportunities for storage all over the house
- Vertical storage can be integrated into closets where there is a wall available
- Creating storage that reaches from the floor to the ceiling is perfectly doable
- Pegboards, stackable cube storage, and vertical shelves are excellent storage solutions
Living in a clutter-free home helps make you feel more comfortable and confident. No matter how small your space is, vertical storage may be a logical solution if you feel overwhelmed by clutter. Reach out to RWC Windows, Doors, and More to talk about how we can help you with having more space.
Tips To Get a Jump Start on Fall Home Maintenance
With the summer coming to a close, it’s time to take a closer look at your fall home maintenance schedule. Your home is going to be more energy efficient and less maintenance issues when you inspect your property every season and make any small repairs necessary. To get a jump start on your fall home maintenance, it’s time to inspect your home and get to work on your maintenance list.
Inspect Your Property Carefully
When it comes to getting a jump start on fall home maintenance, it’s important to inspect your property. Look for damage to your roof, windows, trim and make a list of any problems that you find. If the exterior needs to be painted, get this done before the winter weather hits. Consider your landscaping, and check on the health of the trees and shrubs around your home. Look at the gutters, and get ready to clean them out once all the leaves have fallen.
Come Up with a Maintenance List
The easiest way to get started on your maintenance is to create a list of tasks. Good preparation will help you stay focused when you have limited time on the weekends to get your maintenance done. For any tasks where you need help, schedule service to come and do the work for you before the season gets busy. Get the work done early so that you are ready for the cooler weather that you know is coming.
Focus On Fall Prevention
If you expect icy cold weather within a few months, a focus on preventing falls should be part of your home maintenance each autumn. Look at your walkways and make sure there aren’t any loose bricks or other hazards. Check the railings to see if they are secure. Once the ice and snow pile up, you want to be sure that it is easy to keep your walkways free from ice so that no one falls.
Get Your Heating System Serviced
Your heating system should be checked before you need to turn it on every day in order to prevent problems. The efficiency of your furnace should be tested, and your furnace cleaned for the upcoming season. Your air filters should be changed and any fuel supply topped off. If any repairs are needed on your heating system, they should be done before the weather turns cold.
Get Your Gutters Cleaned
Gutters should be cleaned twice a year, and not until after all the leaves have fallen this fall. Your downspouts should be cleaned out and ready to move water from your roof and away from your home. If you can’t get up to the gutters, get them professionally cleaned before the cold weather hits to protect your home.
To get a jump start on your home maintenance this fall:
- do a careful inspection both inside and out to identify areas that need to be addressed.
- take care of basic maintenance like gutter cleaning and furnace servicing.
- make a list and schedule time to do each task.
- contract for any help that you need early on to avoid problems with scheduling.
If you are trying to complete your home maintenance tips for fall and you need help, it’s time to contact RWC Windows, Doors & More in West Caldwell, NJ at 973-227-7123. We provide home maintenance tips and tricks so you can complete your fall checklist and be ready for the cold weather to come.
Everything You Need To Know About Painting Your Front Door
Wondering how to paint a front door correctly? Painting your home's front door is one of the more common do-it-yourself summer home improvement projects. But, before you pick up that paintbrush, there are many things to consider. This includes: trending paint colors, the type of paint to use for the door material, and what products can improve the paint's performance and make the paint job last longer.
Creative Ideas for Painting Your Front Door
Today's front door colors are bolder and brighter than ever before. A colorful front door is not only pretty, but can also create a unique focal point for the entire property. When choosing a paint color, first decide if you desire a cool color (blues, browns, greens) or a warm color (reds, yellows, gray). Within each of these major groups you will find many hues and shades to choose from. Some new trendy exterior door ideas include Aqua, Mint Green, Lilac, Mustard Yellow, Coral, and Peach.
Whichever front door paint color you choose, be sure it blends with the overall exterior of the home, and makes a strong statement that reflects your family's personality. Choose a few paint chips or purchase small paint samples to see how the color looks during different times of the day.

What Kind of Paint to Use on a Front Door?
The best paint for a front door is one that’s specifically designated for exterior surfaces. Glossy or semi-gloss paints are typically used for front doors, but an eggshell or flat finish are also available. When considering flat paint, remember that it is harder to clean and will show scrapes and nicks better than a glossy paint. A high gloss front door paint will make your door stand out and will exaggerate the architectural features of the door.
Next, you want to consider if an oil-based paint, water-based, or latex paint is best. Whichever you choose, make sure your primer is of the same formula. Latex paints are certainly easier to apply, easier to clean up, and will dry faster. But, oil-based paints last longer and stand up to harsh weather best. Expect a long dry time with oil-based paints and you will need turpentine or paint thinner to clean up any spills.
How to Paint a Metal Front Door
From one of the most handy of handymen, Bob Vila makes these suggestions for painting a metal exterior door:
- If possible, remove the door from its hinges then clean with a degreaser and lightly sand
- Next, you will apply the first coat of primer. Allow it to dry then apply another coat if necessary
- Finally, you will paint the door with two coats of satin or semi-gloss paint and allow to fully dry
- Re-hang the door, replace hardware, and remove any painter's tape around the frame

Important Tips for Painting Your Front Door
Always consider the time of year when you decide to paint your front door and always check the weather forecast. The best conditions when painting a front door for your home are a clear and sunny day without extreme temperatures. While warm days are preferred over cold days, if it is too hot the binding properties of the paint can be affected. This means a paint job that may peel or crack sooner than you expect.
Also, consider the drying process. A warm and overcast day is optimum - but more importantly, you want to choose a day when the humidity levels are low and between 40%-50%. High humidity slows down the drying process. The best time of day for this project is in the early morning, after the overnight dew has evaporated, and there is a gentle breeze to help speed along the drying process. If you’re doubting the best way to paint your door, don’t do it! Leave it to a professional to ensure the best, long lasting results.
Final Exterior Door Painting Ideas & Tips
- Choose a fresh color for your front door, but stay within your personality and comfort levels
- The best type of exterior door paint is a latex paint with a semi-gloss finish
- Avoid painting on days that are very hot, rainy, or a high humidity
- When in doubt, leave your paint job to the professionals
For all your home improvement needs, including exterior front door replacement when a new custom painting simply won’t correct issues with front door that is rusted, swollen, has dings, has hardware issues, is drafty, or shows signs of water or insect damage, contact RWC!
Visit the showroom of RWC Windows, Doors, and More for plenty of front door design ideas from modern, double entry doors to traditional wood doors to recreate your home's architectural detail.
4 Signs It Might Be Time To Change Your Windows
Windows are one of the most functional and aesthetic features of a home. In general terms, windows should last between 15 and 30 years before you need replacements, but this is just a general rule of thumb since some windows can last far longer. Here are four signs it might be time for new windows for your home.
1. Your Windows Are Not In Good Condition
There's nothing good about warped, broken, or damaged windows. Unfortunately, these kinds of issues are common in older homes and when windows have been kept in use beyond how long they really should be. If you see gaps around window frames due to warping, have mold buildup between sealed glass panes, or have windows that won't even open and close, it is a good indication you need replacements.

2. Your Windows Are Not As Efficient As They Should Be
According to Energy.gov, bad windows can account for 10 to 25 percent of heat gain in the summer and heat loss in the winter. These kinds of numbers can drastically affect how much you are paying to keep your home cool in the summer and warm in the winter. While you may not be able to tell by looking that your windows are to blame for higher-than-typical energy bills, you can spot inefficient windows by looking at:
- The energy rating of the window
- Whether you feel drafts around the window in the winter
- How much heat you feel on your skin when standing in front of a window in the summer
3. The Windows Compromise the Value of the Home
When buyers are viewing a home for sale, one of the first things they will want to look at is the windows. Poor-quality windows make a home inefficient and not as good-looking as it should be. Much of the cost of replacement windows can be recouped when you sell the house, so prior to selling is the best time to replace windows. New windows installation cost is offset by what you garner when you do sell.

4. Accumulation of Moisture Is an Ongoing Window Problem
You have pesky moss or mildew growing between glass panes, condensation will not go away, and your windows frost inside during the winter. These kinds of issues are relative to older windows that are not designed to thwart heat and cold transfer. Over time, these problems can easily lead to moisture damage, so replacing windows that have these issues is a good idea.
Takeaways to Remember That Tell You to Get New Windows
- Moisture problems in and around windows are not a good sign
- Windows can lower the value of your home before listing it for sale
- Older windows commonly need their windows replaced
- Damaged windows can generate a lot of problems and should be replaced
- Energy-efficiency is greatly affected by bad windows or old windows in bad shape
Overall, window replacement is one of the best investments you can make in your home’s efficiency, and beauty. Use these signs to help you determine if it is time to make a change. Reach out to us at RWC Windows, Doors & More if you suspect it is time to get your windows replaced and you want to find the best options.
Is It Time to Renovate Your Kitchen? A Diagnostic Assessment
It's one of the most functional rooms in the house, so a complete kitchen renovation is a huge undertaking for any residence. It's easy to put off a kitchen remodel project until it simply cannot be avoided, even though the costs of a renovation can be recouped by as much as 69 percent if you sell your home. But there are certain signs that should tell you when to remodel your kitchen.
You can get by with a few little annoying quirks in an outdated kitchen space. But if you can go through this list of pain points and find more than half of them to be issues you completely understand, it is a good sign now is the best time to remodel kitchen fixtures, features, and layouts. Let’s go through some of the biggest indicators that it’s time to get started.
1. You don't have enough space for storage or food prep
 This is one of the biggest signs your kitchen needs some upgrading. If you are constantly fighting to make enough counter space to cook, have to strategically place things in your cabinets to make them fit or practically climb over furniture to get around, your kitchen needs more space. Another sign indicates you are constantly fighting to keep clutter at bay so the room doesn't look messy.
2. There is no logical traffic flow path through your kitchen.
Having enough room around the primary work surfaces for prime traffic flow in the kitchen is key. According to HGTV, the modern kitchen should have a work aisle between appliances, and counters or other work surfaces should be around 42 inches wide. If there is often more than one cook in the kitchen, you're going to need about four feet of space.
3. Your outdated kitchen does not line up with the rest of the house
You've made improvements to the rest of the house, but walking into your kitchen is a bit like taking a step back in time. The kitchen is the heart of the home. If it's out of line with the body of the house, the entire house can feel off-kilter. A renovation can ensure your home stays up-to-date.
4. Your kitchen is not as efficient as it could be
Outdated appliances could easily drive up the costs of using your kitchen. For example, an old dishwasher that uses too much water will have you doing dishes by hand, or an outdated fridge could be costing you more on your power bill. If the kitchen is not at all efficient, upgrades and a facelift can work wonders for how you feel about the space.
5. The kitchen is not safe
There are a few pretty good reasons to renovate your kitchen if it’s outdated, but one of the main ones is that your kitchen may not be all that safe. Things like in-island ranges and low-situated wall ovens can be a real safety hazard if you have children. If there are faulty things about your kitchen that pose a safety risk, it may be time to seriously consider a renovation.
6. Your lifestyle and your kitchen don't match

You love to cook. You dream of being able to entertain. But your kitchen is so tiny and cramped or difficult to maneuver that you rarely ever do either of these things. Your kitchen should match how you want to use your kitchen space. If it doesn't, it's a good reason to renovate.
7. You prefer to get takeout instead of cooking in your kitchen.
Do you find yourself avoiding cooking in your kitchen? If the idea of spending time in your kitchen has you looking up local takeout menus, it is definitely a good indication the space needs some work.
Key Takeaways to Remember About a Kitchen Remodel Timeline
- A kitchen renovation is easily neglected because it is a big job, but it is one of the most important for the home's value
- Your kitchen should be comfortable enough and roomy enough to cater to the size of your family or your intended kitchen uses
- An inefficient kitchen is an expensive kitchen and should be remodeled
If you checked over at least half of the items on this list, kitchen renovation should be penciled into your future plans. Contact RWC Windows, Doors & More to find out about how we can help.
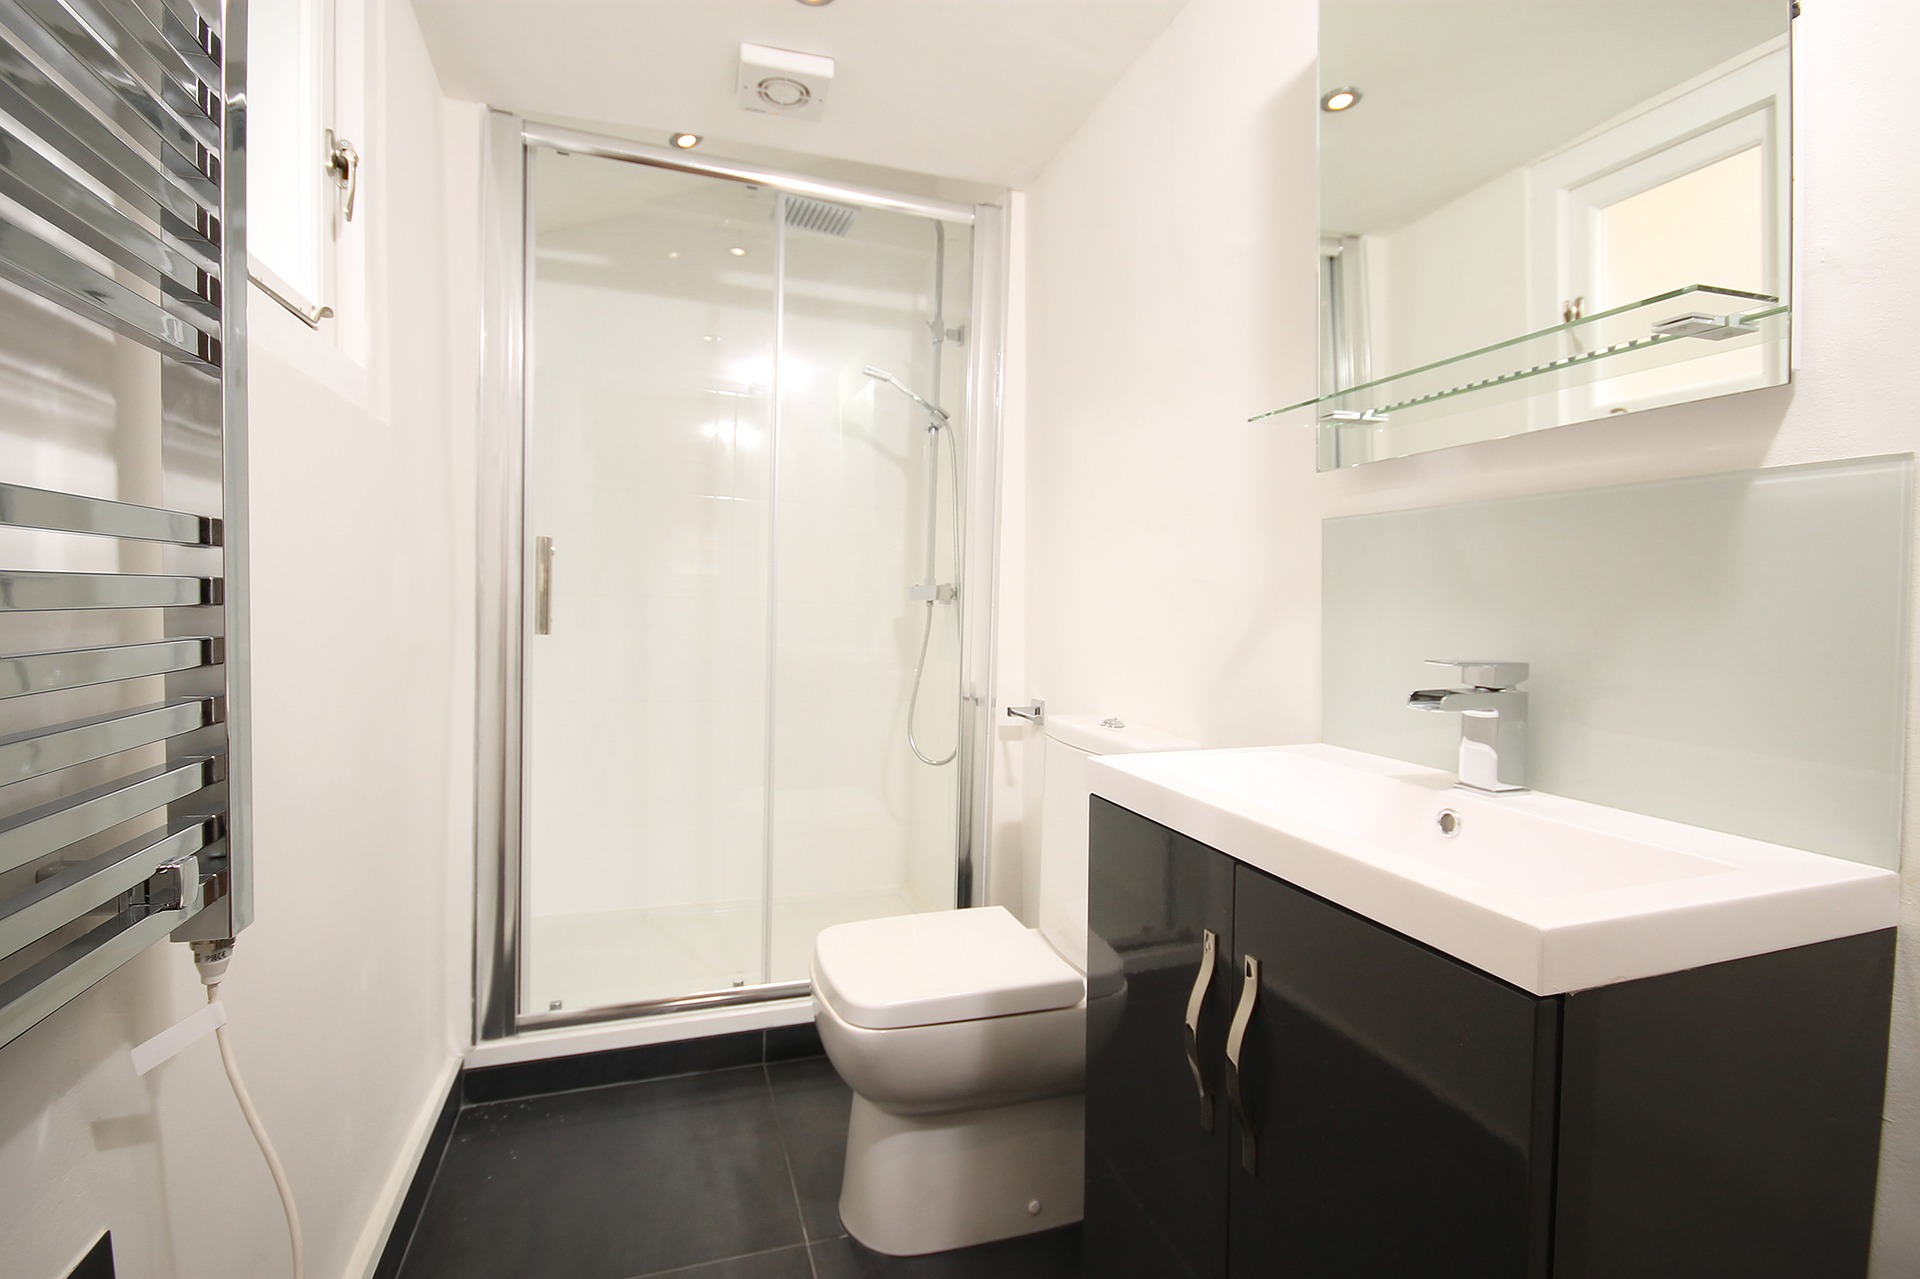
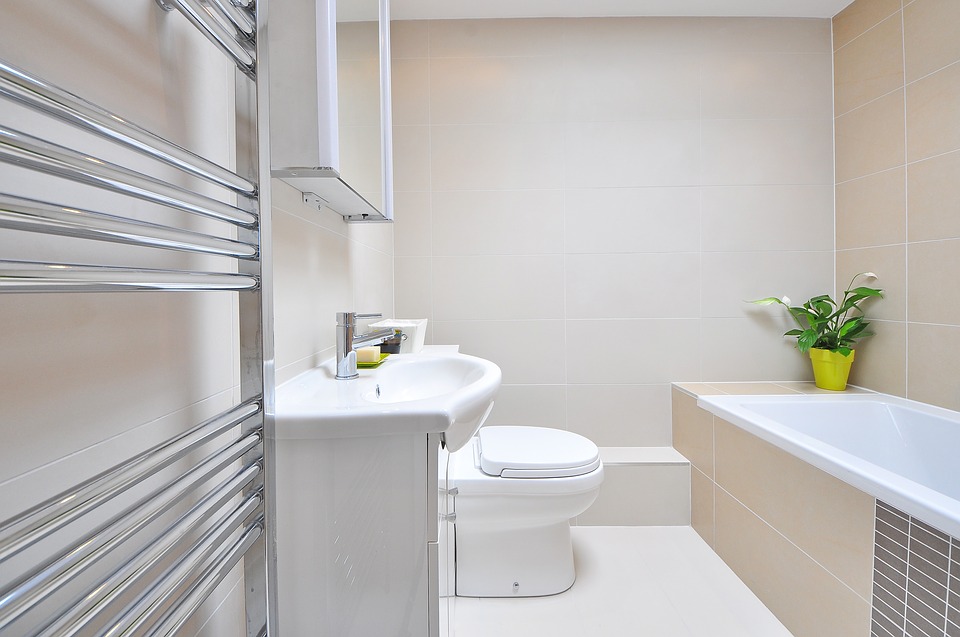
Everything You Need to Know About Installing an Exhaust Fan In Your Bathroom
Homeowners know that moisture on interior surfaces of the home is not a good sign. Mold, mildew, rotting wood, and peeling paint are the result of condensation that has sat on surfaces too long. Your home's bathrooms are the perfect breeding ground for biological contaminants, which is why an exhaust fan in bathroom not working is a big deal!
Purpose of Bathroom Exhaust Fan
The primary purpose of a bathroom exhaust fan is to remove the moisture in the air when the shower or bathtub is in use. This is especially true when the hot water is running, as the steam will generate airborne contaminants, fog up mirrors, and leave condensation on bathroom surfaces. The secondary purpose of a concealed exhaust fan is to remove bathroom odors -- including the fumes that come from using strong cleaners. And finally, the exhaust fan will reduce humidity levels which can spoil your bathroom decor, particularly painted and wallpapered walls.
Bathroom Exhaust Fan Problems
Bathroom exhaust fans will typically last about 10 years, but this will depend on the quality of the manufactured components and how often the fan is used. Is your bathroom fan making loud sounds, not turning on and off, or does it have poor air flow? It could be caused by a number of problems. Some of these issues may be a DIY project for someone comfortable with hand tools and electrical circuits, but often a bathroom fan installation service professional can install the right size fan, wires, and circuit breakers for a longer exhaust fan life and better performance. By hiring a professional, you can avoid:
- A bad switch or frayed wiring
- Motor or other component has failed
- Loose electrical connections
- Missing fasteners causing rattle
Main Culprit - Exhaust Fan Bathroom Motor
When you hear unusual noises coming from the bathroom exhaust fan or it simply stops working completely, the fan motor can be burned out. You can replace the motor, but with most exhaust fans being fairly economical - a better solution is to have the bathroom exhaust replaced with one that performs more efficiently. According to HGTV, depending on the options you choose, plan to spend $80 to $400 for a new bathroom ventilation fan.
Sometimes the exhaust fan may fail with no prior signs. Fans and motors simply wear out over time due to frequent usage and the fact that moisture can cause electrical components to have a shortened life cycle. A squealing sound may indicate a problem with the exhaust fan bathroom motor bearings. This can cause the fan's motor to overheat, which can melt the insulation on wires and cause an electrical short circuit.
How to Choose a Bathroom Fan
When replacing your bathroom exhaust fan, consider how large the bathroom is, and what type of moisture generating fixtures you have. A whirlpool tub requires 100 cfm of airflow capacity, in addition to the 50 cfm for a bath/shower combo and 50 cfm for each toilet. Another way to size an exhaust fan for bathrooms under 100 sq. ft. is to allow 1 cfm of exhaust capacity for every square foot of bathroom floor space.
Also, consider the noise level of the fan you choose. A bathroom should provide a soothing and calm experience. Choose an exhaust fan that is exceptionally quiet. Avoid those that are rated in excess of 4.0 sones ( degrees of loudness) as they tend to be noisy.
Partner with RWC Windows, Doors, and More for expert bathroom fan installation service with the latest in smart options, including:
- Motion sensor activation
- Humidity sensing
- Built-in heaters
- Low Wattage night light
Choose an exhaust fan that has the EnergyStar label for efficient operation. While you may be able to remove a failed bathroom exhaust and replace with another that has similar connections, if your new fan has any of the above listed options, it is always best to allow a professional to handle the installation.
Take-Aways
- The size fan you choose depends on your bathroom fixture types
- A failed motor is usually the reason for non-working exhaust fans
- A broken exhaust fan can lead to peeling paint and mold problems
- Calling a professional is the best way to ensure your fan is secure
RWC Windows, Doors, and More has been providing high-quality bathroom renovations to New Jersey homeowners that exceed their expectations. Get started today by requesting a quote to relieve you of your home improvement worries!
How to Fix a Swollen Door: Causes, Solutions, and When to Replace
That gorgeous wooden door you picked out for your home tied together traditional look and function you wanted, and that investment sure has served you well. Unfortunately, one day you find that your wooden front door expanded and it will no longer close smoothly.
Wood is porous, which means when it is exposed to moisture, it can absorb that moisture and swell. When a door is installed in a door frame, it is fitted exactly to the size of that frame, so if the door changes shape, it can create a lot of problems. Take a look at some of the things you should know about how to fix a swollen door.
What Causes A Swollen Door?
Even though moisture exposure is the most likely culprit if you have a swollen door, there can actually be a few reasons why a door will warp, swell, and change shape. According to Hunker, a door can swell if there is a heat source close to the door, so keeping heat sources at least 36 inches away from the door is best. Poor ventilation can also cause a door to swell, especially interior doors if your home is especially humid.
Will a Swollen Door Go Back To Normal?
Wood can expand and contract as it is exposed to moisture and changes in climate. However, if a door is swollen a great deal due to heat or moisture exposure, it is unlikely that it will revert to its original shape. For example, if your front door has absorbed a tremendous amount of water due to exposure to the rain and lack of sealant, the moisture may eventually dry out and evaporate, but the structure of the wood fibers can be changed forever.
How Do You Fix a Swollen Door?
If you're wondering how to fix a swollen exterior door or interior door, you should know that this is no easy feat. If a door only has minimal swelling that is causing it to rub against its frame, you may be able to remove the door and plane down the swollen area with a sander. However, anything beyond the most minimal swelling is not an easy fix. Some doors can't be fixed at all, and any efforts made to mend them can make matters worse. It is always a good idea to bring in a professional for an opinion before you go through the trouble of trying to fix a swollen door on your own
Key Takeaways to Remember About Swollen Doors
- Front door swelling from water is often due to lack of protective finishing, so prevention is key to avoiding the problem
- Both interior and exterior wooden doors can have problems with swelling, but exterior doors more commonly have problems
- Keep your doors away from heat and water sources as much as possible to avoid problems with swelling
- Repairing a severely swollen door is not always possible without ruining the integrity of the door; replacement may be necessary
- Make sure you pick well-built doors that will be less likely to swell
Even though having a swollen door can seem like a simple problem, it is not always an easy problem to fix. Plus, there could be underlying issues why the door is swelling that need attention. Reach out to us at RWC Windows, Doors & More for an assessment of a swollen door or for help with finding a replacement.